The Case Against Wet Scanning: Why Mounting Fluid Might Not Be Worth the Trouble
After years of experimenting with wet-mount scanning, I’ve come to a conclusion that might be controversial in film photography circles: for most of us, anti-Newton ring glass is the better path. Here’s why.
The Promise of Wet Scanning
If you’ve spent any time in film scanning forums, you’ve heard the pitch. Wet mounting your negatives — sandwiching them between a carrier and your scanner’s platen with a thin layer of mounting fluid — is supposed to be the gold standard. The fluid fills in base-side scratches, eliminates Newton rings by matching the refractive index between film and glass, and can marginally improve sharpness by ensuring perfect optical contact. Products like Aztek Kami 2001 Scanner Mounting Fluid and Kami Lumina have become staples among dedicated scanning enthusiasts for exactly these reasons.
On paper, it sounds like a no-brainer. In practice? It’s a different story entirely.
The Bubble Problem Nobody Warns You About
Here’s what the tutorials and product listings don’t emphasize enough: getting a perfectly clean, bubble-free wet mount is maddeningly difficult. I’ve been using the Aztek Kami 2001 fluid, and no matter how carefully I work — how slowly I lower the negative, how precisely I apply the fluid, how methodically I squeegee — I end up with bubbles. Not just underneath the negative against the glass, but on top of the emulsion side as well.
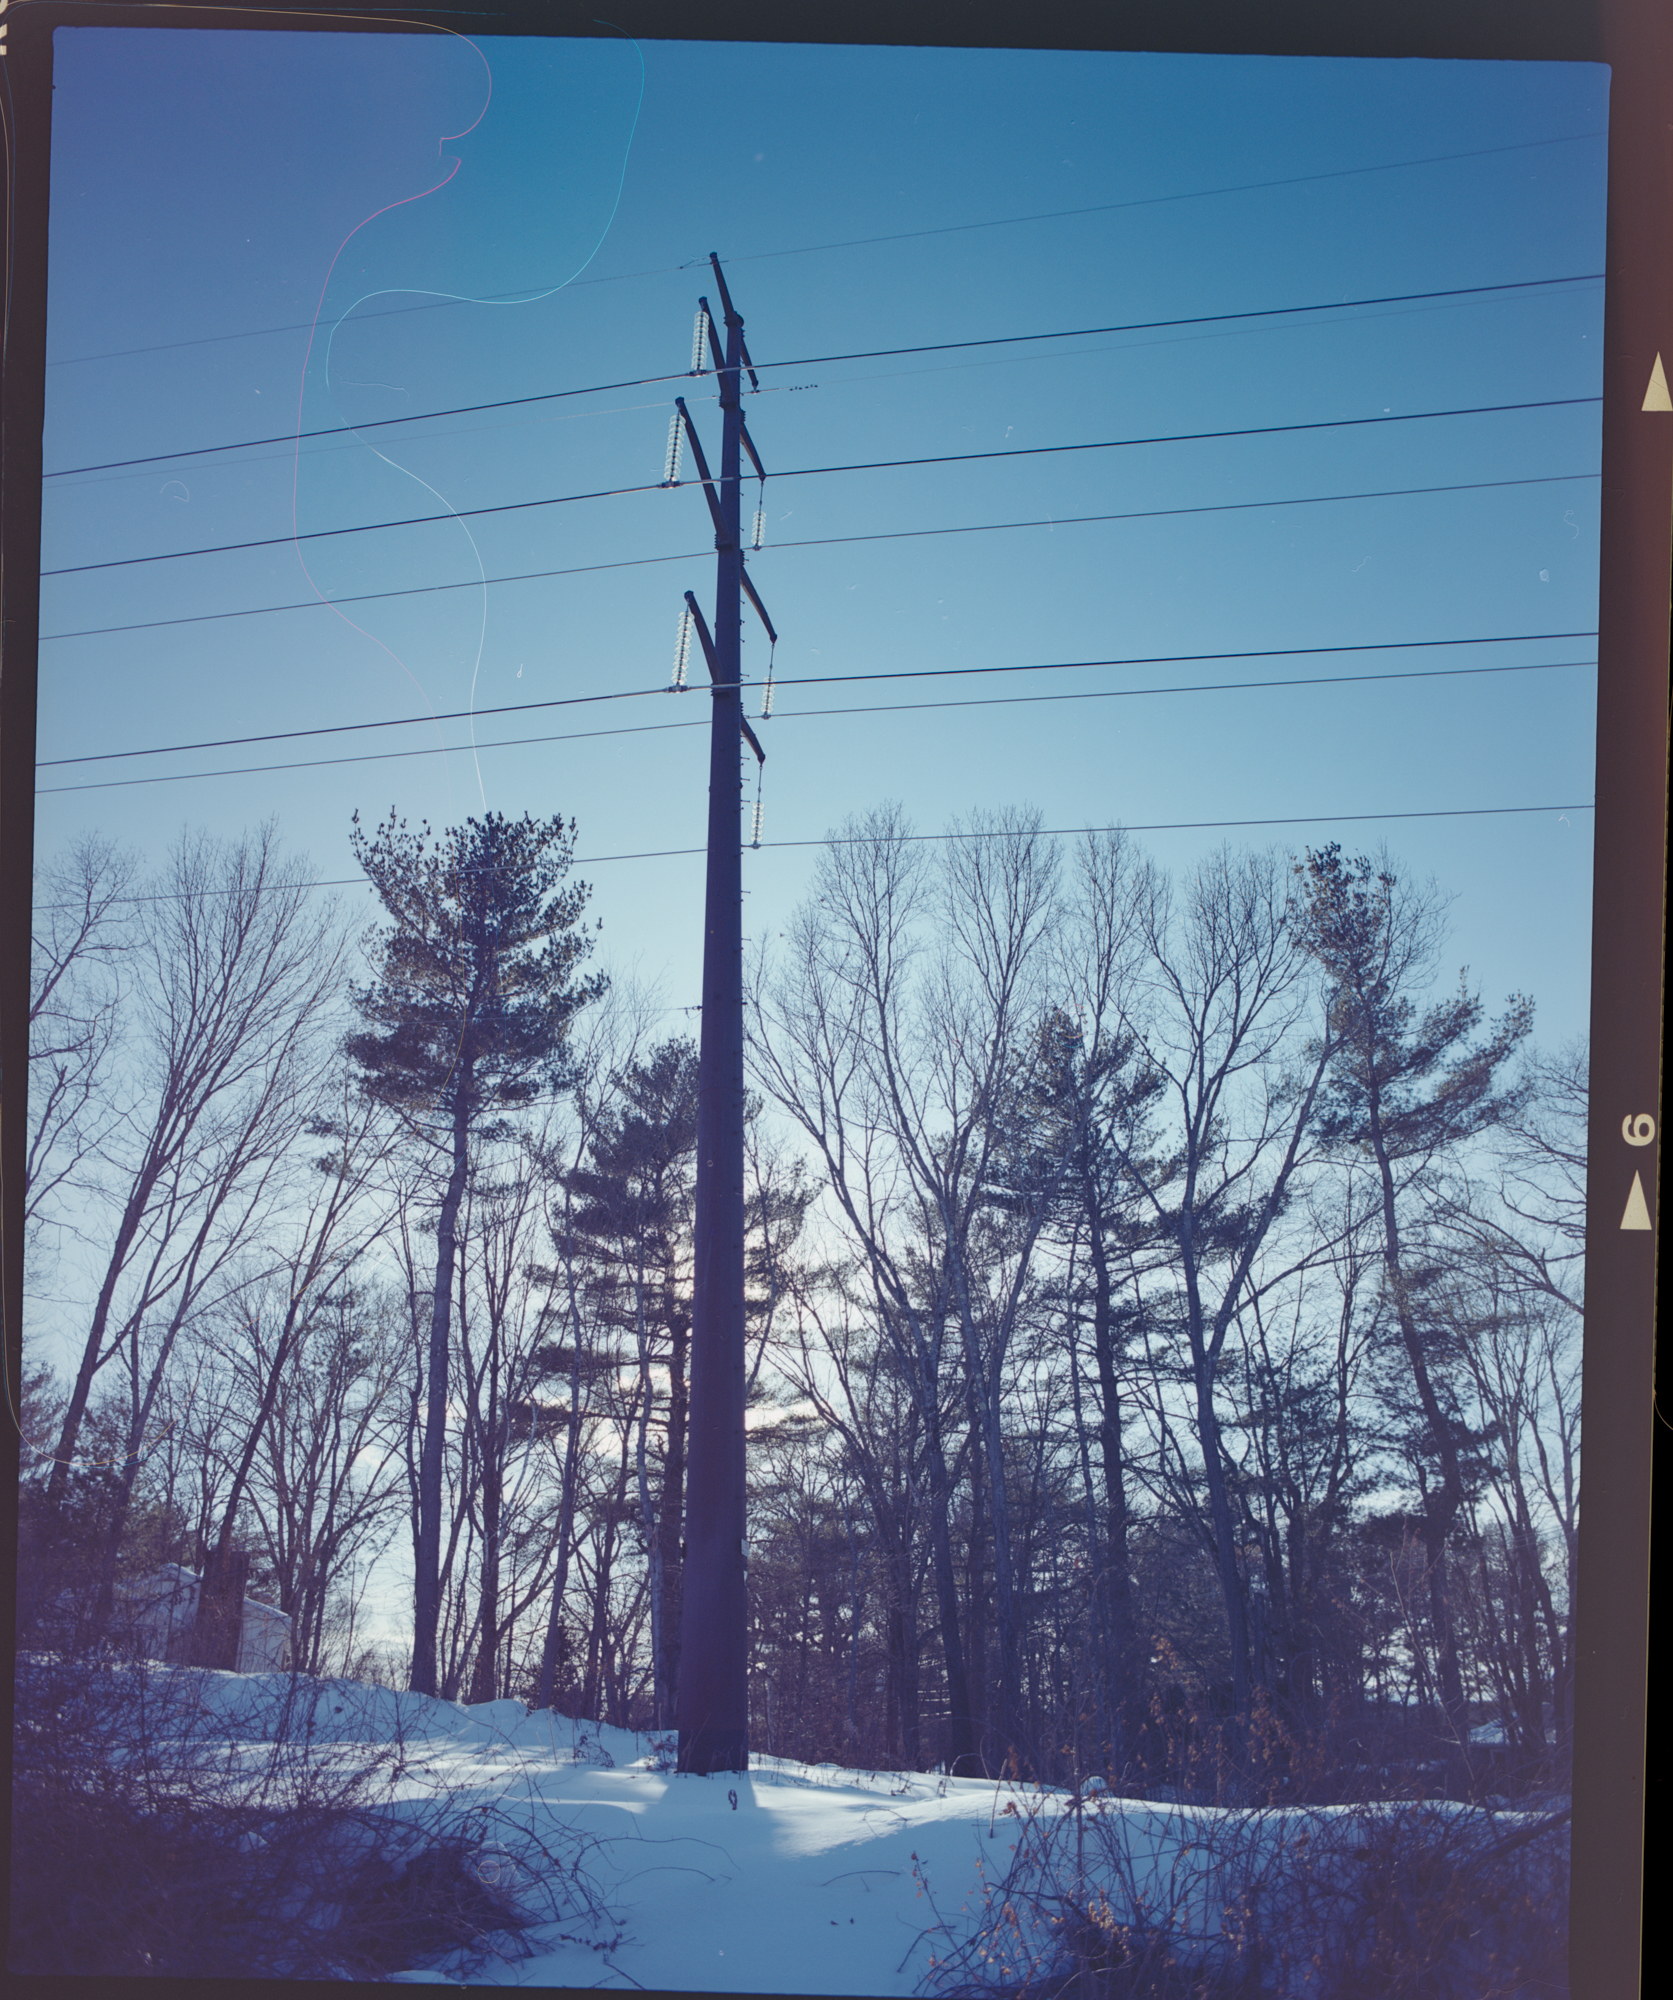
These aren’t always large, obvious air pockets you can spot and chase out with a roller. Many are micro-bubbles that sit invisibly until the scanner’s light source reveals them as bright spots, halos, or — worst of all — sinuous, thread-like trails that snake across your image. They show up most viciously in areas of smooth, even tone: skies, water, studio backgrounds, anything where your eye expects clean gradation. A winter sky that should read as a pristine blue gradient instead becomes a roadmap of fluid artifacts.
The particularly insidious thing about these artifacts is that they can mimic other defects. At first glance, a bubble trail might look like a scratch on the negative, a hair, or even a chemical processing defect. You don’t always realize the problem is the wet mount itself until you’ve wasted time examining the negative under a loupe only to find it’s clean.
Not mention, as you make multiple attempts, the fluid is just picking up more and more dust and debris.
The Workflow Tax
Even when wet scanning goes well, the workflow penalty is substantial. Every negative requires:
- Cleaning the scanner glass (both sides) to surgical standards
- Applying fluid to the glass evenly and without excess
- Carefully laying the negative into the fluid bed without trapping air
- Applying fluid to the top of the negative
- Positioning the top glass or carrier without introducing new bubbles
- Waiting for any remaining bubbles to migrate to the edges (they often don’t)
- Scanning before the fluid begins to evaporate at the edges, which introduces its own artifacts
- Cleaning the negative after scanning to remove all fluid residue
- Cleaning the glass again for the next frame
For a single frame, this might add ten to fifteen minutes to your scanning workflow. Multiply that across a roll of 120 film — even just 10 or 12 frames — and you’re looking at hours of additional handling time. For a roll of 36-exposure 35mm or a batch of 4×5 sheet film, the time investment becomes genuinely prohibitive.
Compare this to dry scanning with anti-Newton ring glass: load the negative into the carrier, close it, scan. If you need to reposition, it takes seconds. There’s no fluid to apply, no cleanup, no race against evaporation.
The Health Question
This is the part that doesn’t get discussed nearly enough. Scanner mounting fluids are chemical solvents. The Aztek Kami 2001 and similar products are hydrocarbon-based, and while manufacturers have worked to reduce toxicity compared to older formulations, you’re still working with volatile organic compounds in close proximity to your face.
Most scanning sessions aren’t a quick in-and-out affair. You’re hunched over your scanner for extended periods, often in a small room or home office without dedicated ventilation. The fluid evaporates continuously during the mounting and scanning process — that’s partly why edge artifacts appear if you don’t scan fast enough — and those vapors are going straight into your breathing space.
The safety data sheets for these products typically recommend adequate ventilation and avoiding prolonged inhalation. In a commercial scanning facility with proper fume extraction, that’s achievable. In a spare bedroom or basement darkroom, “adequate ventilation” often means cracking a window and hoping for the best.
Is occasional wet scanning going to cause acute harm? Probably not. But if you’re doing this regularly — scanning multiple rolls per week, spending hours at a time with an open container of solvent on your desk — the cumulative exposure deserves more consideration than most of us give it. At minimum, you should be working with a window open and ideally with some form of active air extraction pulling fumes away from your workspace.
When Wet Scanning Actually Makes Sense
I don’t want to suggest wet mounting is never worthwhile. There are specific scenarios where the payoff justifies the hassle:
Badly scratched negatives. If you have irreplaceable negatives with significant base-side scratches, wet mounting can genuinely salvage images that would otherwise require extensive retouching. The fluid fills scratches in a way that no dry method can replicate. For archival or restoration work on damaged originals, it remains the best optical solution.
High-end drum scanning. Professional drum scanners were designed around wet mounting. The curved drum surface, the specific mounting tapes and fluids formulated for that workflow, and the controlled environment of a professional scanning bureau make wet mounting far more manageable than trying to do it on a flatbed at home.
Single hero images. If you have one critical negative that needs to be absolutely perfect — a portfolio piece, a competition entry, a client deliverable — and you’re willing to invest the time to get the mount right (potentially making multiple attempts), wet scanning can deliver a marginally superior result.
The Anti-Newton Ring Glass Alternative
For everything else — and that covers the vast majority of my scanning — anti-Newton ring glass (ANR glass) handles the primary problem that wet mounting solves. Newton rings form when two smooth surfaces come into near-contact, creating interference patterns. ANR glass has a microscopically textured surface that prevents this optical contact, eliminating Newton rings without any fluid.
Does ANR glass fill scratches? No. Does it provide the same theoretical maximum in optical coupling? No. But it delivers clean, consistent results frame after frame with zero added workflow complexity, zero chemical exposure, and zero risk of introducing fluid artifacts into your scans.
The practical difference in final image quality between a well-executed dry scan with ANR glass and a well-executed wet scan, at the resolutions most of us are working at on flatbed scanners, is minimal. We’re talking about differences that disappear in any reasonable print or screen presentation. Meanwhile, the practical difference in workflow efficiency, consistency, and peace of mind is enormous.
My Recommendation
If you’re considering wet scanning, here’s my honest advice: start with anti-Newton ring glass and good scanning technique. Learn your scanner, optimize your software settings, and develop a consistent handling workflow. For the overwhelming majority of film scanning needs — even for medium and large format negatives where quality expectations are highest — this will serve you well.
Keep wet mounting in your back pocket as a specialized technique for specific problem-solving situations: damaged negatives, critical one-off scans, or if you eventually move to drum scanning. But don’t make it your default workflow. The bubble frustrations, the time penalty, the chemical exposure, and the inconsistency of results simply don’t justify making it standard practice.
The best scan is the one you actually complete without wanting to throw your scanner out the window. For most of us, that means keeping it dry.
Have experience with wet scanning — good or bad? I’d love to hear what’s worked for you. Drop a comment below.
Purchasing gear from the above link helps me keep the site going!