The Giant SLR That Changed Medium Format

The Pentax 67 system needs no introduction to film photographers, but it does deserve a proper deep dive. In this Pentax 67 review, I’ll share everything I’ve learned about the camera since adding one to my kit, combined with the history, quirks, and practical knowledge that every owner (or prospective owner) should have.
If you’ve ever been curious about what separates the different versions, why you need to remove the lens before swapping the prism, or what that infamous “coupling chain” actually does, read on.
Search for Pentax 67 gear at KEH.com Purchasing gear through my link helps keep this site going.
The Pentax 67 started as a 35mm SLR on Steroids
In the early 1960s, medium format photography was dominated by waist-level finder cameras — Hasselblads, Rolleiflexes, Mamiya TLRs. These were brilliant systems, but they required photographers to adapt to an unfamiliar shooting style: looking down into a reversed image on a ground glass.
Asahi Optical Co. (the company behind Pentax) saw an opportunity. They were already producing some of the best 35mm SLRs in the world — the Spotmatic series was a massive commercial and critical success. Their idea was deceptively simple: take the SLR concept that 35mm photographers already knew and loved, and scale it up to medium format.
Development began around 1960, but the project hit repeated delays. The original design kept evolving as photographic technology advanced during the decade. Two major specification changes pushed back the release: the decision to support 220 film (which doubled the frame count per roll) and the shift from a mechanical shutter to an electronically-governed one.
A prototype, dubbed the Pentax 220, appeared in 1964 and was publicly shown at Photokina in 1966. After further refinement, the production camera finally launched in 1969 as the Asahi Pentax 6×7. In the United States, it was marketed as the Honeywell Pentax 6×7, since Honeywell handled Pentax distribution in North America at the time.
The camera was immediately distinctive. It looked like someone had put a Spotmatic in a photocopier and hit “enlarge.” The layout was pure SLR: eye-level prism on top, lens out front, film advance lever on the right, shutter speed dial on top. Any photographer who had used a 35mm SLR could pick up the Pentax 6×7 and start shooting within minutes.
But the negatives it produced were anything but 35mm. At 56×70mm, a single 6×7 frame has roughly 4.5 times the surface area of a 35mm frame. That translated to extraordinary detail, smoother tonal gradations, finer grain, and enlargement capabilities that approached 4×5 large format quality — all from a camera you could handheld.
The 6×7 Aspect Ratio
The choice of 6×7 was deliberate and pragmatic. While Hasselblad had standardized on the square 6×6 format and some competitors used 6×4.5, Pentax argued that 6×7 was the ideal compromise.
The actual negative measures 56×70mm, giving an aspect ratio very close to 4:5, which happens to be the standard ratio for 8×10 and 16×20 photographic prints. This meant that a Pentax 67 negative could be enlarged to standard print sizes with almost no cropping, unlike 6×6 negatives which waste significant area when printed in rectangular formats. For working professionals who needed to deliver finished prints to clients, this was a meaningful practical advantage.
The tradeoff is frame count: you get 10 exposures per roll of 120 film (versus 12 from a 6×6 camera or 15-16 from a 645). On 220 film, you get 20 exposures (21 on the earliest version). That means each frame costs more — but if you’re coming from medium format, you’re already used to counting your shots carefully.
The Four Pentax 6×7 Versions: How to Tell Them Apart
This is where things get important, especially if you’re buying used. There are four distinct versions of the Pentax 67, and the differences matter for both functionality and repairability.
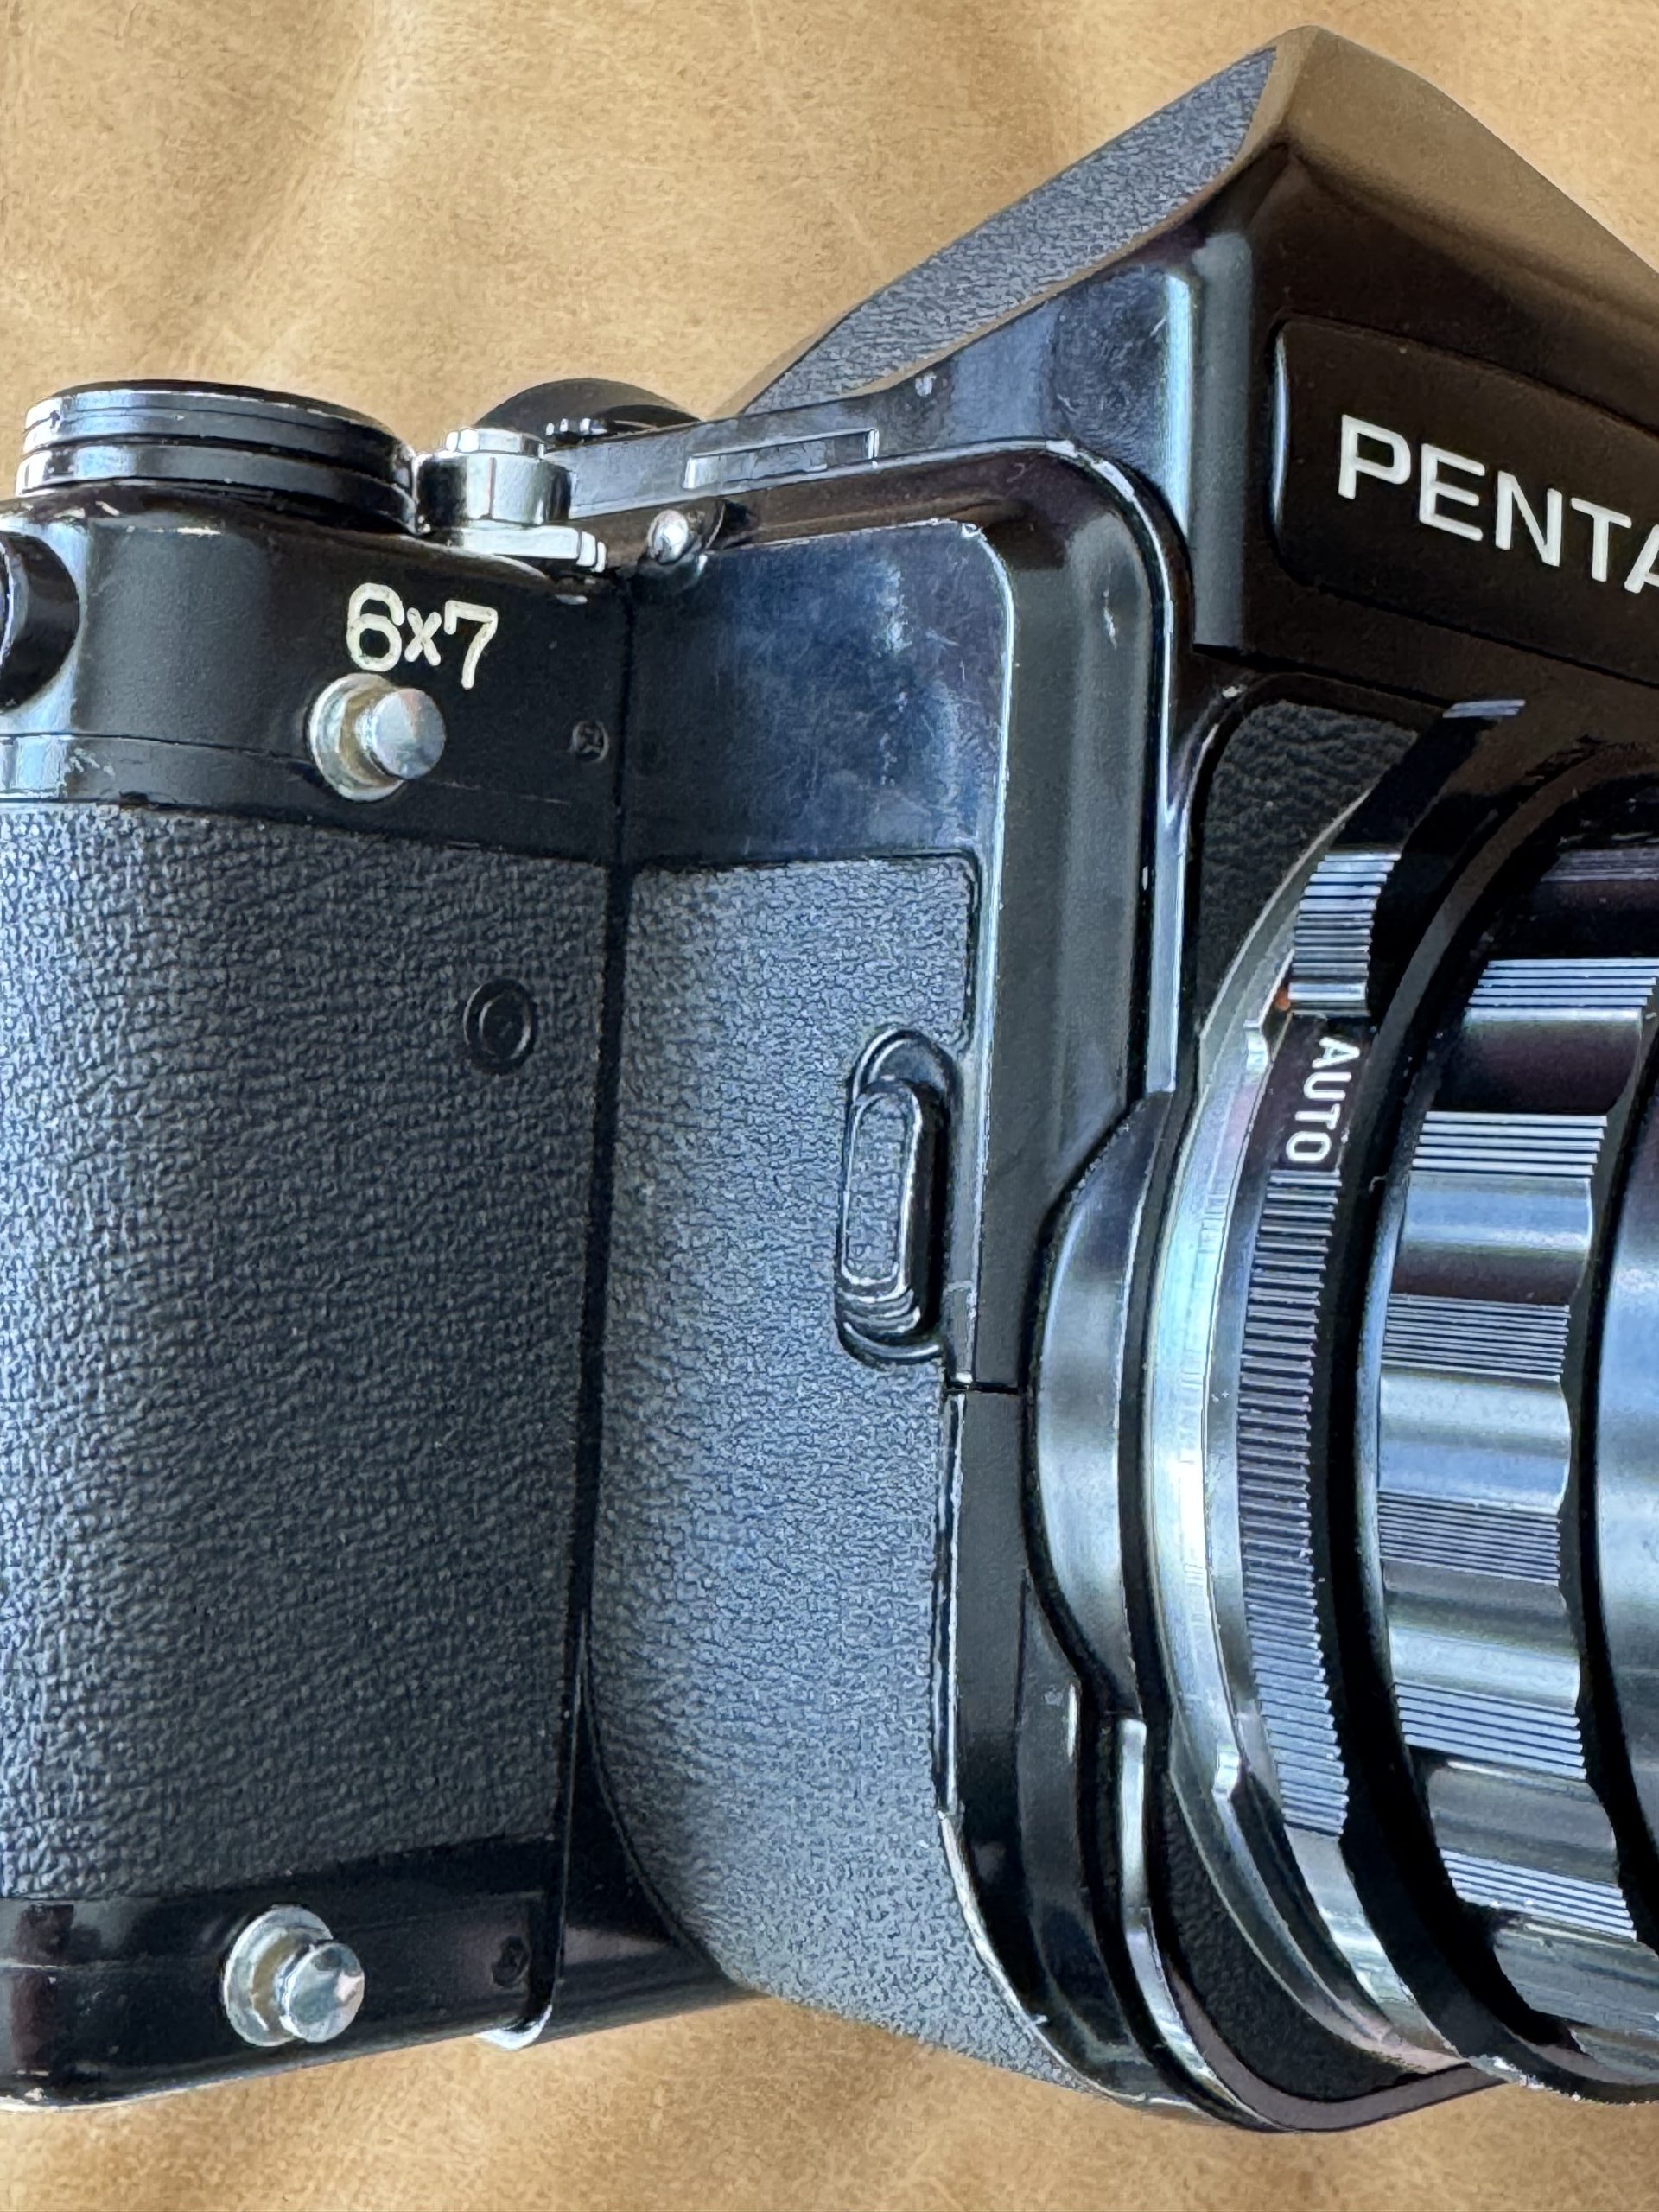
1. Asahi Pentax 6×7 (1969–1976) — The Original
The first version is identifiable by the “6×7” marking on the right side of the body and the “Asahi Pentax” branding on the prism. In the U.S., you may find these marked “Honeywell Pentax.”
What it lacks: Mirror lock-up. This is the most significant omission. The Pentax 67’s mirror is enormous — it has to clear a 6×7cm frame — and the resulting mirror slap creates substantial vibration. Without mirror lock-up, you’re relying on fast shutter speeds or a very sturdy tripod to avoid camera shake.
How to identify it: There is no sliding switch on the right side of the body behind the lens mount. If you see a clean, uninterrupted surface there, it’s an original non-MLU body.
Should you buy one? These are the least desirable from a practical standpoint. They’re the oldest examples (50+ years at this point), they lack mirror lock-up, and replacement parts from the original production run have been long exhausted. However, they’re also the cheapest, and they produce identical image quality to every version that followed.
Hidden feature: The shutter speed dial has a secret T (Time) mode. Set the dial to the blank area between X and 1/1000, and the shutter stays open until you press the release again — no locking cable release required.
2. Asahi Pentax 6×7 MLU (1976–1989) — The Mirror Lock-Up Version
The MLU version arrived in 1976 as a running production change. Externally, it still says “6×7” and carries the “Asahi Pentax” branding.
The key addition: A small sliding switch on the right side of the body, just behind the lens mount. Pushing this switch upward locks the mirror in the raised position before you fire the shutter, dramatically reducing vibration for tripod-mounted long exposures and close-up work.
How to identify it: Look for that switch. If there’s a sliding lever next to the lens mount on the right side, it’s an MLU body.
Internal improvements: The MLU designation coincided with broader internal upgrades that Pentax phased in during the mid-1970s. These included improved durability in the film advance mechanism, a redesigned clutch plate, and a switch from a rubberized counter roller to a smoother all-metal version. The 220 film frame count was reduced from 21 to 20 exposures as a consequence of the new clutch mechanism, though the 120 mode (10 exposures) remained the same.
Should you buy one? This and the next version (the Pentax 67) represent the sweet spot in the lineup — fully functional with mirror lock-up, mechanically robust, and significantly cheaper than the 67II.
3. Pentax 67 (1989–1998) — The Refined Classic
In 1989, Asahi released the updated Pentax 67 — note the dropped “6×7” naming and the removal of “Asahi” from the branding. The front plate now reads simply “Pentax” and the body is marked “67”.
What changed:
The shutter was revised and went fully electronic. One consequence: Bulb mode now consumes battery power, which it didn’t on earlier versions. (Pentax offered a modification service to address this for photographers who relied heavily on bulb exposures.)
The TTL metering prism was updated. The older CdS (cadmium sulfide) metering cell was replaced with a silicon photo diode, which offered more consistent metering response and didn’t suffer from CdS’s tendency to “remember” bright light sources and give inaccurate readings afterward.
The meter coupling chain was strengthened — more on this critical component in the prism section below.
Cosmetic updates included subtle changes to knob materials and finishes, and the lens release lock shifted from chrome to black.
How to identify it: The “67” marking on the body rather than “6×7,” and “Pentax” on the prism without “Asahi.”
Should you buy one? Absolutely. For most shooters, this is the version to get. It has all the mechanical improvements, the better metering prism option, and a stronger coupling chain. It can still be found for reasonable prices, and importantly, it’s more repairable than the 67II since it relies on simpler mechanical and electronic components.
4. Pentax 67II (1998–2009) — The Final Evolution
The 67II was the most significant redesign in the system’s history. While it maintained full compatibility with all existing Pentax 67 lenses, the body itself was substantially modernized.
Major improvements:
A built-in right-hand grip was integrated into the body — a feature that 35mm SLR photographers had enjoyed for years. This dramatically improved handling and balance. The optional left-hand wooden grip remained available for those who preferred it.
An entirely new AE (auto-exposure) prism finder enabled aperture-priority automatic exposure — a first for the system. This prism also offered three metering modes: center-weighted, spot, and multi-segment metering. The viewfinder display switched from the older needle indicator to LED readouts showing shutter speed, aperture, flash status, metering mode, and exposure compensation.
An LCD panel on the top plate displayed ISO, frame count, battery status, and shutter status.
Additional features included a self-timer, multiple exposure capability via a dedicated lever, expanded shutter speeds (adding 2-second and 4-second options), and a wider ISO sensitivity range from 6 to 6400.
The camera switched to two CR123A lithium batteries, replacing the single 6V PX28/4LR44 of earlier models.
The catch: The AE prism is not compatible with earlier Pentax 67 bodies, and the older TTL prisms are not compatible with the 67II. If you’re invested in the 67II ecosystem, you’re committed to its specific finder. Also, the 67II’s electronics are more complex, meaning that if the electronics fail, the camera is essentially unrepairable — there are fewer technicians willing or able to work on them, and replacement electronic components simply don’t exist.
Should you buy one? If budget isn’t a concern and you want the most refined shooting experience, yes. But the price premium over a standard Pentax 67 is significant, and multiple experienced repairmen have noted that the 67II is riskier from a long-term reliability standpoint. Several well-known Pentax technicians have affirmed that the 67II isn’t built quite as tank-like as its predecessors, and its dependence on proprietary electronics makes it a more fragile investment.
The Prism System: TTL Metering and the Critical Coupling Chain
This is one of the most important things to understand about the Pentax 67 system, and it’s something that trips up nearly every new owner at some point.
How the Prism Works
The Pentax 6×7/67 doesn’t have a built-in light meter. Metering is provided entirely by the TTL (through-the-lens) pentaprism finder, which is a separate, removable accessory that slides into the finder bay on top of the camera body.
There are several finder options across the system’s history:
Non-metered pentaprism — A simple eye-level prism with no metering. Lightweight and trouble-free.
TTL metered pentaprism (6×7 era) — Uses a CdS metering cell. Provides center-weighted metering with a 60% center / 30% inner field sensitivity pattern. Displays exposure via a match-needle system visible in the viewfinder.
TTL metered pentaprism (67 era) — Same basic design but upgraded to a silicon photo diode for more accurate and responsive metering.
Waist-level finder — A folding hood that allows you to look down into the focusing screen. Provides 100% frame coverage (versus 90% through the pentaprism) and doesn’t interact with the coupling chain at all.
Chimney finder — A magnifying right-angle viewer. Also doesn’t use the coupling chain.
AE pentaprism (67II only) — The advanced auto-exposure finder with LED display, spot metering, and aperture-priority mode. Not compatible with earlier bodies.
All finders are interchangeable within their compatibility group (6×7 and 67 share finders; the 67II uses its own). They mount by sliding into the finder bay and are secured by two locking buttons on either side.
The Coupling Chain: What It Does and Why It Matters
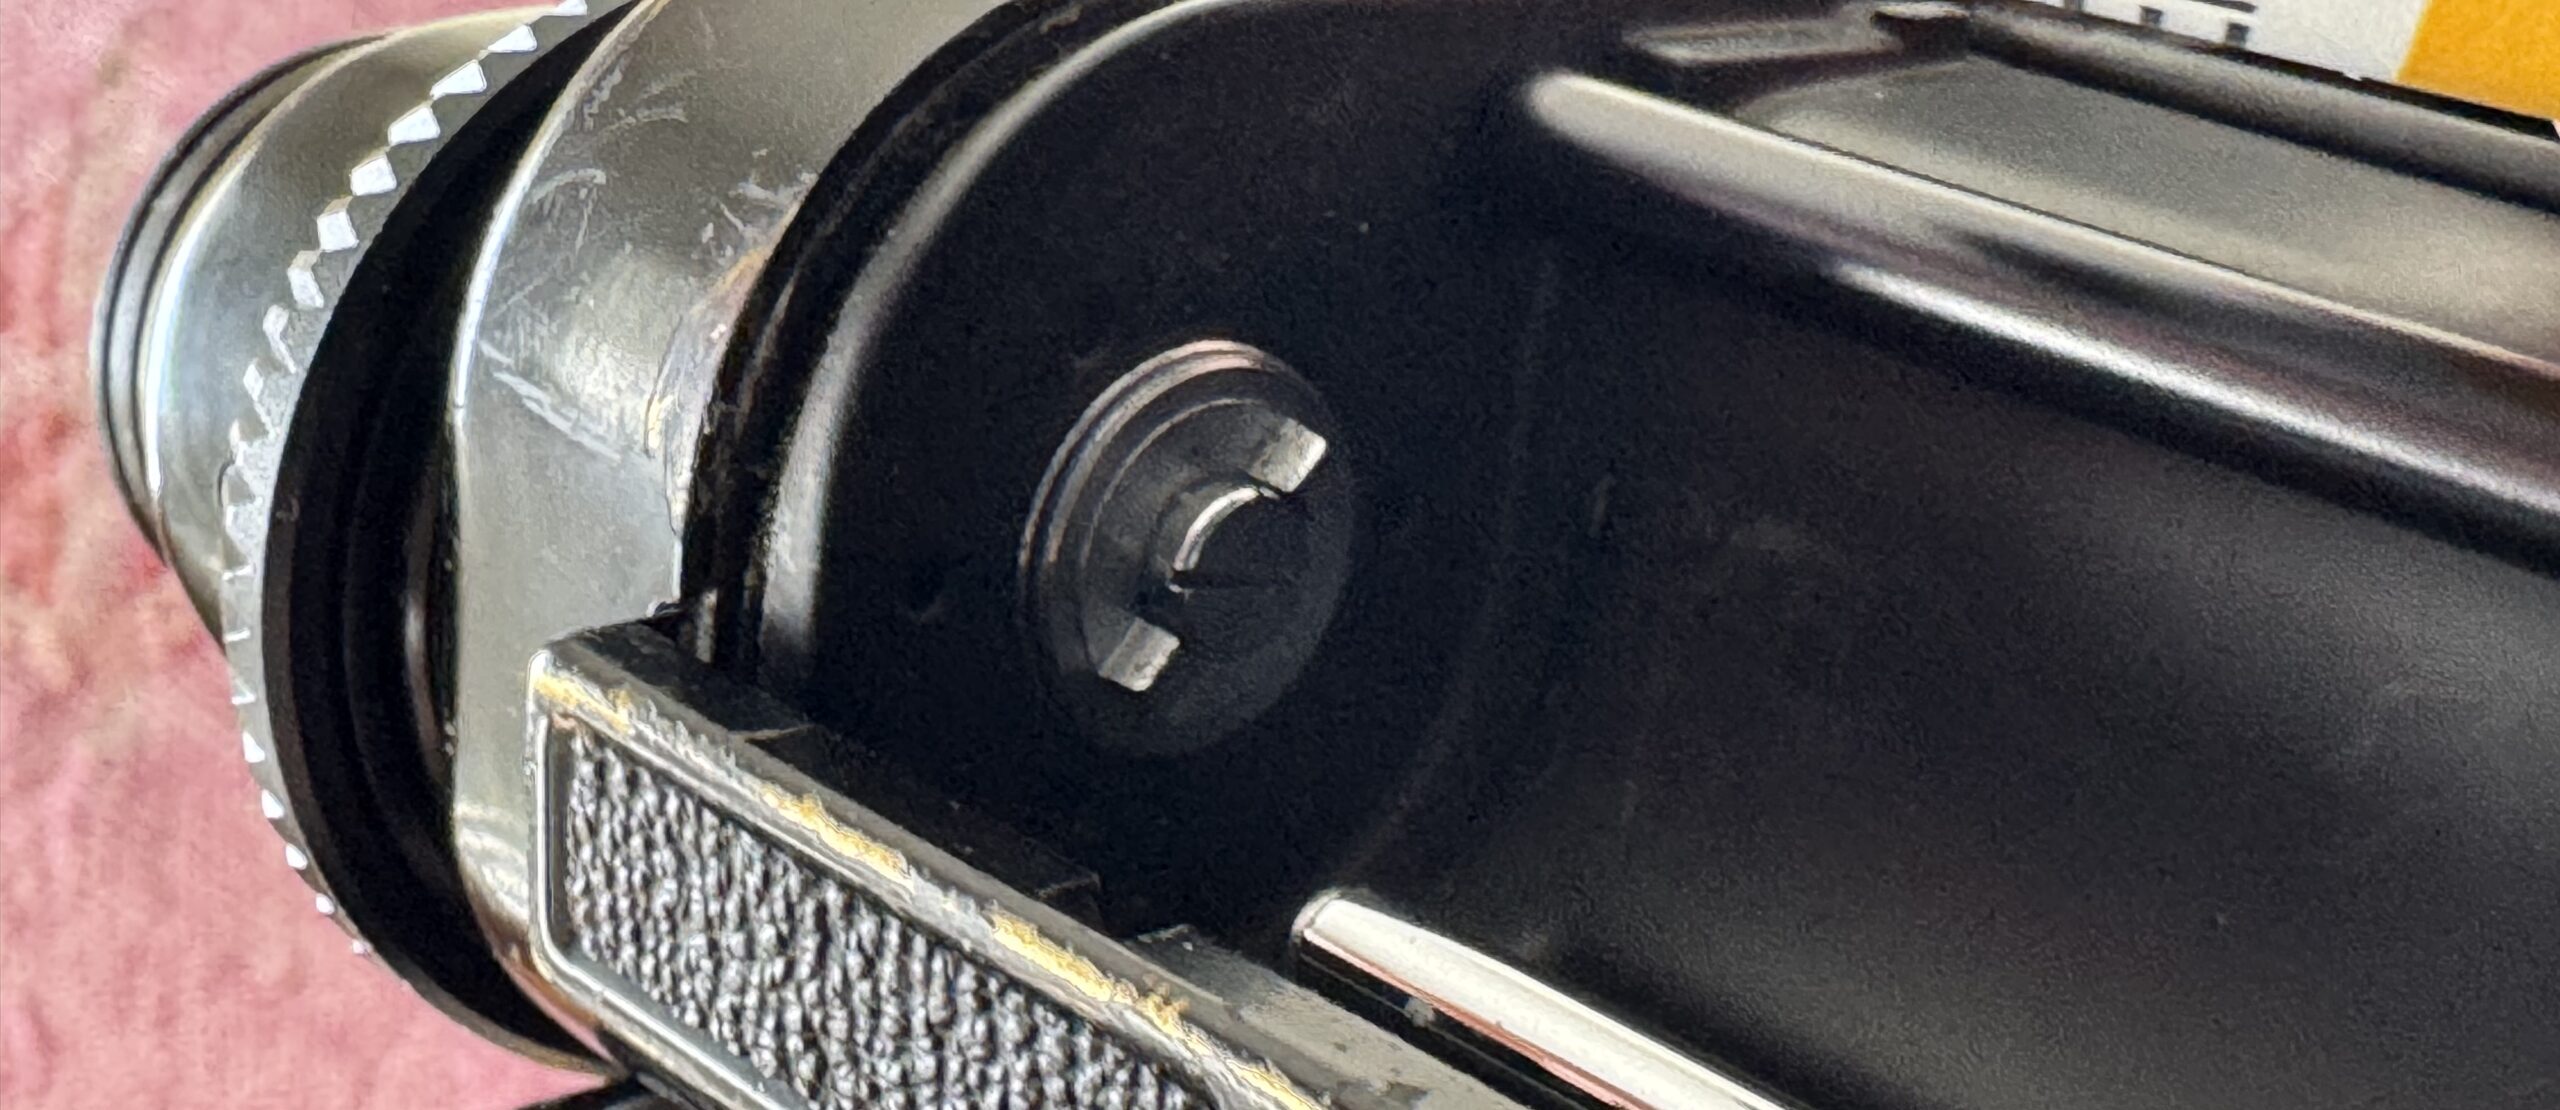
Here’s where things get idiosyncratic. Inside the Pentax 67, there’s a small metal chain running in a shallow slot at the base of the mirror box, just behind the lens mount. This chain physically connects the lens aperture ring to a tab inside the finder bay that communicates aperture information to the TTL metering prism.
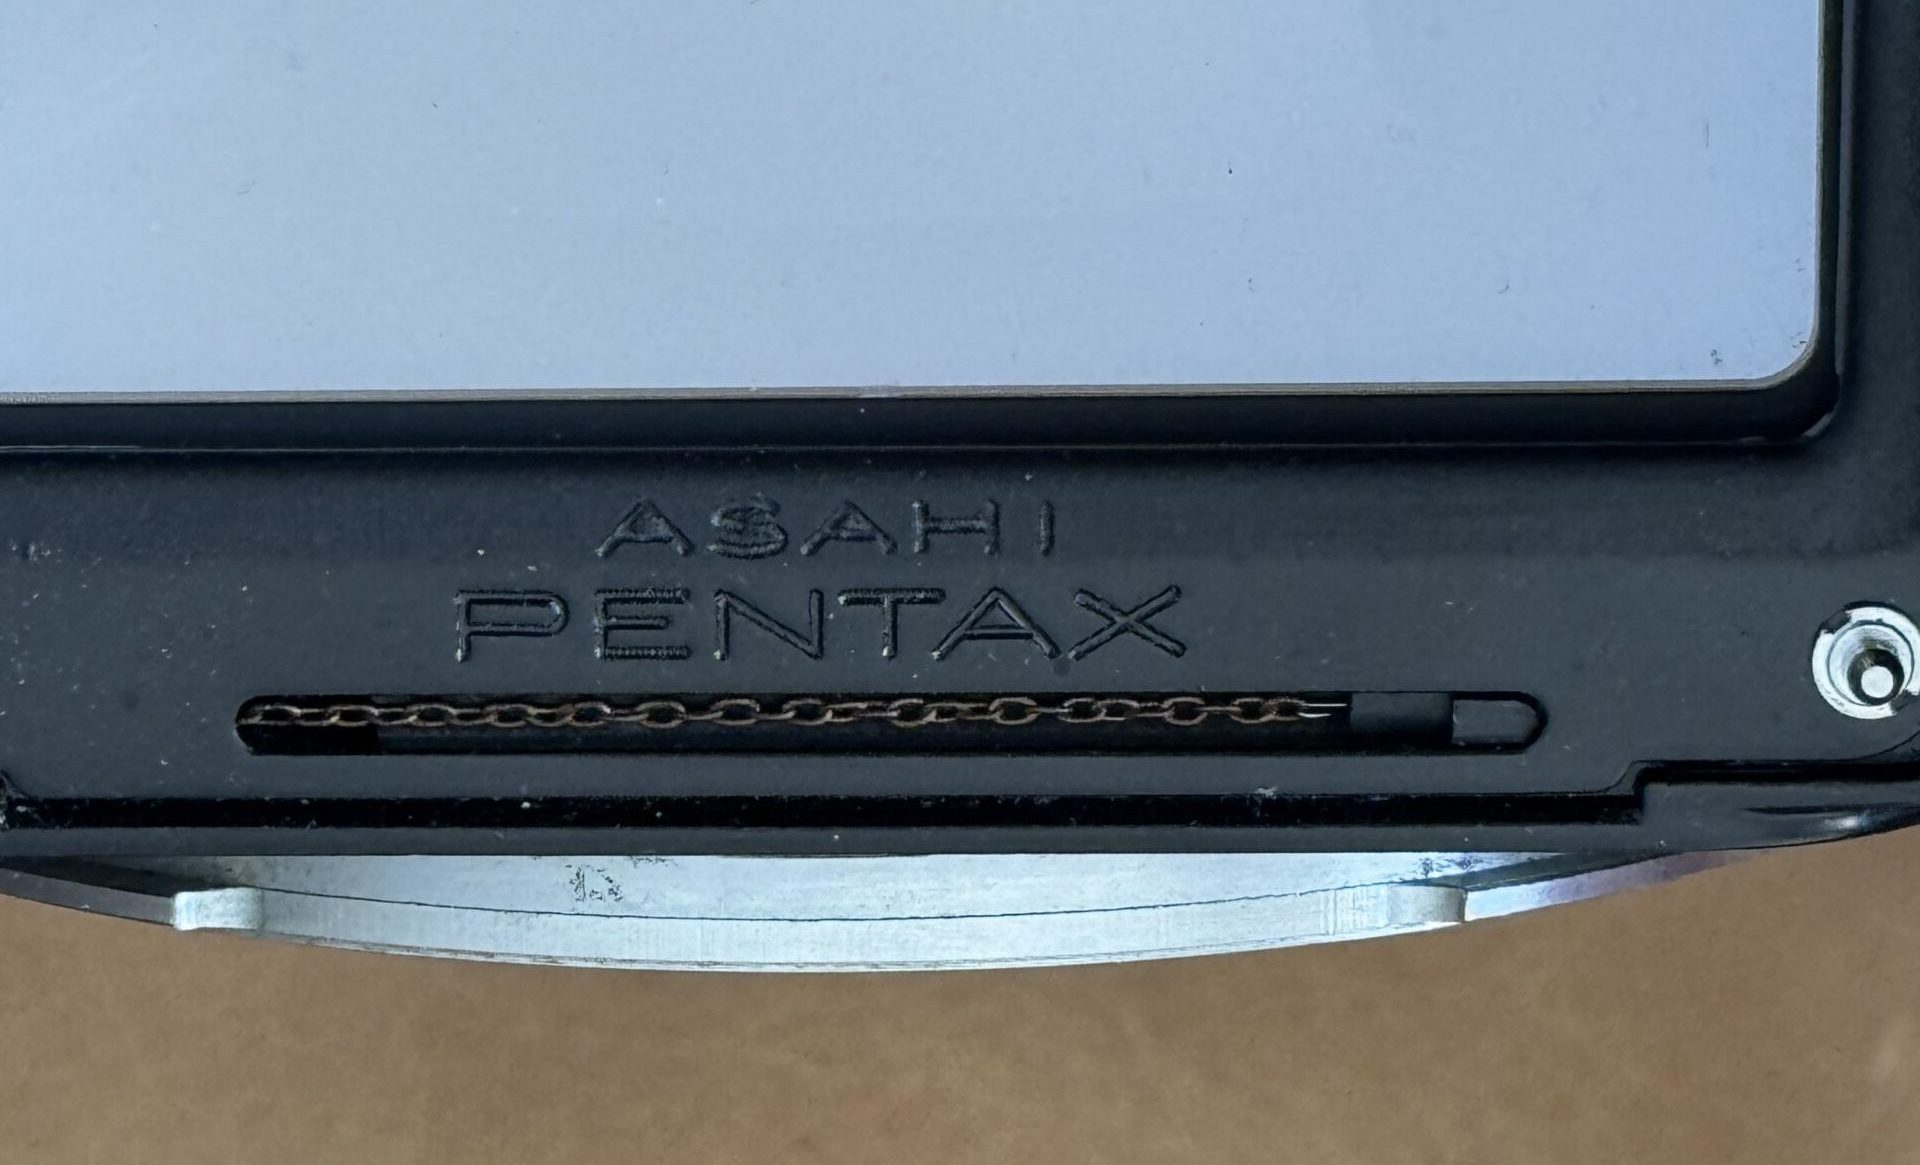
When you turn the aperture ring on the lens, a coupling pin on the lens mount moves an indexed sliding ring on the body. That ring pulls the chain back and forth, which moves a corresponding tab that the TTL prism reads to know what aperture you’ve selected. This is how the meter knows your aperture setting — it’s a purely mechanical linkage, no electronics involved.
The problem: this chain is fragile. On the original 6×7 bodies, it was particularly delicate. The Pentax 67 (1989) introduced a stronger chain with better materials, but it’s still a known weak point across all pre-67II versions.
Why You Must Remove the Lens Before Installing the TTL Prism
This is the single most important operational rule for the Pentax 67 system, and it’s the one that breaks cameras when ignored:
When mounting or removing the TTL metering prism, always remove the lens first.
The correct sequence is:
To remove the prism: Remove the lens → Remove the prism
To install the prism: Remove the lens → Install the prism → Remount the lens
Why? When you mount the lens, its aperture coupling pin engages with the body’s coupling ring, which tensions the chain to the correct position for the current aperture setting. The TTL prism has a corresponding tab that needs to mesh with the chain’s position in the finder bay. If you swap the prism while a lens is attached, the chain can be stressed in the wrong direction — the body-side coupling may not be in the correct position to receive the prism’s tab. Over time (or sometimes immediately), this stress fatigues and snaps the chain.
A broken coupling chain means the TTL meter becomes completely unresponsive — the needle won’t move regardless of light conditions. The repair is possible but requires disassembly and recalibration of the lens mount and focusing screen, and it’s ideally a job for a qualified technician.
Remarkably, Pentax never clearly documented this procedure in the original 6×7 manuals. Many photographers in the early decades were entirely unaware of the chain’s existence, let alone the correct mounting sequence. The advisory about lens-first removal only became widely known later, around the time the improved Pentax 67 was released with its stronger (but still breakable) chain.
Important note: This rule applies specifically to the TTL metered prism. The non-metered pentaprism, waist-level finder, and chimney finder don’t interact with the coupling chain, so they can be swapped freely regardless of whether a lens is attached.
If you’ve just acquired a Pentax 67 and the meter needle isn’t responding, before assuming the electronics are dead, try this: remove the lens, remove the prism, reinstall the prism, then reinstall the lens. This resets the coupling chain to its correct position and resolves the issue in many cases. It’s virtually a golden rule to do this every time you unpack the camera from your kit.
The Lens System
The Pentax 67 boasts the largest lens lineup of any medium format system — over 20 focal lengths across multiple generations, ranging from a 35mm fisheye to a 1000mm reflex mirror lens.
Lens Generations
The lenses evolved through four naming conventions that roughly correspond to the camera body versions:
Super-Takumar 6×7 — The earliest lenses, with standard single-layer coating and knurled metal focus rings. Heavier construction, often with larger filter thread sizes.
Super-Multi-Coated Takumar 6×7 — Same optical designs as the Super-Takumars but with Pentax’s improved 7-layer multi-coating for better contrast and flare resistance. Visually almost identical to their predecessors.
SMC Pentax 6×7 — Updated cosmetics with rubber-grip focusing rings replacing the older knurled metal. Some lenses received optical improvements as well.
SMC Pentax 67 — The final generation, released alongside the Pentax 67 body in 1989 and continuing through the 67II era. Further cosmetic modernization, and many lenses received closer minimum focusing distances and smoother helicoid focus mechanisms.
The good news: all generations are fully compatible with all camera bodies (6×7, 67, and 67II). The mount never changed.
The Legendary 105mm f/2.4
No discussion of the Pentax 67 is complete without the 105mm f/2.4. This lens is the reason many photographers buy into the system. On a 6×7 negative, 105mm provides a slightly long “normal” perspective (equivalent to roughly 52mm in 35mm terms), and at f/2.4 the depth of field is extraordinarily shallow. The result is a three-dimensional quality to images — razor-sharp subjects that separate from creamy, gradual bokeh — that approaches what you’d get from a large format lens.
There are three versions of the 105mm f/2.4:
Super-Takumar 105mm f/2.4 — The original. Uses thorium glass elements that are prone to yellowing over time (this is mildly radioactive glass, a common practice in optics of the era). The yellowing can be reversed by prolonged UV exposure. This version reads: “Super-Takumar / 6×7” on the front ring.
Super-Multi-Coated Takumar 105mm f/2.4 — Updated coating, same thorium glass issue. Look for “Takumar” on the front ring to identify either of these first two versions. This version reads: “S-M-C Takumar / 6×7” on the front ring.
SMC Pentax 67 105mm f/2.4 — The latest version with revised coatings providing the best contrast. No thorium glass. This is the most sought-after and expensive version. This version reads: “SMC Pentax” on the front ring — no Takumar branding at all.
All three are optically excellent. The later version simply offers better coatings and no yellowing concern.
The Dual Bayonet Mount
The Pentax 67 features a unique dual bayonet mount system. The inner bayonet (three-flange) is used for most lenses from 35mm through 300mm. These lenses support auto-aperture operation — the lens stays wide open for bright viewfinder focusing and stops down to the selected aperture only when the shutter fires.
The outer bayonet (four-flange, symmetrical) is designed for larger, heavier telephoto lenses (400mm and longer). The outer bayonet allows the body to rotate and lock in any of four positions, which is useful for switching between landscape and portrait orientation with long lenses on a tripod. However, lenses mounted on the outer bayonet don’t support auto-aperture — you have to manually stop down before metering and shooting.
Notable Lenses Worth Knowing
45mm f/4 — Ultra-wide for 6×7 (equivalent to about 22mm in 35mm). Compact, razor sharp, and bargain-priced on the used market. Takes rear-mounted gelatin filters.
55mm f/4 — Moderate wide-angle (about 28mm equivalent). One of the sharpest lenses in the system. Some examples have a mysterious internal rattle that doesn’t affect performance.
75mm f/2.8 AL — A newer design with aspherical elements. Fast, lightweight for its focal length, and optically superb.
75mm f/4.5 — A budget landscape lens that punches well above its price point. Can often be found for under $200.
90mm f/2.8 — Available in standard and leaf-shutter (LS) versions. The LS version allows flash sync at all shutter speeds.
105mm f/2.4 — Three variants. Ideal portrait lens. Talked about above.
135mm f/4 Macro — For close-up work with outstanding flatness of field.
165mm f/4 LS — A leaf-shutter portrait lens. Note: do not use mirror lock-up with the 165mm LS, as this can cause jamming and damage.
200mm f/4 — A solid medium telephoto for portraits and compressed landscapes.
300mm f/4 ED IF — The premium telephoto, with ED glass and internal focusing. Highly sought after and priced accordingly.
Loading Film: The Learning Curve
Loading film into the Pentax 67 is notoriously fiddly compared to most medium format cameras. Unlike Hasselblad’s modular film backs that you can preload at your leisure, or Mamiya RB67’s removable inserts, the Pentax 67 loads film directly into the camera body — there are no interchangeable backs.
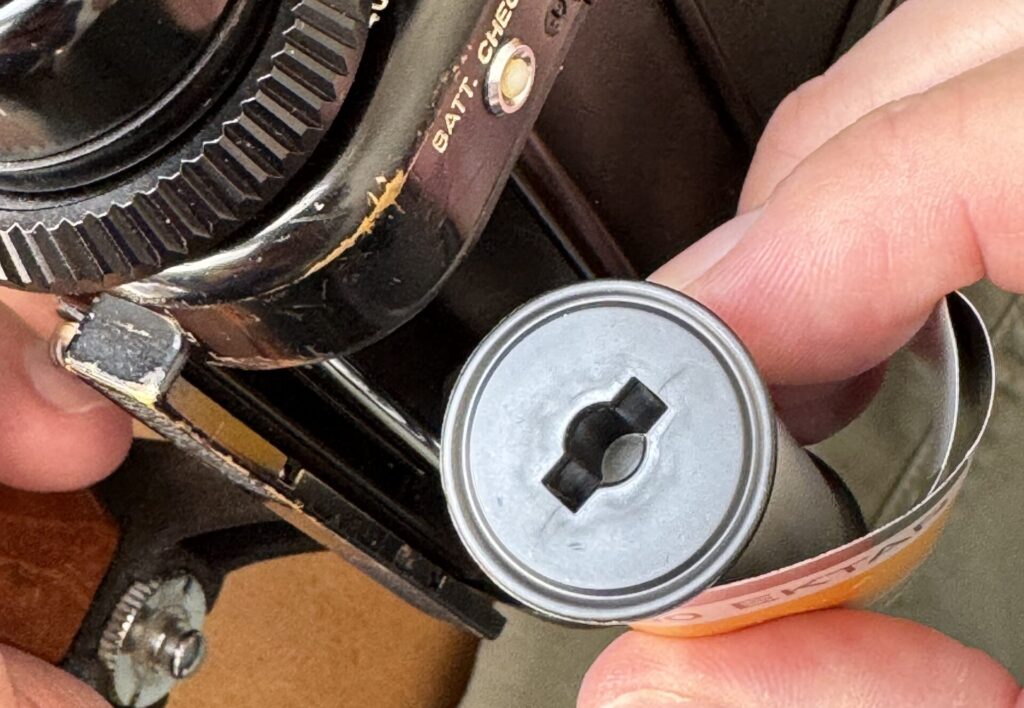
The process involves opening the hinged back, fitting the fresh roll onto the supply spool, threading the film leader across the pressure plate to the take-up spool, and aligning the film’s start arrow with the start mark inside the camera.
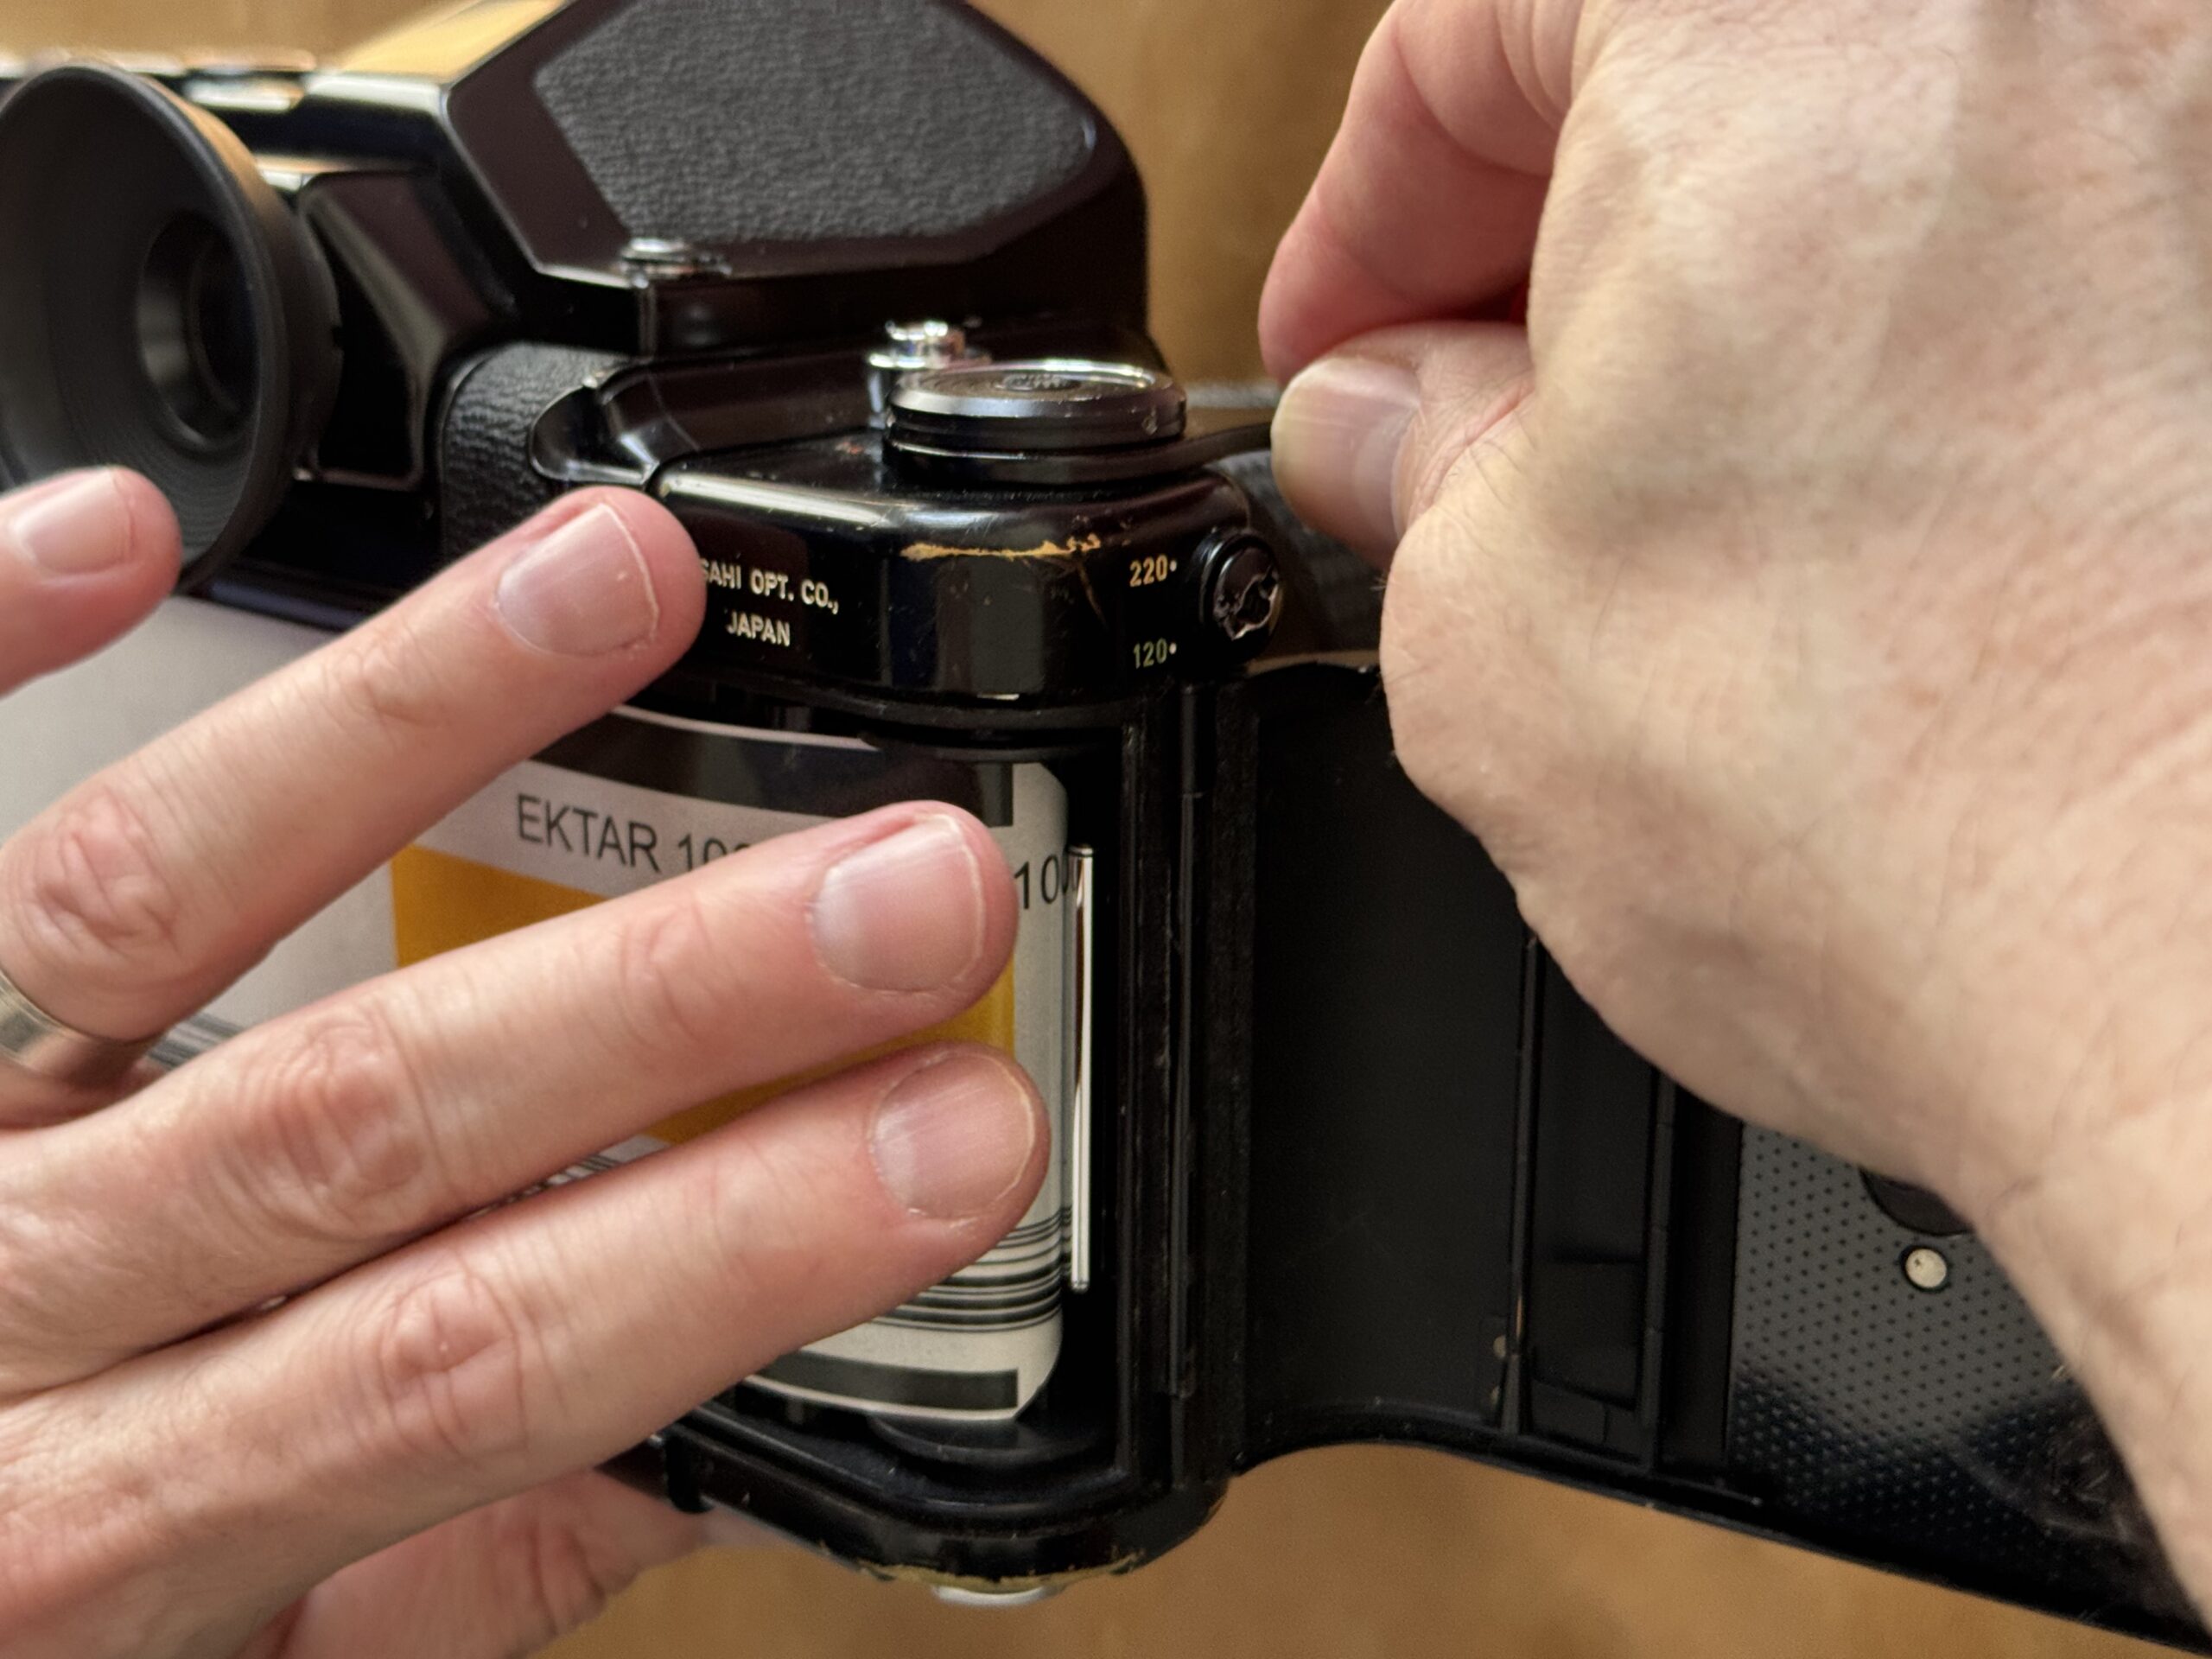
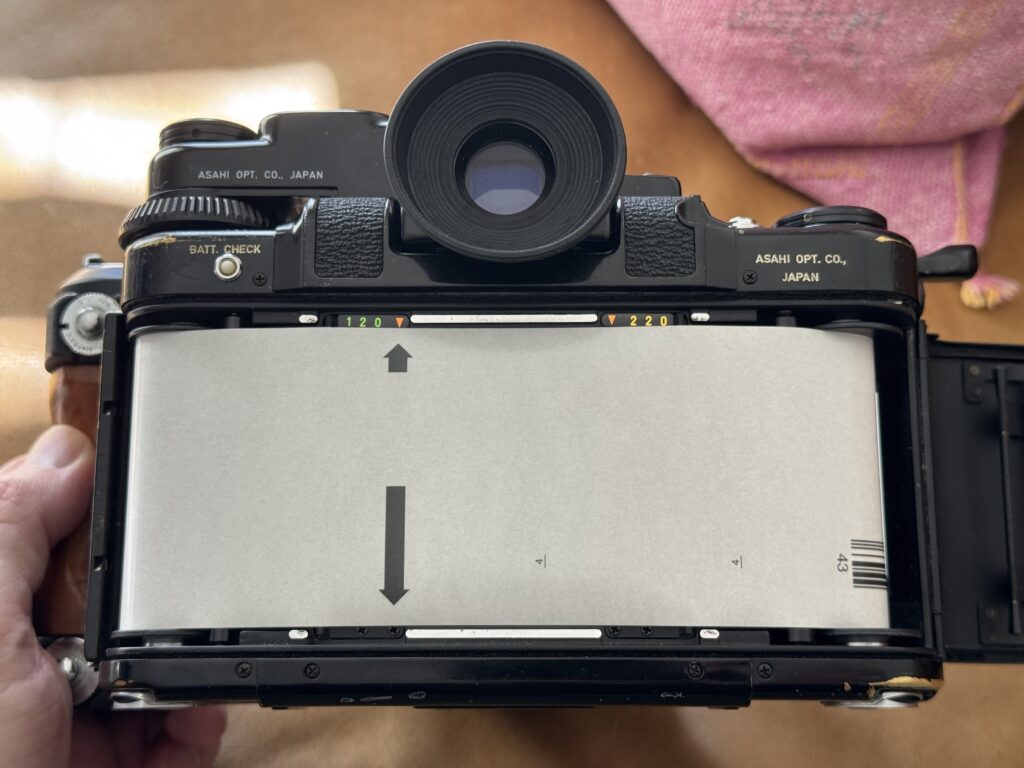
The spool holders require angling the roll in at just the right position, which can be maddening when you’re rushing to capture fleeting light.
A couple of important notes: the camera has a 120/220 selector switch on the right shoulder. This must match the film type you’re loading. Additionally, you must also switch the pressure plate inside the back door to the corresponding position — 120 film has paper backing and needs more pressure, while 220 is thinner. Getting this wrong results in soft images due to poor film flatness.
After closing the back, you advance the film until the frame counter reaches 1. On my first roll, I didn’t wind far enough and thought the camera was broken — it wasn’t, I just needed to keep advancing. A common new-owner mistake.
The Shutter and Mirror Slap
The Pentax 67’s focal plane shutter runs from 1 second to 1/1000 of a second, plus Bulb mode. Flash sync is at 1/30 second via PC sync sockets on the left side of the mirror housing (X-sync for electronic flash, FP for flash bulbs).
The elephant in the room is mirror slap. The mirror in this camera is massive — it has to swing out of the way of a 56×70mm imaging area — and when it fires, you feel it. The vibration is significant enough that handheld shooting at slow shutter speeds (below about 1/125) requires good technique or will result in softness.
Mirror lock-up (on MLU and later bodies) is essential for tripod work at slow speeds. Raise the mirror, let the vibration settle for a second or two, then trip the shutter with a cable release. The difference in sharpness at speeds like 1/15 or 1/8 is dramatic.
The 67II improved the mirror dampening somewhat, but the fundamental physics haven’t changed — it’s a big, heavy mirror in a big camera, and it’s going to make itself known.
Practical Tips From an Owner
Always carry a cable release. Given the mirror slap, a cable release isn’t optional equipment — it’s essential for any tripod-mounted work.
Invest in a good strap. The camera with prism and lens easily exceeds 5 pounds. A quality padded strap makes the difference between an enjoyable outing and a miserable one.
Battery: Always carry an extra 6v battery. While the battery can last an exceptional amount of time, there’s no accurate way of knowing when it’s going to die. Looking at the red light battery test brightness for remaining power is subjective.
Use an external meter for critical work. The TTL prism meter is adequate for general shooting, but for precise exposure — especially with slide film — a dedicated handheld meter (incident reading) will give more consistent results.
Leave the shutter uncocked and the speed dial on B when storing. This reduces tension on internal springs and extends the life of the shutter mechanism.
Keep the wooden grip. It looks like an afterthought, but the left-hand wooden grip significantly improves stability when shooting handheld. The cold shoe on top is the only way to mount a flash on pre-67II bodies.
Budget for a CLA. These are 30-50 year old cameras. Even a well-maintained example will benefit from a professional Clean, Lubricate, and Adjust service. Eric Hendrickson at Pentax Repairs is widely regarded as the go-to specialist for these cameras in the United States.
Pentax 67 vs. Hasselblad 500cm
Since I shoot both systems, I frequently get asked to compare these two systems. They’re fundamentally different cameras designed around different philosophies.
The Hasselblad is modular. Interchangeable film backs let you swap between film types mid-roll, or carry preloaded backs for fast reloading. The waist-level finder and square format encourage a contemplative, deliberate shooting style. The leaf shutter in each lens provides flash sync at all speeds, whereas the Pentax 67 is limited to 1/30s sync speed due to the horizontal curtain shutter needing to travel across that large piece of film.
The Pentax 67 is an SLR. It handles like an oversized 35mm camera. Eye-level composition feels natural and immediate. The 6×7 rectangular format matches standard print sizes. The focal plane shutter allows for a wider range of lens designs and faster maximum speeds.
Neither is objectively better. The Hasselblad excels in controlled studio work and situations where modularity matters. The Pentax shines for photographers who want the familiarity of SLR handling with medium format quality — especially for portraits and landscapes where the 6×7 aspect ratio and the rendering of lenses like the 105mm f/2.4 are hard to beat.
The biggest practical difference in the field: with the Hasselblad, you can carry multiple film backs. With the Pentax, once you’ve loaded a roll, you’re committed to those 10 frames until you finish or sacrifice the remaining exposures.
Considerations
Prices for Pentax 67 bodies have climbed steadily over the past several years, driven by the film photography revival and the camera’s cult following among portrait and fashion photographers. The system has been used by legendary photographers including Patrick Demarchelier, Mario Testino, Sandro D’Orazio, and Karl Lagerfeld — a pedigree that continues to attract new shooters.
Despite the rising prices, the Pentax 67 system remains more accessible than many competing medium format platforms. A late-model Pentax 67 body with the 105mm f/2.4 can still be assembled for under $1,000 if you shop carefully, and many of the excellent wider-angle lenses (75mm f/4.5, 55mm f/4) remain relative bargains.
The camera demands commitment. It’s heavy, it’s loud, it’s mechanically complex, and each frame costs real money. But in exchange, it delivers negatives with a quality and character that are genuinely difficult to replicate by any other means. The combination of the 6×7 negative, Pentax’s outstanding optics, and the deliberate shooting pace that the camera imposes produces results that keep photographers coming back to this system decade after decade.
If you’re considering one, my advice: get a late-model Pentax 67 (not the 67II unless you need AE) with the 105mm f/2.4 and a TTL metering prism. Have it CLA’d by a reputable technician. Learn the coupling chain ritual. Load a roll of Portra 400, and enjoy!
Below are images taken with the Pentax 67 and other articles related to this medium format camera:
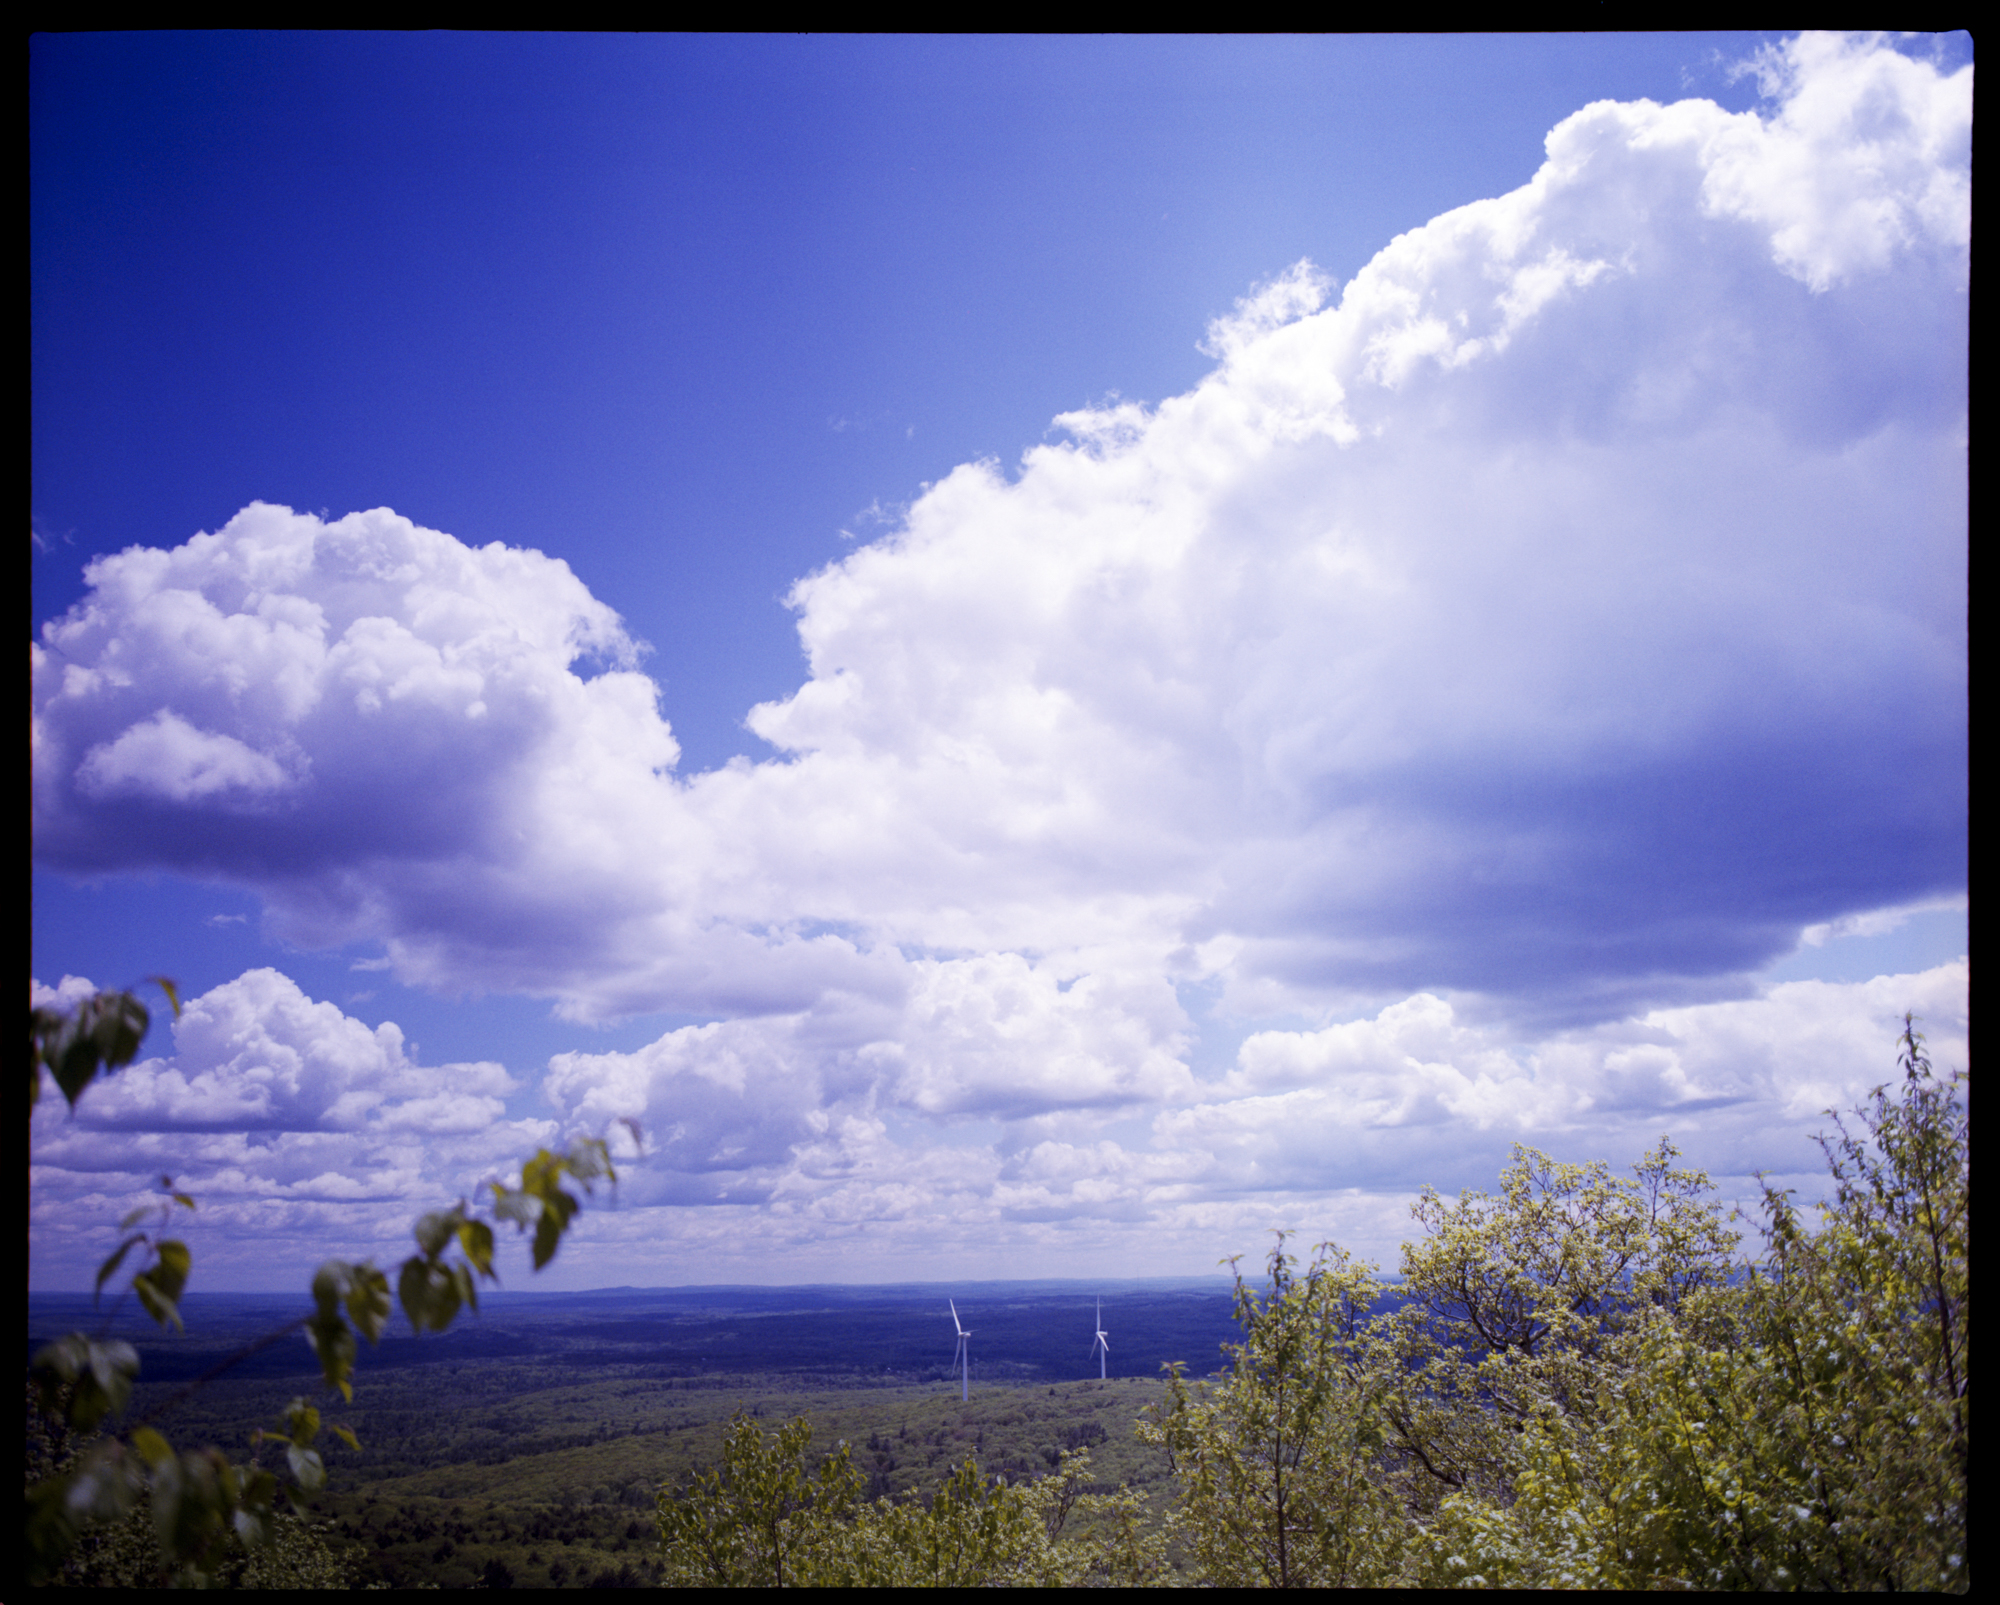
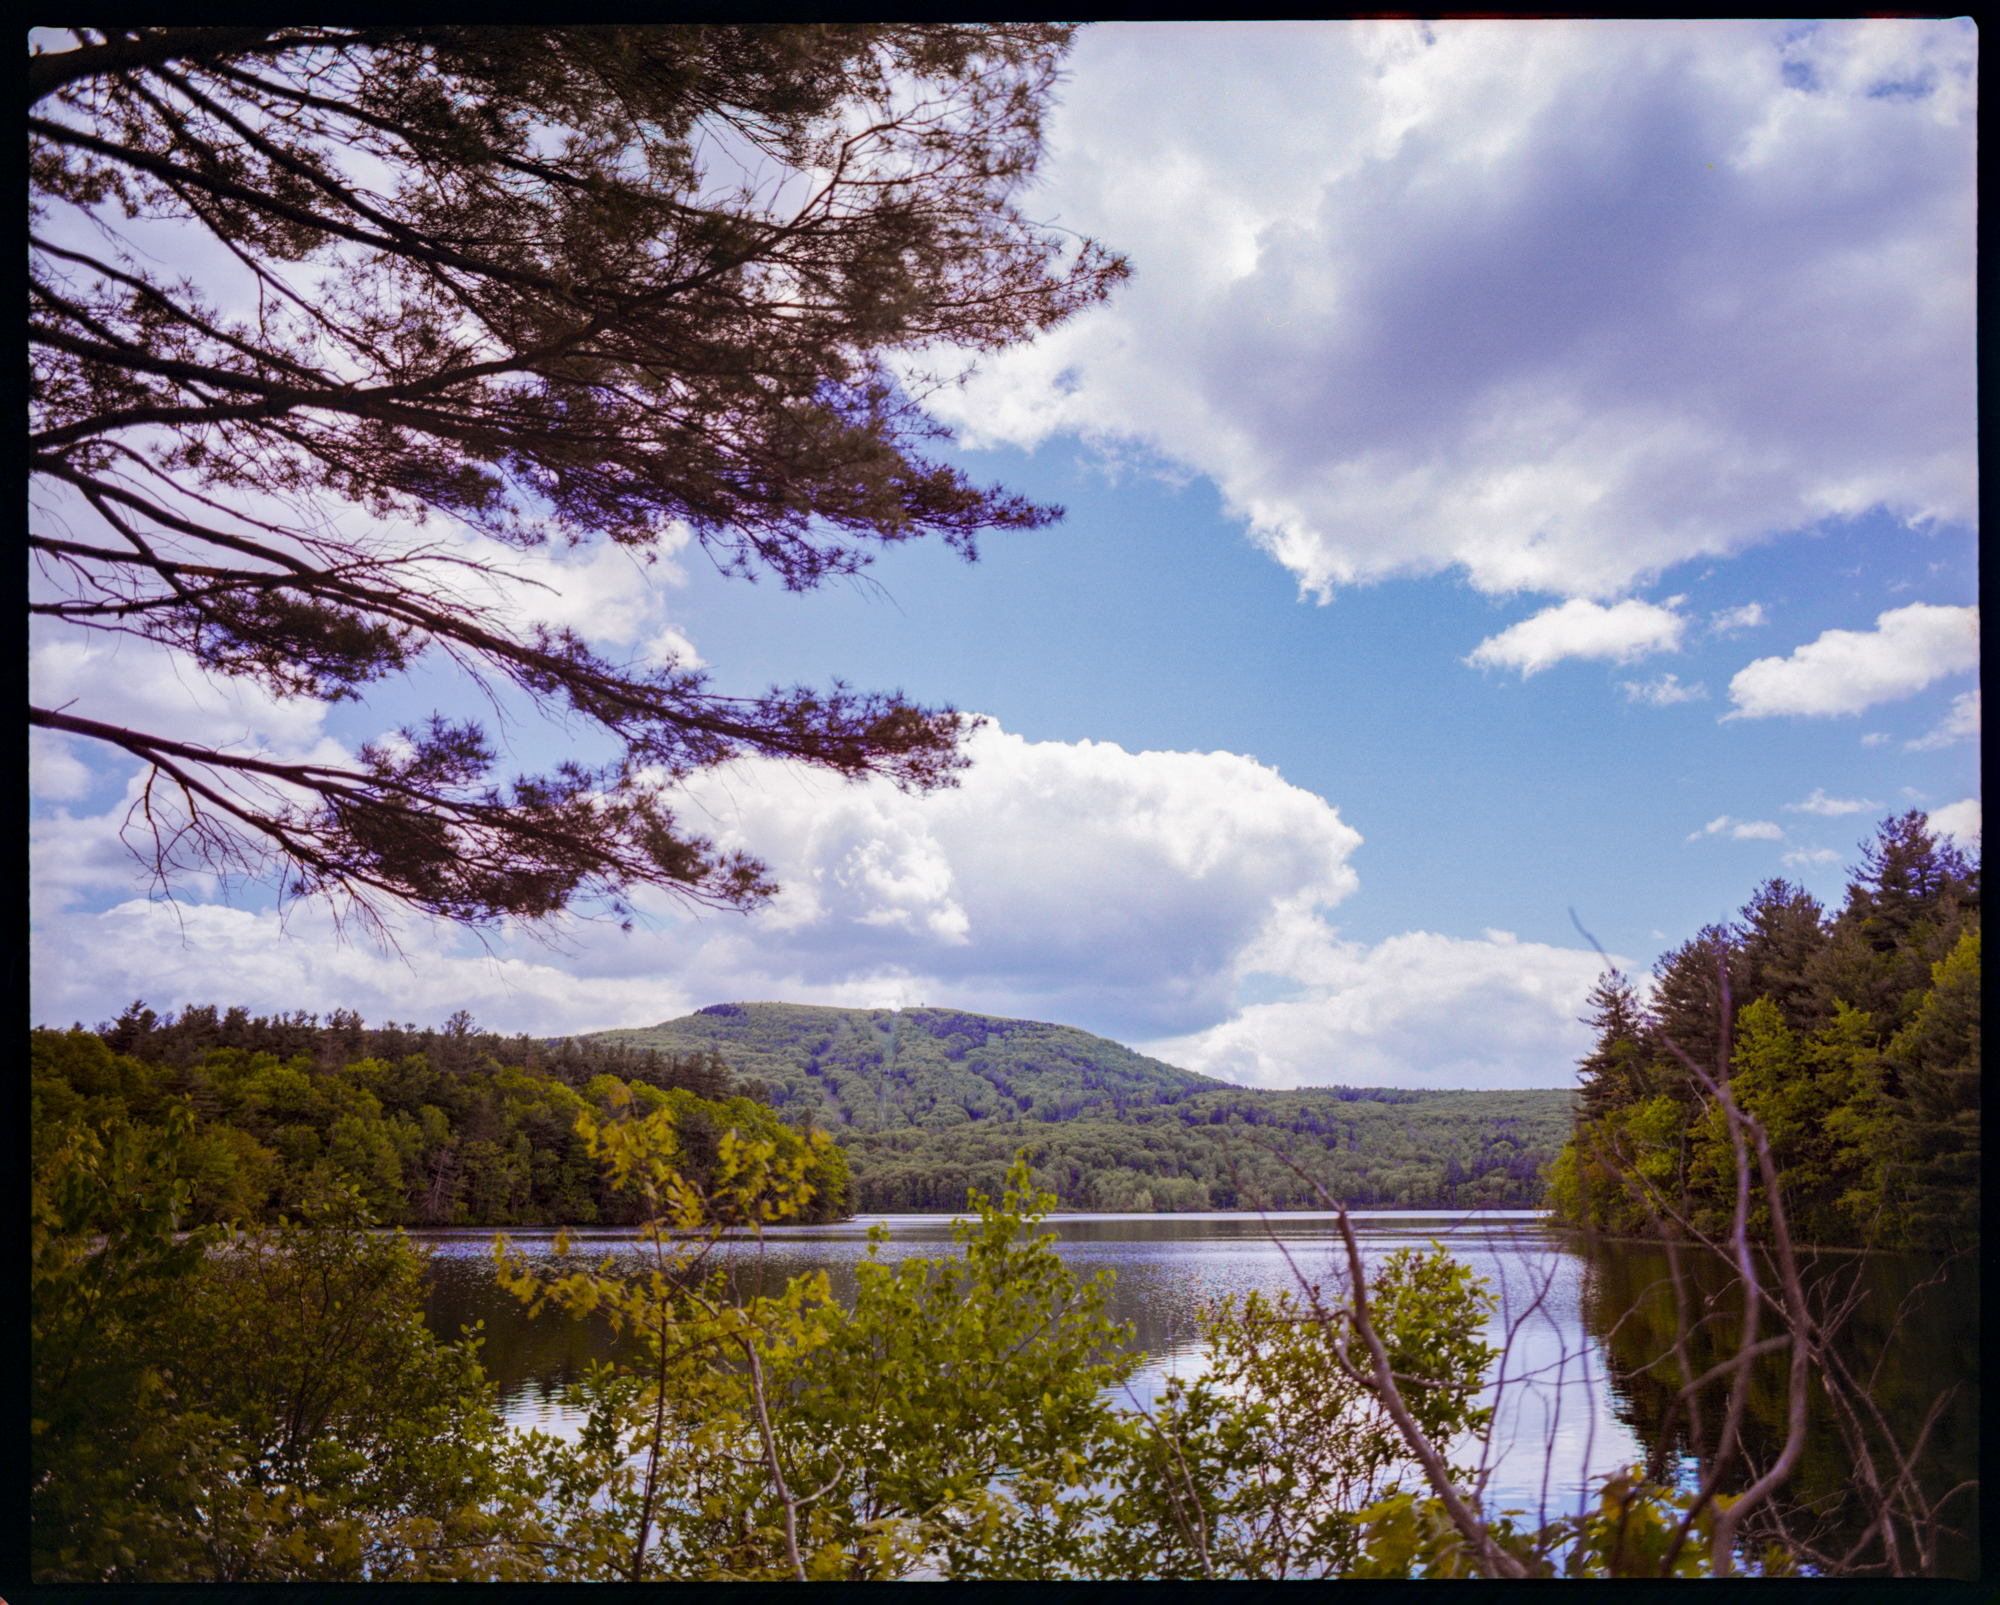
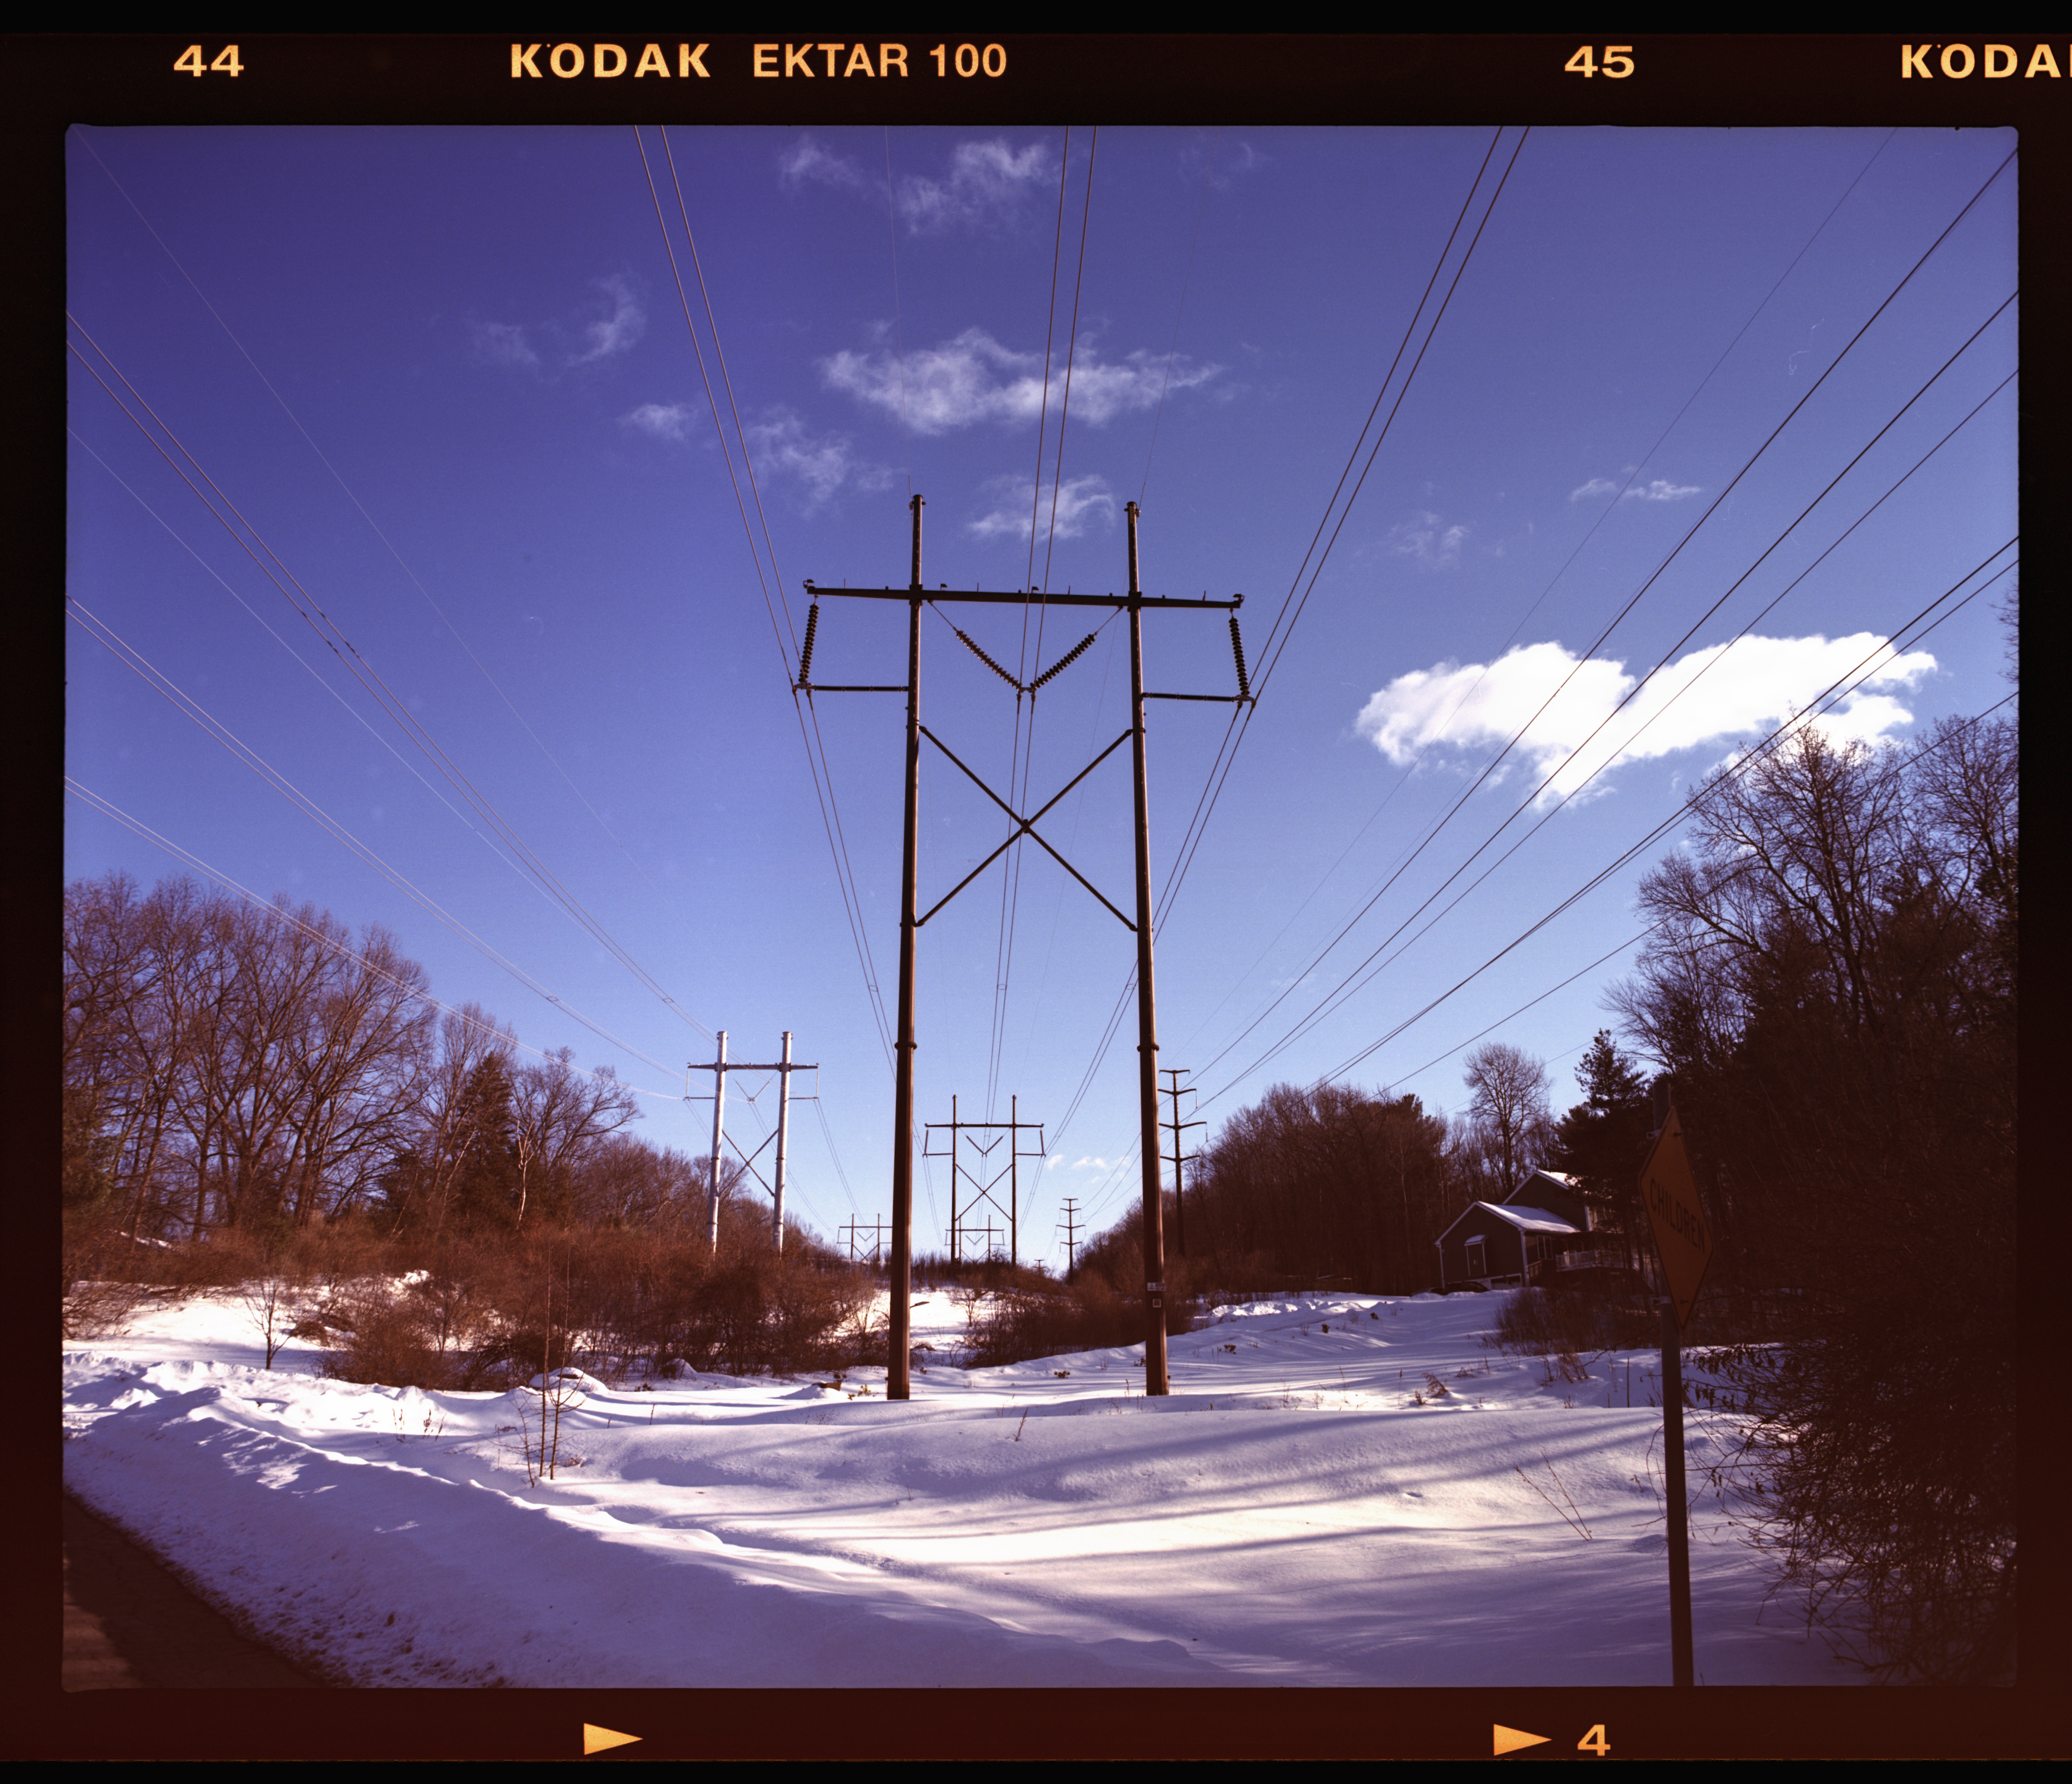
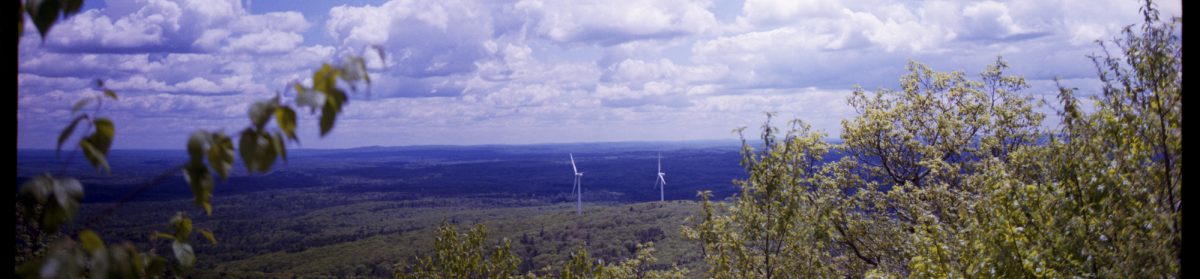
The above images were taken with the 55mm f4.
Search for Pentax 67 gear at KEH.com Purchasing gear through my link helps keep this site going.
Purchasing gear from the above link helps me keep the site going!