One of the most common questions I get from people getting into medium format film photography is some version of “how do I keep the costs down?” It’s a fair question. Between the camera, the film, and getting everything developed and scanned, the per-frame cost of shooting 120 film can add up quickly — especially when you’re only getting 10 or 12 shots per roll.
The good news is that with a few smart choices and some simple tricks I’ve picked up over the years, you can bring those costs down dramatically without sacrificing quality. Some of these tips saved me real money. A couple of them might surprise you.
If you’re curious about exactly what it costs to shoot medium format film frame by frame, I put together a full breakdown in The Cost of Shooting Medium Format Film. It’s a helpful starting point for understanding where your money actually goes.
Develop Your Own Film at Home
This is the single biggest money-saver available to any film photographer. Professional labs typically charge between $10 and $25 per roll for developing and scanning. When you’re working with 120 film and getting 10 frames per roll on a 6×7 camera, that cost per image climbs fast.
A basic home developing setup — a tank, reels, a thermometer, a changing bag, and your first round of chemistry — will cost roughly $75 to $100. After that initial investment, each roll costs somewhere between $1 and $3 to develop depending on your chemistry. Over time, the savings are substantial, and the process itself becomes genuinely enjoyable once you get comfortable with it.
I’ve put together a step-by-step walkthrough of how I process color film at home: Developing Color Film at Home. It covers everything from mixing chemistry to hanging your film to dry.
Try Room Temperature Color Developing
One of the things that intimidates people about developing color film at home is the temperature requirement. Standard C-41 processing calls for chemistry at 102°F, and maintaining that temperature throughout the process usually means buying a sous vide machine, a water bath setup, or some other temperature control device.
But here’s something a lot of photographers don’t realize — you can develop C-41 color film at room temperature with adjusted development times and get perfectly good results. I’ve been doing it and wrote about the process in detail: Developing Color Film at Room Temperature.
Skipping the temperature control equipment saves you money on gear and simplifies the whole workflow. All you really need is a thermometer and your kitchen sink. It’s a great option for anyone who wants to try home color developing without investing in additional equipment right away.
Start with Black and White
If you’re brand new to home developing, black and white film is the most budget-friendly way to get started. B&W chemistry is less expensive than C-41 kits, lasts longer in storage, handles more rolls per batch, and is much more forgiving when it comes to temperature and timing.
Developers like Rodinal and HC-110 are concentrates that you dilute heavily, which means a single bottle can develop dozens upon dozens of rolls. Compare that to a C-41 kit that handles 8 to 16 rolls before it’s spent, and you can see how quickly the savings add up.
Black and white developing is also a wonderful way to learn the fundamentals. The process is simpler, the margin for error is wider, and once you’re confident with B&W, stepping up to color feels much less daunting.
Choose Film Stocks Wisely
Premium film stocks like Kodak Portra 400 are beautiful, but at $12 to $15 a roll, they’re an investment. The great thing about medium format is that the larger negative size brings out the best in more affordable film stocks too.
Kodak Gold 200 is one of my favorite examples. It costs significantly less than Portra, and in 120 format the results are genuinely impressive — warm tones, smooth grain, and excellent scanning characteristics. It’s well worth trying if you haven’t already.
For black and white, budget-friendly options like Fomapan 100 and Kentmere 400 (made by Ilford) deliver solid results at a fraction of the cost of Tri-X or HP5. They’re great films for everyday shooting and learning, and you might find you enjoy their character just as much.
The Hole Punch Trick for Hanging Film
This is one of those small, practical tips that has made a real difference in my workflow, and it costs almost nothing.
When you use a wetting agent like Photo-Flo in your final rinse — which I’d strongly recommend to avoid hard water spots on your negatives — the film comes out of the tank incredibly slippery. Standard film clips can struggle to grip the wet film, and the last thing you want is a freshly developed strip of 120 film sliding off and landing on the floor.
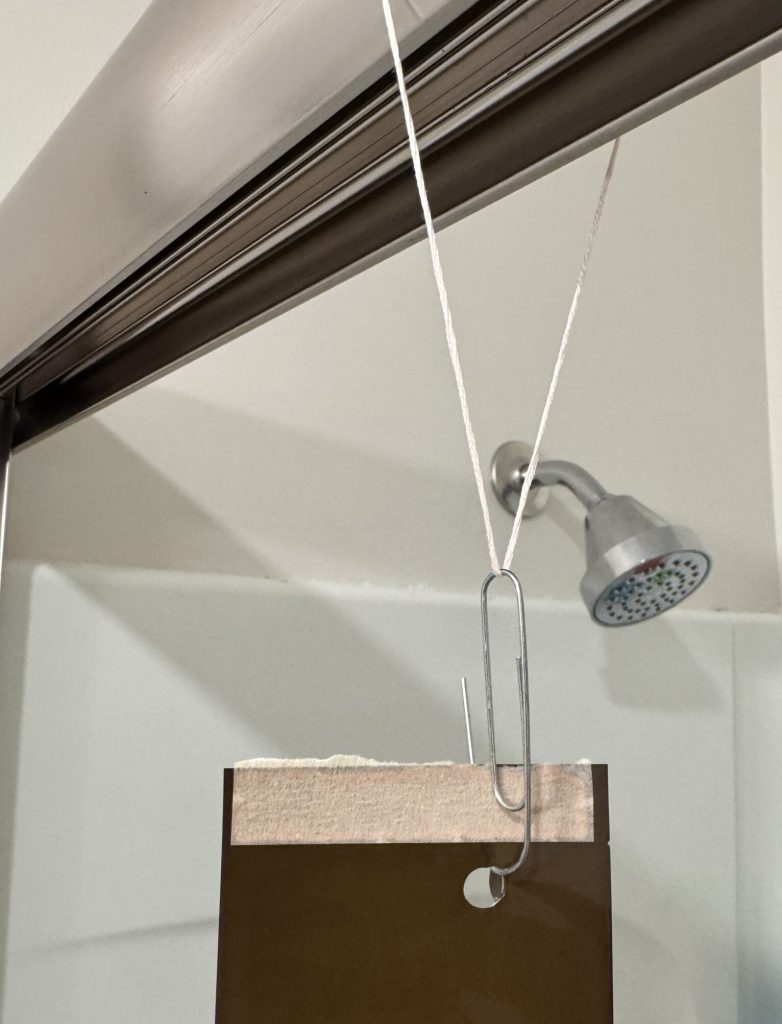
Here’s what I do: I take a regular office hole punch and punch a single hole in the very end of the film strip, right in the tail where there’s no image data. Then I thread a paperclip through the hole, tie the paperclip to a piece of string, and hang the string over the shower curtain rod.
The hole gives the clip a solid, mechanical grip that won’t slip no matter how wet the film is. It’s simple, it’s reliable, and the whole setup costs a few dollars at most. Little solutions like this can save you from a lot of frustration.
Stretch Your Chemistry Further
Most film chemistry can handle more rolls than the manufacturer’s minimum estimate. C-41 kits that advertise 8 rolls can often be pushed to 12 or even 16 rolls with a small increase in development time to compensate for chemistry exhaustion.
The key to getting the most out of your chemistry is proper storage. Keep air out of your bottles — accordion-style collapsible containers work well for this, and some photographers drop clean glass marbles into their bottles to raise the liquid level and reduce the air gap. Store bottles in a cool, dark place, and your chemistry will stay active much longer.
B&W chemistry stretches even further. Rodinal at a 1:50 dilution is used as a one-shot developer, but because it’s so dilute, the per-roll cost is almost negligible. Developers like D-76 can be replenished and reused multiple times at stock dilution.
Scan Your Film at Home
Lab scanning fees can easily double the cost of processing. If you’re on a budget, scanning at home is one of the best ways to bring costs down over time.
A used Epson V600 flatbed scanner can be found for under $200 and handles 120 film well enough for web use and moderate-sized prints. It’s not going to match a dedicated film scanner or drum scan, but for most purposes it’s more than adequate.
If you’d like to get the most out of your flatbed scans, I wrote about how to maximize detail and tonal range in Dynamic Range of Film Scanning. Small adjustments to your scanning workflow can make a noticeable difference in the final image.
Another option worth exploring is DSLR scanning — using a digital camera with a macro lens and a light table to photograph your negatives. It’s fast, produces sharp results, and uses equipment you may already own.
Use Distilled Water for Your Final Rinse
This is one of the simplest and cheapest things you can do to protect your negatives. A gallon of distilled water costs about a dollar and a half at any grocery store, and using it for your final rinse eliminates mineral deposits and water spots entirely.
You don’t need distilled water for every step — tap water works fine for your developer, stop bath, and fixer. But for that last rinse, especially combined with a small amount of wetting agent, distilled water will give you clean, spot-free negatives every time. I’ve covered this in more detail in my article on hard water spots on film negatives.
Diagnose Before You Spend
When something goes wrong during developing — and it happens to everyone at some point — it’s tempting to assume you need new chemistry, a better tank, or different equipment. More often than not, the issue comes down to something simple like agitation technique, a small temperature drift, or chemistry that’s been pushed one roll too far.
I’ve written about the most common film developing issues and how to identify what went wrong, as well as a focused guide on streaks in film and how to fix them. Learning to read your negatives and troubleshoot effectively will save you from spending money on problems that don’t require new gear.
The Bigger Picture
One of the things I appreciate most about medium format film photography is how it naturally encourages you to slow down. With only 10 or 12 frames per roll, every shot matters a little more. That deliberateness — thinking carefully about composition, exposure, and timing before pressing the shutter — is actually one of the best ways to keep costs reasonable. You end up shooting fewer frames, but better ones.
You don’t need expensive equipment or premium chemistry to develop great negatives at home. A basic tank, some affordable chemistry, a hole punch, a paperclip, and a gallon of distilled water will take you a long way. The most important investment is time — time to learn the process, time to experiment, and time to enjoy it.
That’s what this hobby is really about.
For more guides on medium format film photography, developing techniques, and gear reviews, visit MediumFormatPhotography.com.
Purchasing gear from the above link helps me keep the site going!