

Making the jump to the GFX 100S is exciting—and if you’re coming from Canon, Nikon, or Sony, potentially disorienting. Fujifilm has its own control philosophy, menu structure, and terminology that can feel foreign at first. This guide will walk you through the camera’s key settings, explain how it differs from other systems, and share practical configurations to get you shooting confidently.
Understanding Fujifilm’s Control Philosophy
Before diving into specific settings, it helps to understand how Fujifilm thinks about camera controls.
Canon, Nikon, and Sony largely follow the same paradigm: mode dials (P/A/S/M), dual command wheels, and deep menu systems. Fujifilm’s heritage is different. Their X-series cameras famously use dedicated aperture rings and shutter speed dials that mimic classic film cameras. The GFX 100S takes a hybrid approach—it has a traditional PASM mode dial but retains Fujifilm’s emphasis on direct, physical controls and extensive customization.
The result is a camera that feels different in your hands. There’s no “exposure compensation dial” spinning accidentally in your bag. Instead, you get deliberate, tactile controls that reward photographers who take time to configure them properly.
The Physical Layout
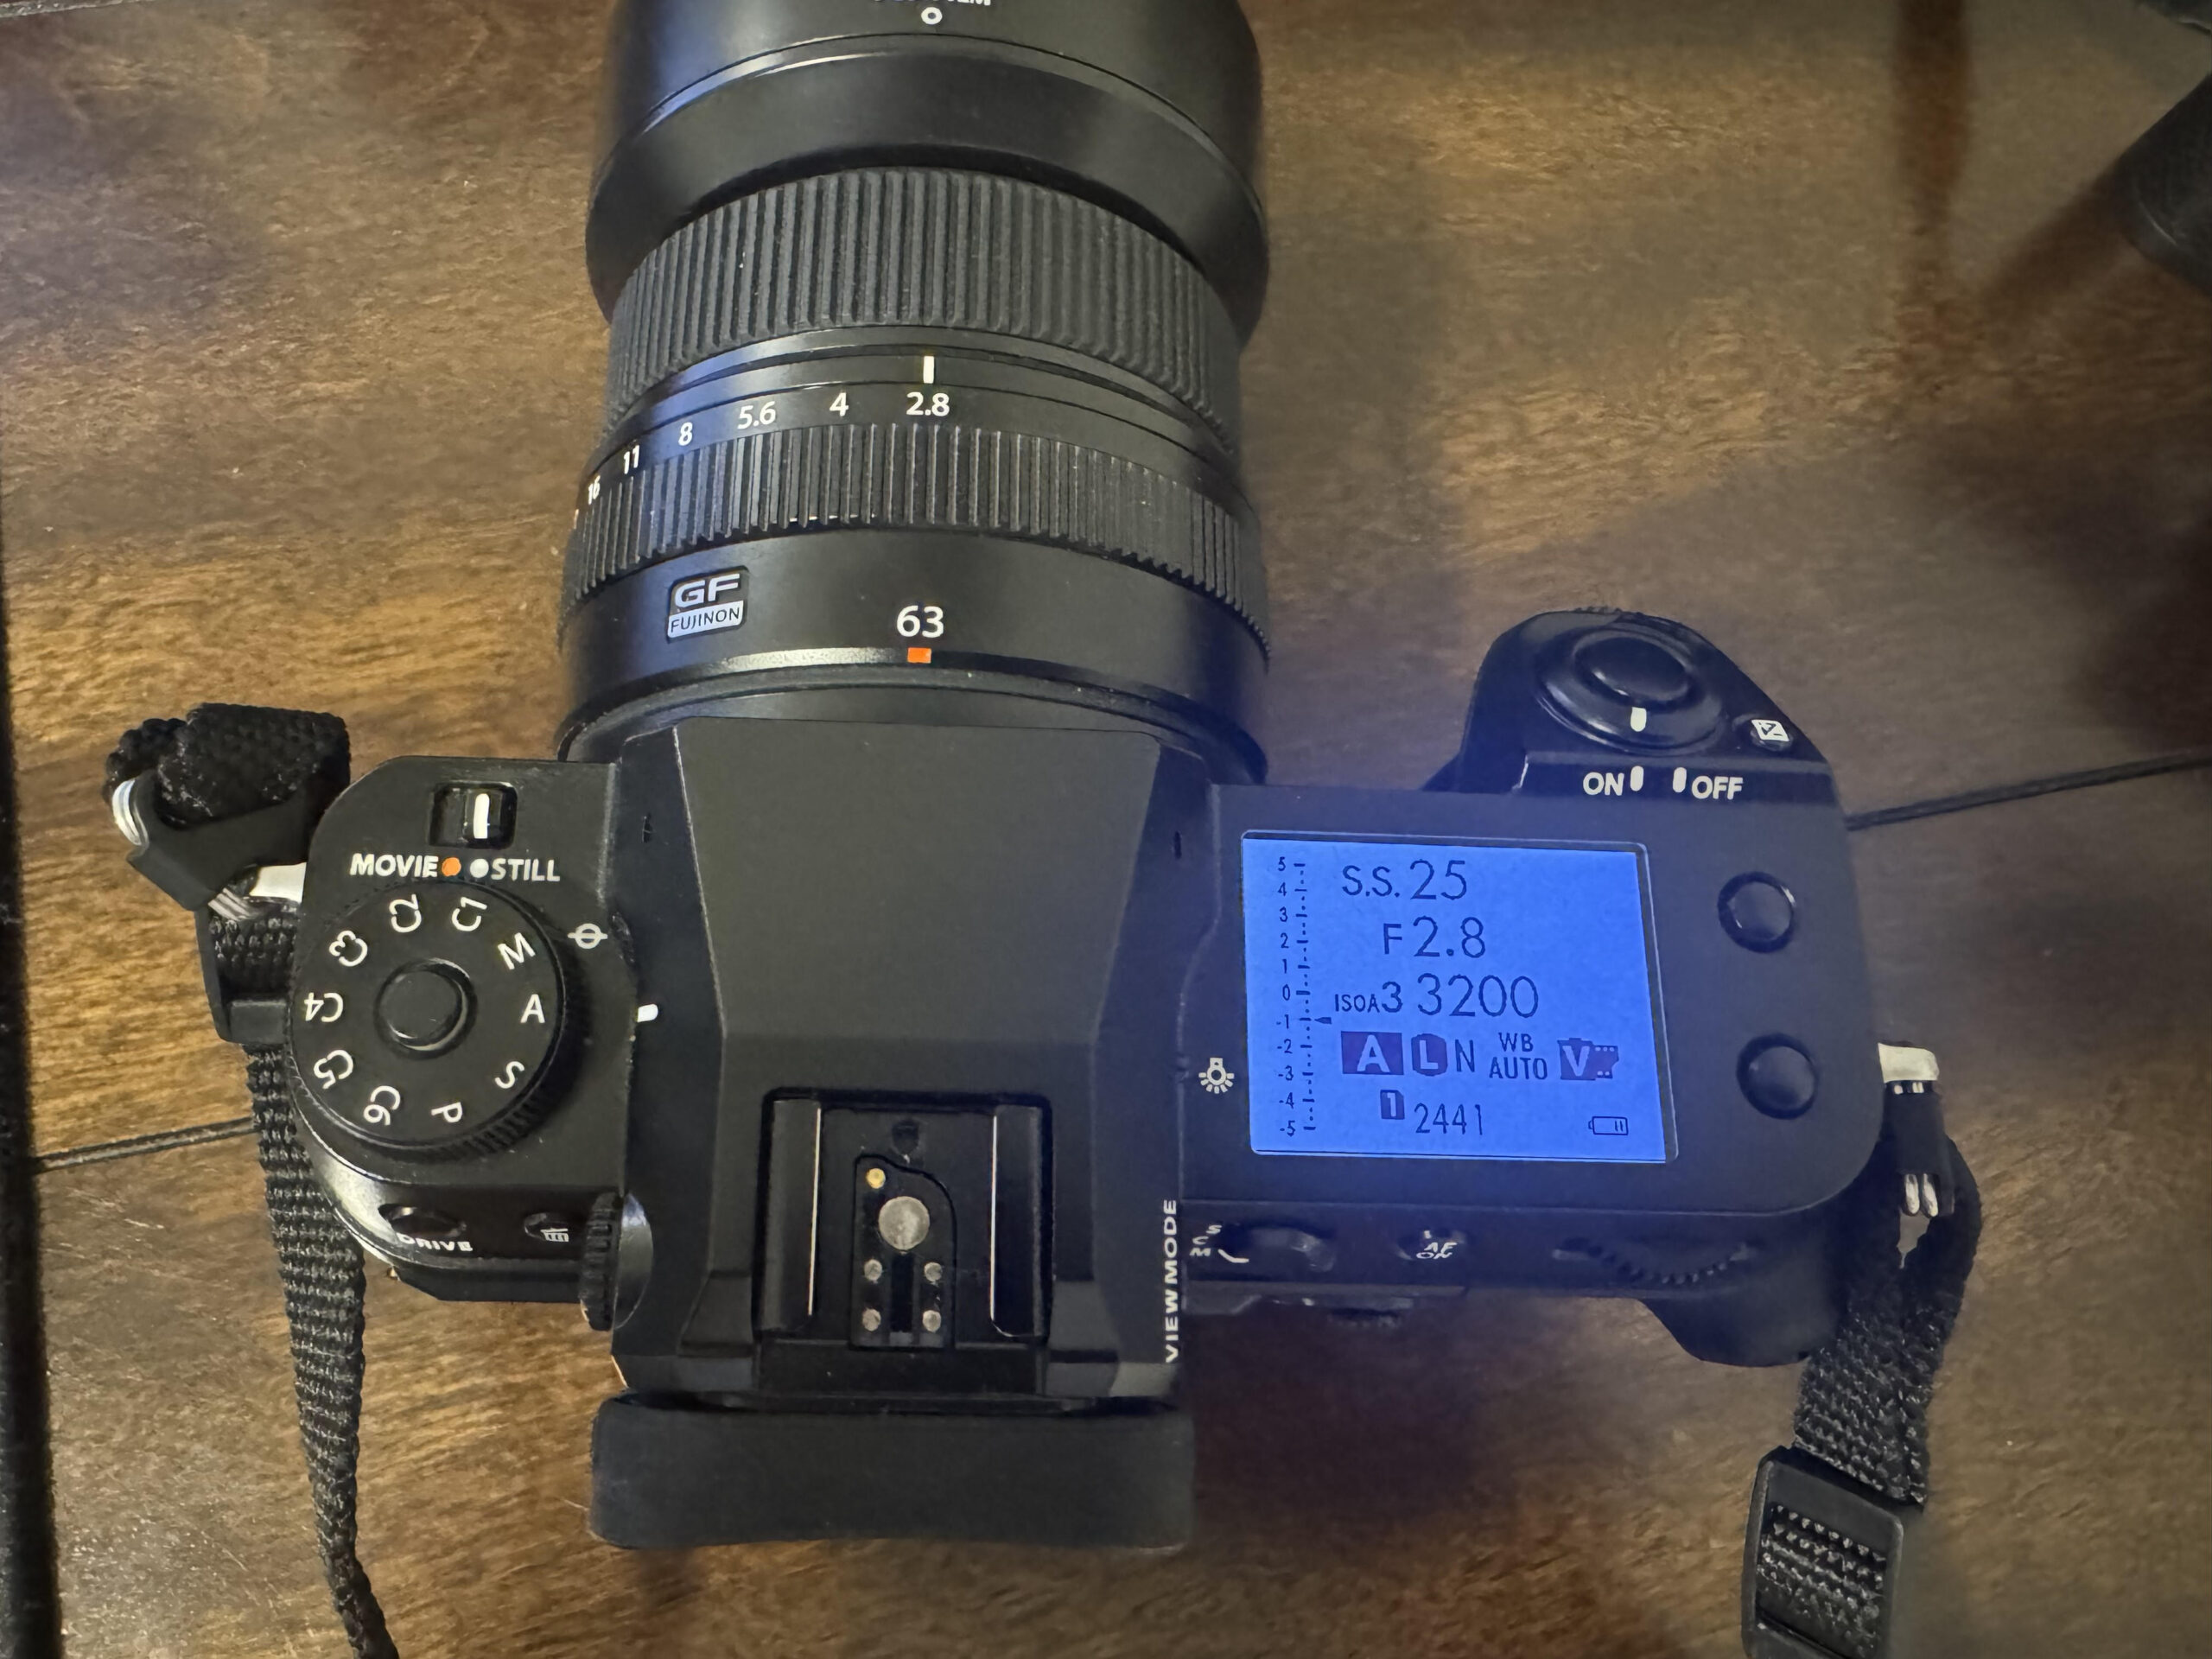
Top Plate Controls
Mode Dial: Located on the left shoulder, this selects your shooting mode. Beyond the standard P/A/S/M modes, you’ll find:
- C1 through C6: Custom presets that save your complete camera configuration
- VIDEO: Dedicated video mode
Front Command Dial: The dial near the shutter button. By default, this controls shutter speed in Manual mode and adjusts exposure compensation in Program/Aperture Priority.
Rear Command Dial: Located on the back right. Controls aperture by default. Press it in to toggle between functions.
Drive Dial: On the left side, this physical dial controls continuous shooting, bracketing, self-timer, and multiple exposure modes. Coming from Sony or Canon where these are buried in menus, having a dedicated dial feels luxurious.
Back Controls
Focus Lever (Joystick): The eight-way joystick moves your focus point. Press it in to center your focus point—a shortcut you’ll use constantly.
AF-ON Button: Dedicated back-button focus. More on configuring this later.
AEL/AFL Button: By default, locks exposure. Highly customizable.
Q Button: Opens the Quick Menu—your most important shortcut to frequently changed settings.
DISP Button: Cycles through display modes on the EVF and LCD.
Key Menu Settings to Configure First
The GFX 100S menu system is extensive. Here are the critical settings to address when you first get the camera.
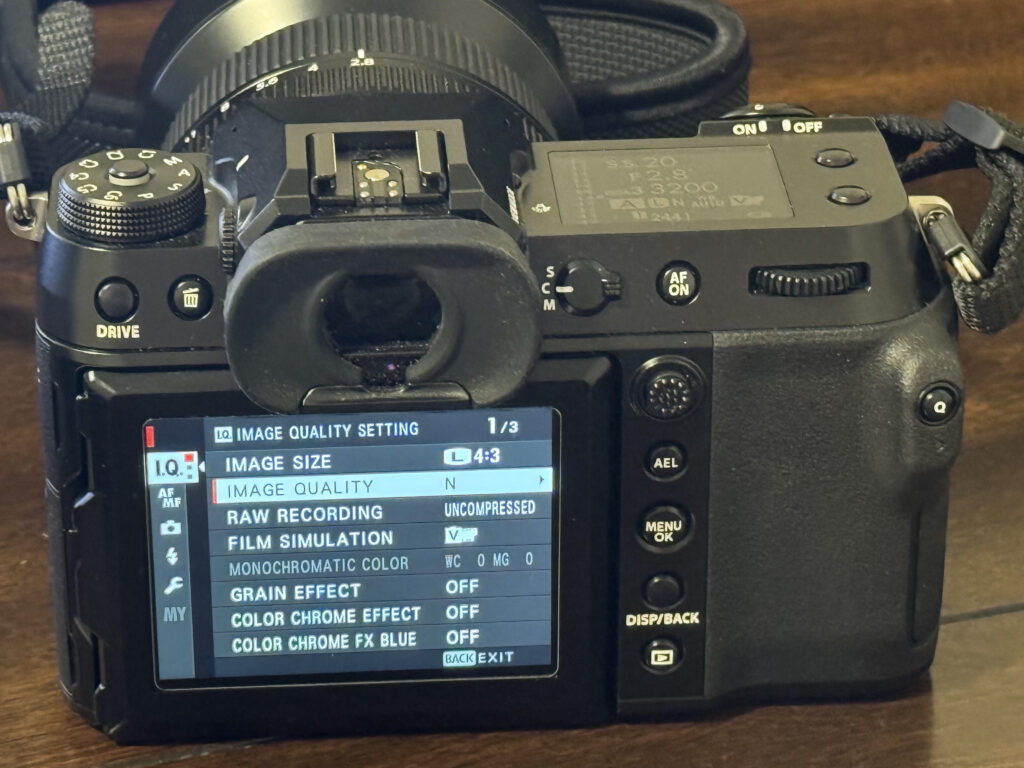
Image Quality Settings (IQ Menu)
Image Size: You have options from the full 102MP down to smaller sizes. Most photographers leave this at Large (102MP) since storage is cheap and you can always downsample later.
RAW Recording: Choose between Uncompressed and Lossless Compressed. Lossless Compressed saves significant space with no quality penalty—use it.
Film Simulation: Fujifilm’s signature feature. Unlike Canon Picture Styles or Sony Creative Looks, Film Simulations are genuinely useful—many photographers shoot JPEG + RAW because the Fuji JPEGs are that good. Start with Provia (standard), but explore Astia (soft), Velvia (vivid), and Classic Neg for different looks.
Autofocus Settings (AF/MF Menu)
AF Mode: Choose between Single Point, Zone, Wide/Tracking, and All. Single Point gives you precision; Zone offers a good balance. Wide/Tracking works best for moving subjects.
Face/Eye Detection: The GFX 100S has capable face and eye detection. Set this to ON and choose between face priority or eye priority. Eye AF works well for portraits but can hunt in challenging conditions.
Pre-AF: This keeps the camera continuously focusing even before you half-press the shutter. It speeds up AF acquisition but drains battery faster. I leave it off and use back-button focus instead.
AF+MF: Enable this. It allows you to manually override autofocus by turning the focus ring after the camera has locked focus—essential for fine-tuning critical focus.
Focus Check: When enabled, the camera automatically magnifies the image when you turn the manual focus ring. Invaluable for manual focus work.
Shooting Settings
IS Mode: The GFX 100S has impressive in-body stabilization. Options include Continuous (always on), Shooting Only (activates at shutter press), and Off. Continuous helps with composition but uses more battery. Most photographers use Shooting Only.
Shutter Type: You can choose Mechanical, Electronic, Mechanical + Electronic (auto-switching), or Electronic Front Curtain. Each has tradeoffs:
- Mechanical: Traditional shutter, no rolling shutter issues, flash sync at all speeds up to 1/4000s
- Electronic: Silent, speeds up to 1/16000s, but potential rolling shutter with fast movement
- Electronic Front Curtain: Reduces shutter shock, good compromise for landscapes
For most work, Mechanical + Electronic lets the camera choose intelligently.
Button/Dial Settings
This is where you make the GFX 100S truly yours.
Function Button Settings: The camera has numerous customizable buttons:
- Fn1 (top plate)
- Fn2 (top plate)
- Rear Fn button
- AEL button
- AF-ON button
- Touch Function (swipe gestures on the LCD)
Popular assignments include:
- Film Simulation (quick access to change looks)
- ISO
- White Balance
- Focus Area selection mode
- Preview Depth of Field
- Histogram display
Command Dial Settings: You can swap what the front and rear dials control, and configure whether they change function in different modes.
The Q Menu: Your Best Friend
Press the Q button to access a 16-slot grid of your most-used settings. Unlike digging through menus, everything here is one or two clicks away.
The Q Menu is fully customizable. I recommend including:
- Film Simulation
- Dynamic Range
- White Balance
- ISO
- Image Size
- AF Mode
- Face/Eye Detection
- Self-Timer
- Flash settings
- Grain Effect
- Color Chrome Effect
To customize the Q Menu, press and hold the Q button, then select which settings appear in each slot.
Custom Presets: The C1-C6 Slots
This is a feature many photographers underutilize. Each custom slot saves nearly every camera setting—not just exposure values, but AF configuration, image quality settings, button assignments, and more.
Consider setting up presets like:
- C1: Landscape — Base ISO, Velvia film simulation, single-point AF, mechanical shutter
- C2: Portrait — Auto ISO with reasonable ceiling, Astia or Pro Neg Std, face/eye detection on, EFCS
- C3: Street — Auto ISO, Classic Neg, zone AF, electronic shutter for silence
- C4: Tripod/Studio — ISO 100 locked, tethering settings, manual focus, IBIS off
The ability to switch between completely different camera configurations with one dial click is tremendously powerful.
Coming from Sony
Sony shooters will find the GFX 100S autofocus capable but not as aggressive. The GFX is a medium format camera optimized for deliberate shooting, not rapid-fire action. Expect:
- Slower continuous shooting (5 fps max)
- AF that’s confident but not as tenacious as Sony’s tracking
- Less reliance on menu diving, more emphasis on physical controls
- Film Simulations that actually get used—unlike Sony’s Creative Looks, which most shooters ignore
The biggest adjustment: slow down. The GFX 100S rewards a more deliberate pace.
Coming from Canon
Canon users will feel relatively at home with the button layout, though the menu system differs significantly. Key differences:
- No physical control wheel on the back (like Canon’s rear dial)—Fuji uses front/rear command dials
- Film Simulations replace Picture Styles
- The Q Menu replaces Canon’s Quick Control screen
- No touchscreen AF point selection by default (though you can enable it)
Fujifilm’s menus are organized differently and can feel scattered at first. Give yourself time to learn where settings live.
Coming from Nikon
Nikon shooters often adapt quickly to the GFX 100S. The control philosophy has similarities—emphasis on direct controls, sensible ergonomics, and logical button placement. Key differences:
- The GFX uses a single card slot (a common complaint)
- Battery life is shorter than Nikon DSLRs, comparable to mirrorless
- The EVF, while excellent, is still an EVF—not an optical finder
- Menu structure follows Fujifilm’s own logic
The biggest revelation for Nikon users is often the Film Simulations and how pleasant the GFX files are to process. The color science feels different—many say more “organic.”
Final Thoughts
The GFX 100S isn’t a camera you master immediately. Its depth rewards exploration—there are features like in-camera HDR, multiple exposures, and advanced bracketing that deserve articles of their own.
The best advice: resist the urge to configure everything at once. Start with the basics—get comfortable with the dials and the Q menu. Then gradually build out your custom buttons and presets as you discover your own shooting patterns.
Coming from other systems, give yourself permission to feel slow at first. The GFX 100S isn’t trying to be the fastest camera in the world. It’s trying to be a medium format camera that delivers exceptional image quality with handling that gets out of your way. Once the controls become second nature, they really do.
For more info on the GFX 100s, Check out my article on GFX Resolution.
Purchasing gear from the above link helps me keep the site going!