Film Fogging: How to Identify and Prevent Light Leaks in Your Photographs
If you’ve ever pulled a roll of freshly developed film from the tank — or received scans back from your lab — only to find mysterious glows, color shifts, or washed-out areas creeping into your frames, you’ve encountered fogging. It’s one of the most common issues in film photography, and while it can occasionally produce happy accidents, it’s usually just heartbreaking. The good news is that fogging is almost always diagnosable and preventable once you know what to look for.
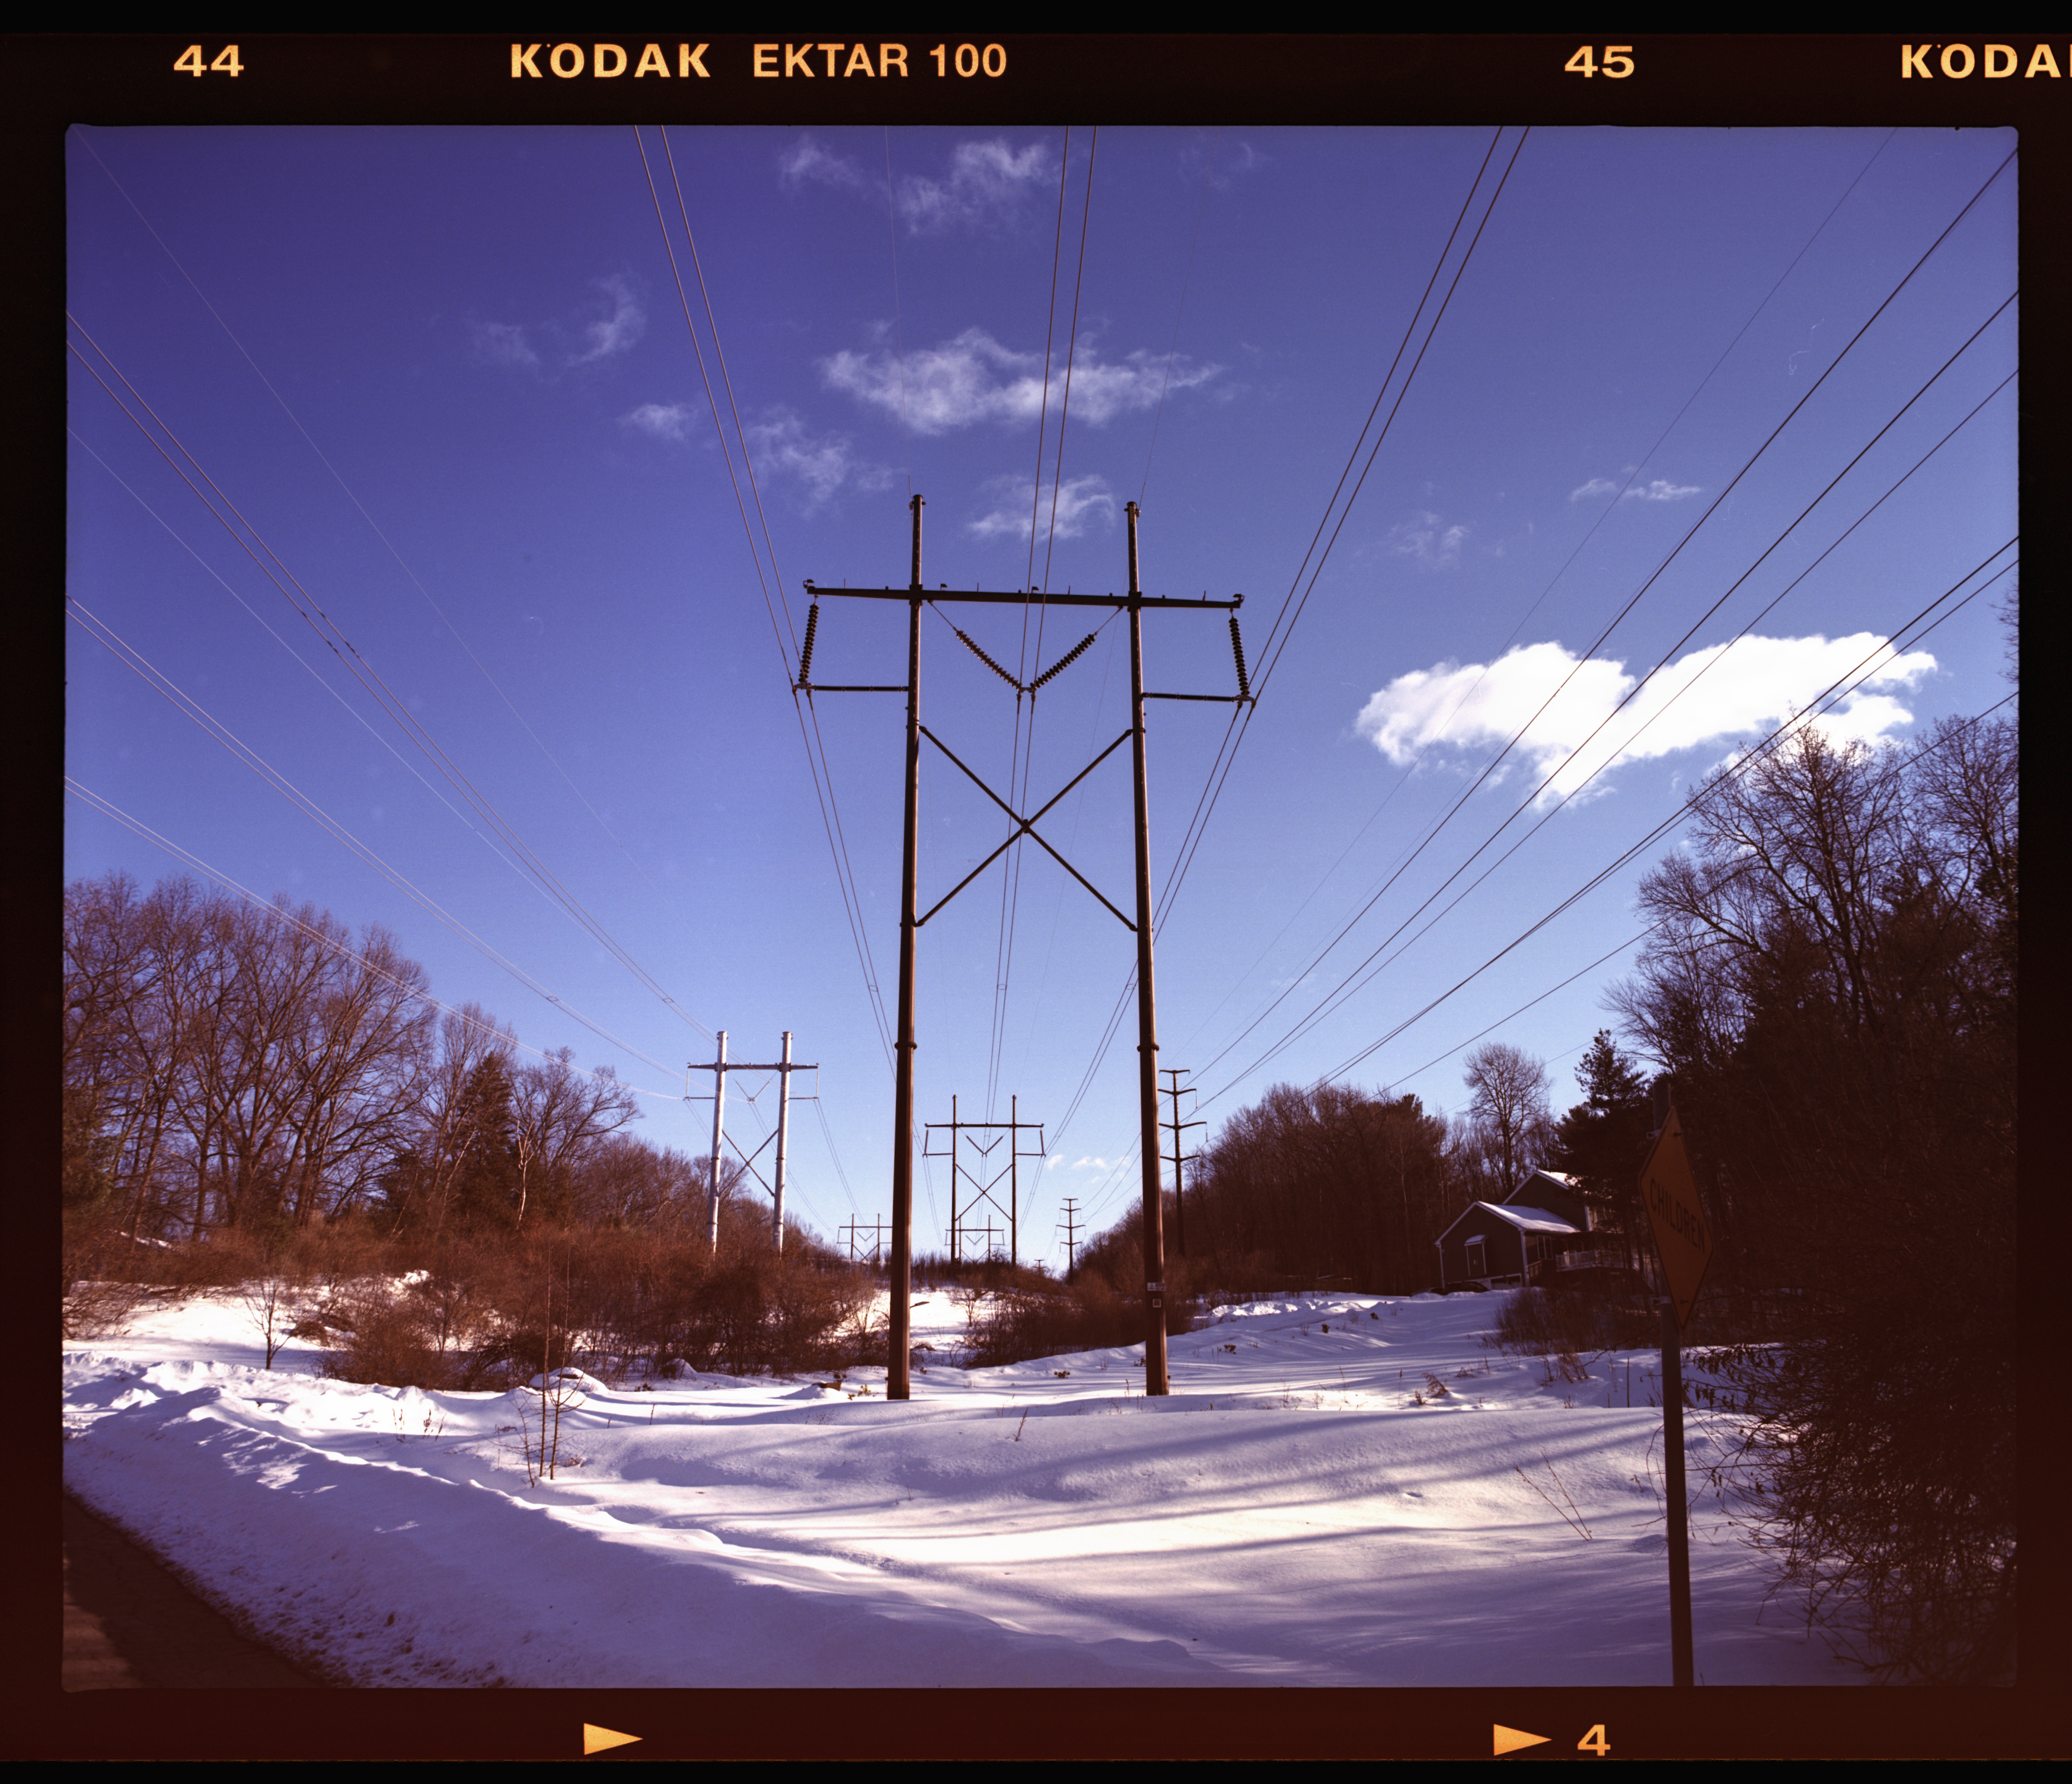
This is not the worst example of fogging, but notice the bottom of the rebate is not pure black like the rebate at the top.
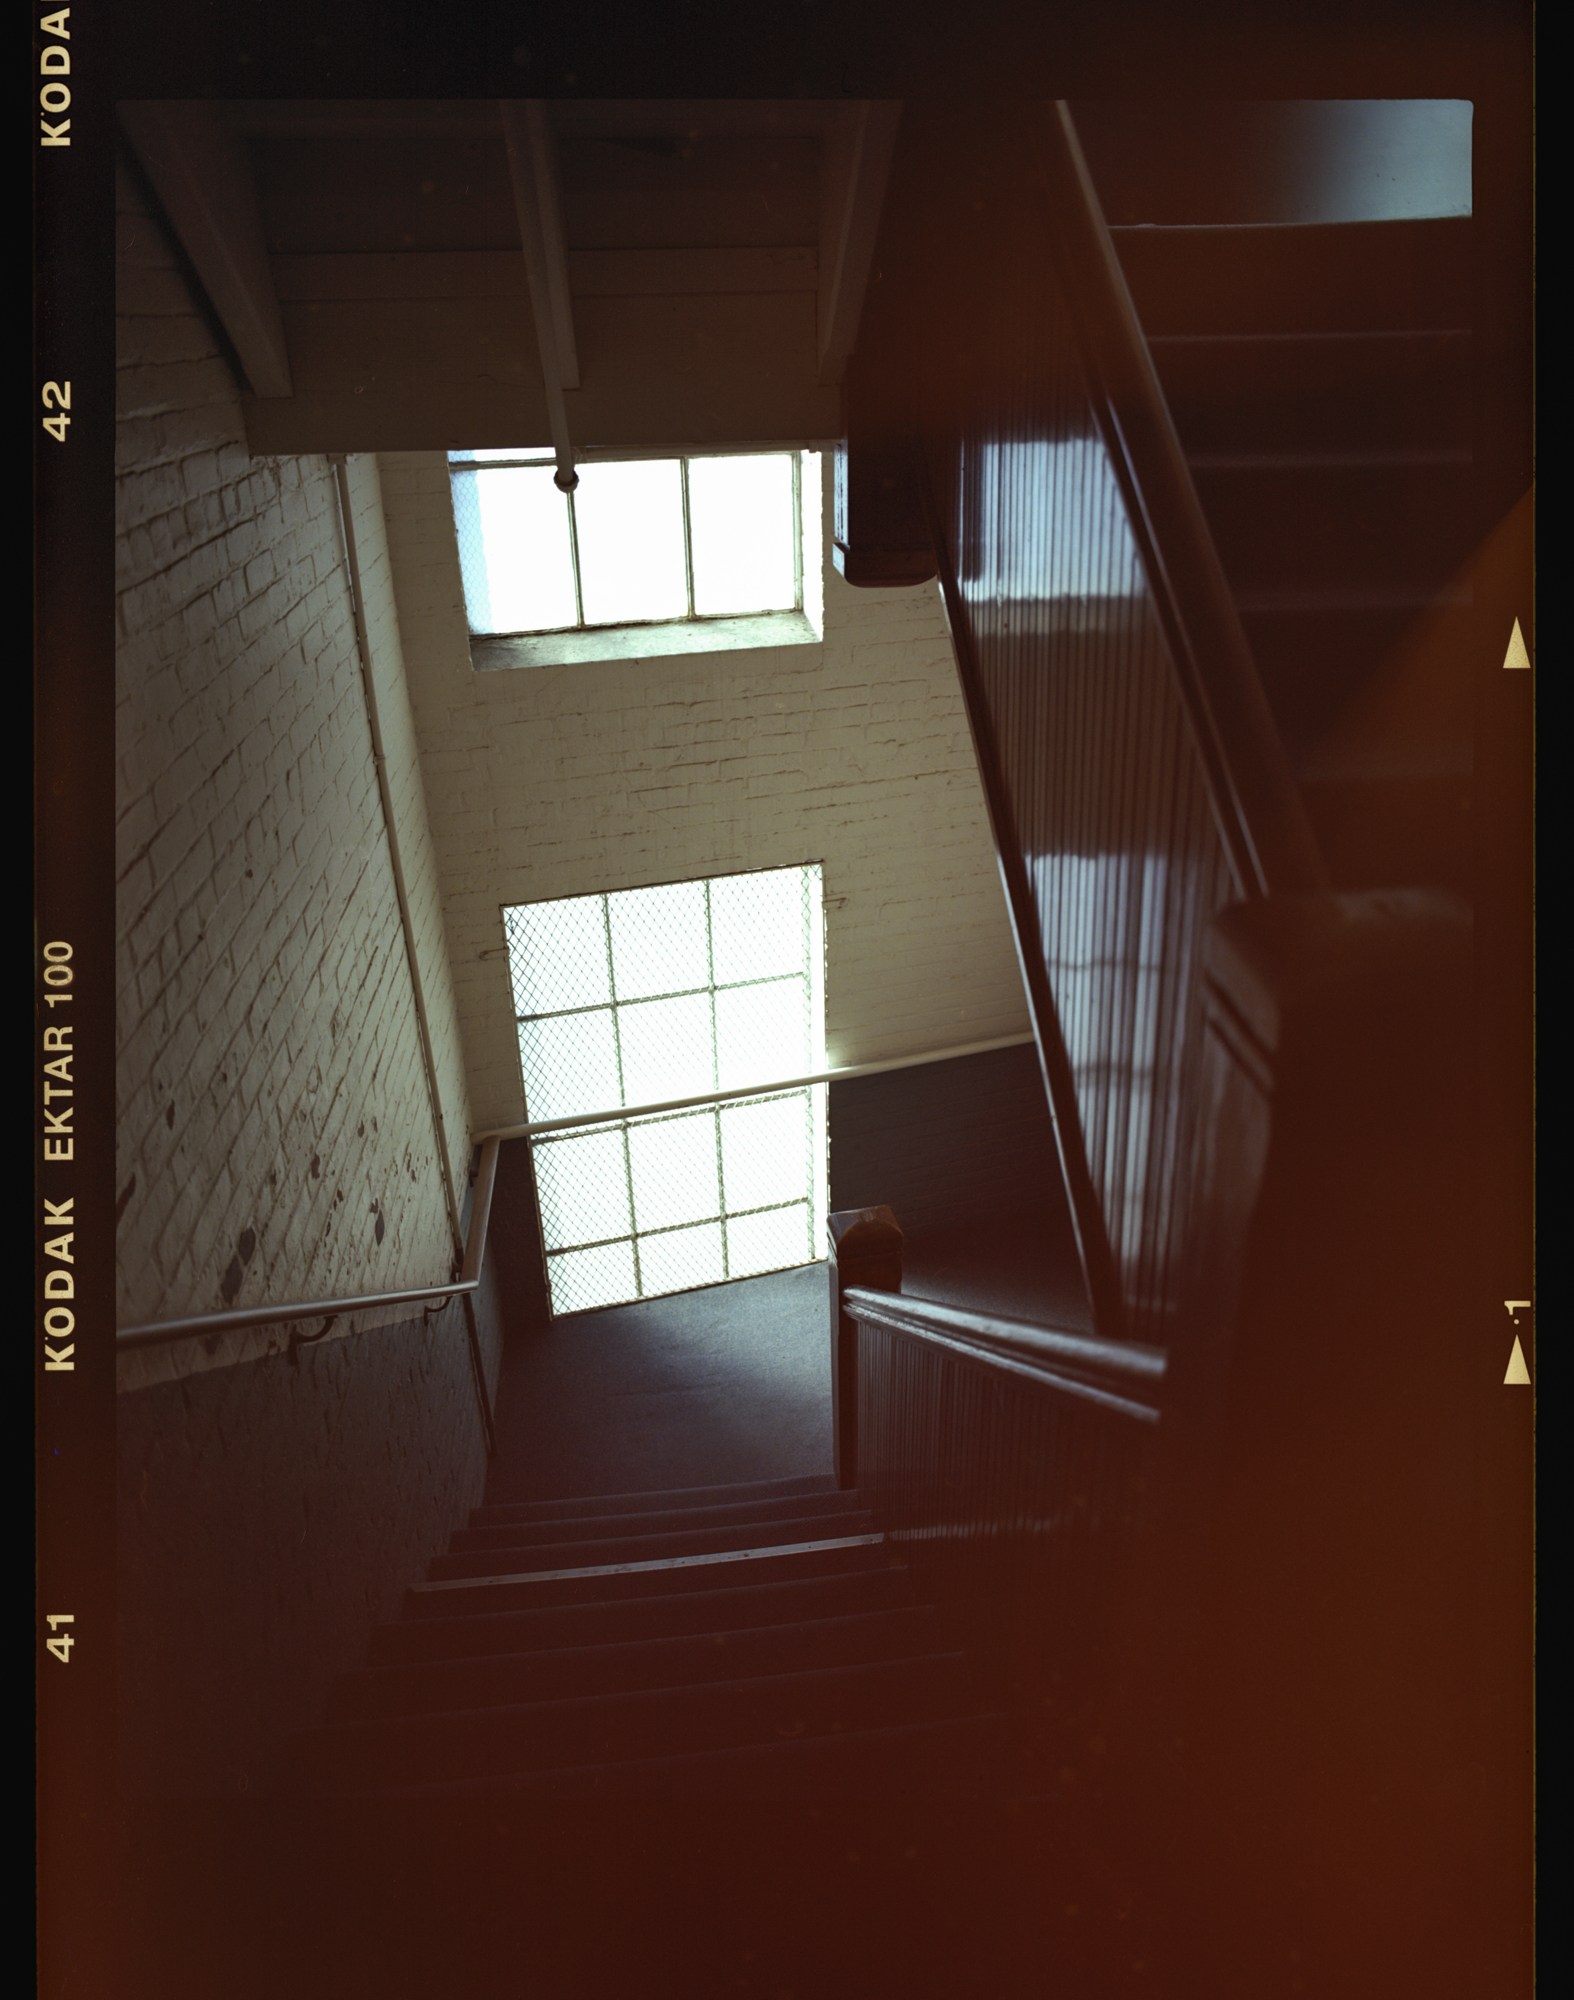
Below is another example from the same day. I brought the image into Lightroom and boosted the shadows to make the light leak more apparent. Now in portrait mode so leak is to the right. I’ve isolated this to being a bad seal on my Pentax 67
What Is Film Fogging?
Fogging is any unwanted exposure of the film emulsion to light (or, less commonly, to heat, radiation, or chemical contamination). The result is a loss of contrast, color shifts, or outright veiling of the image — areas where detail is obscured by a haze that shouldn’t be there. On color negative film, fogging typically manifests as warm orange, red, or magenta tones in the affected areas. On black-and-white film, it appears as a general gray density in areas that should be clear.
How to Tell If Your Photograph Is Fogged
Edge Fogging (Light Leaks)
The most common type. Look for a band of discoloration running along one edge of the frame. It’s usually warm-toned on color negative stocks — orange, red, or magenta — and tends to be strongest at the film’s edges, tapering off as it moves toward the center of the image. This pattern is a dead giveaway: light is entering the camera or film back from one side.
Key diagnostic clues:
- The fogging appears in the same position across multiple frames on the roll, because the light source is fixed relative to the film path.
- On medium format film, the fogging may appear along the edge closest to the paper backing’s outer wrap, since that’s where ambient light has the shortest path to the emulsion.
- The affected area often has a gradient quality — intense at the very edge, fading as it moves inward.
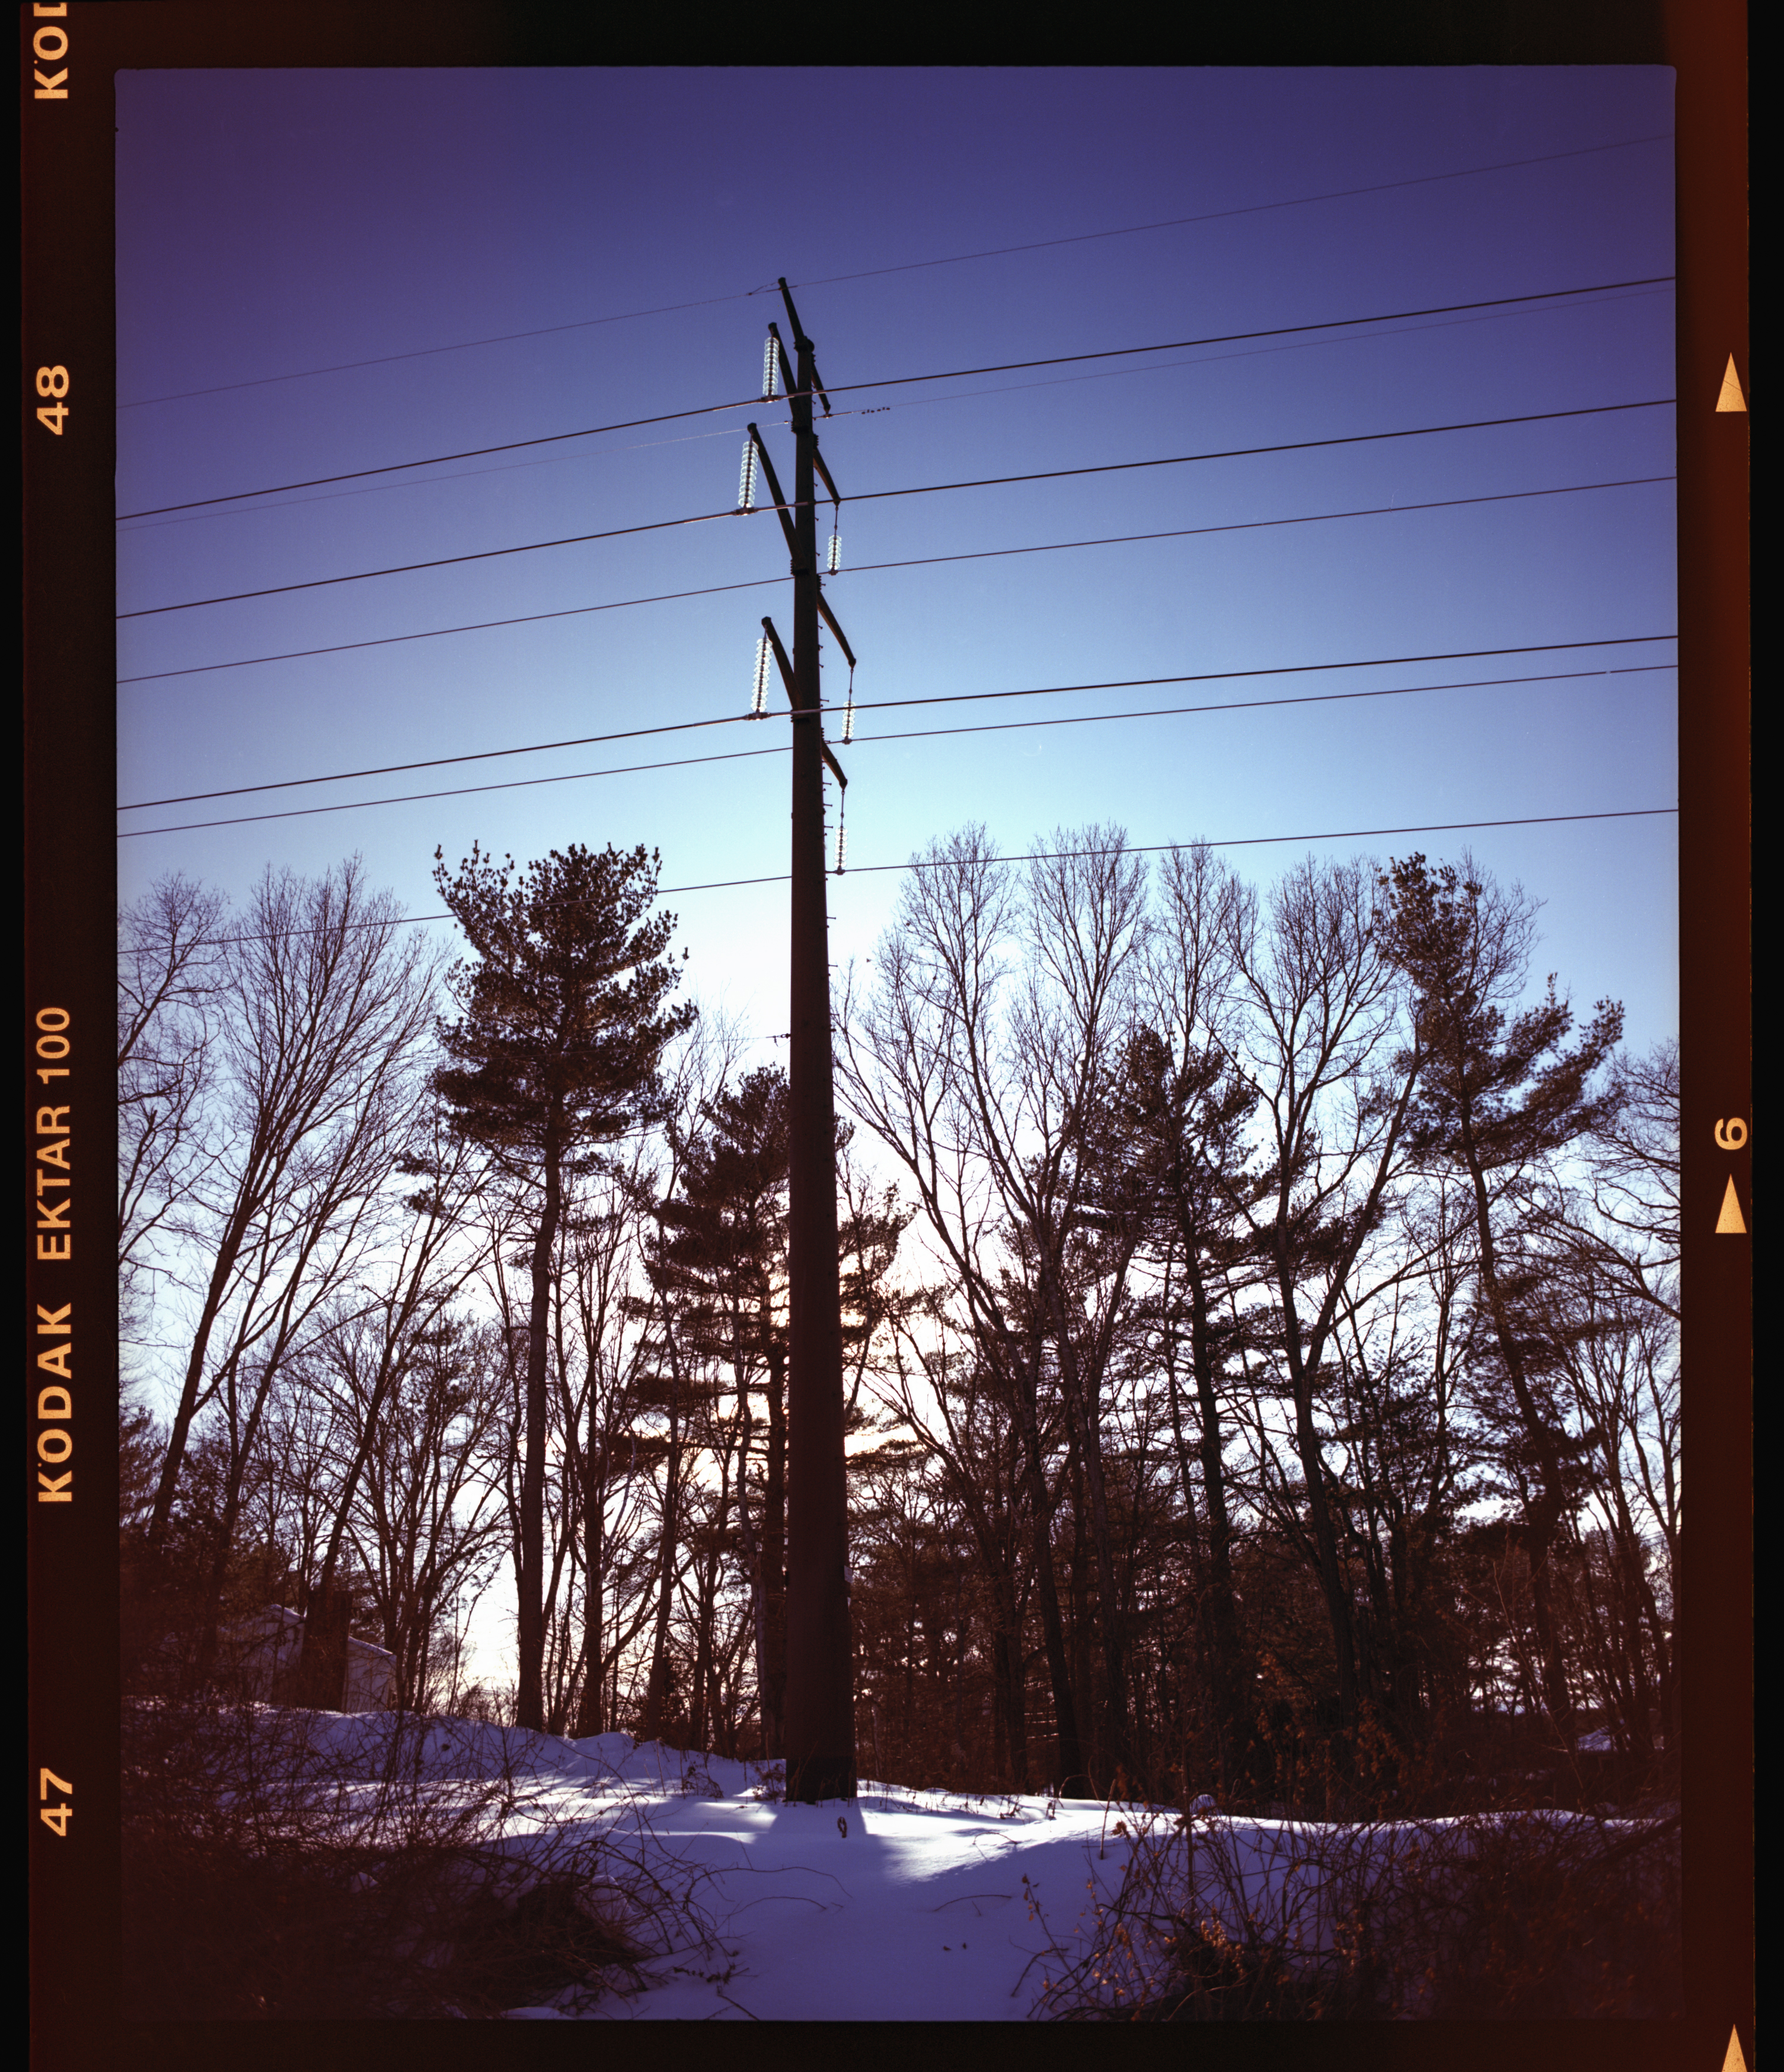
Below is the worst light leak from this particular role of film.
Minor light leaks are much more noticeable in the shadows of photographs.
The reasons for the light leaks with this role of film is that I didn’t realize my Pentax 67 is completely missing the seal around the film door. See below:
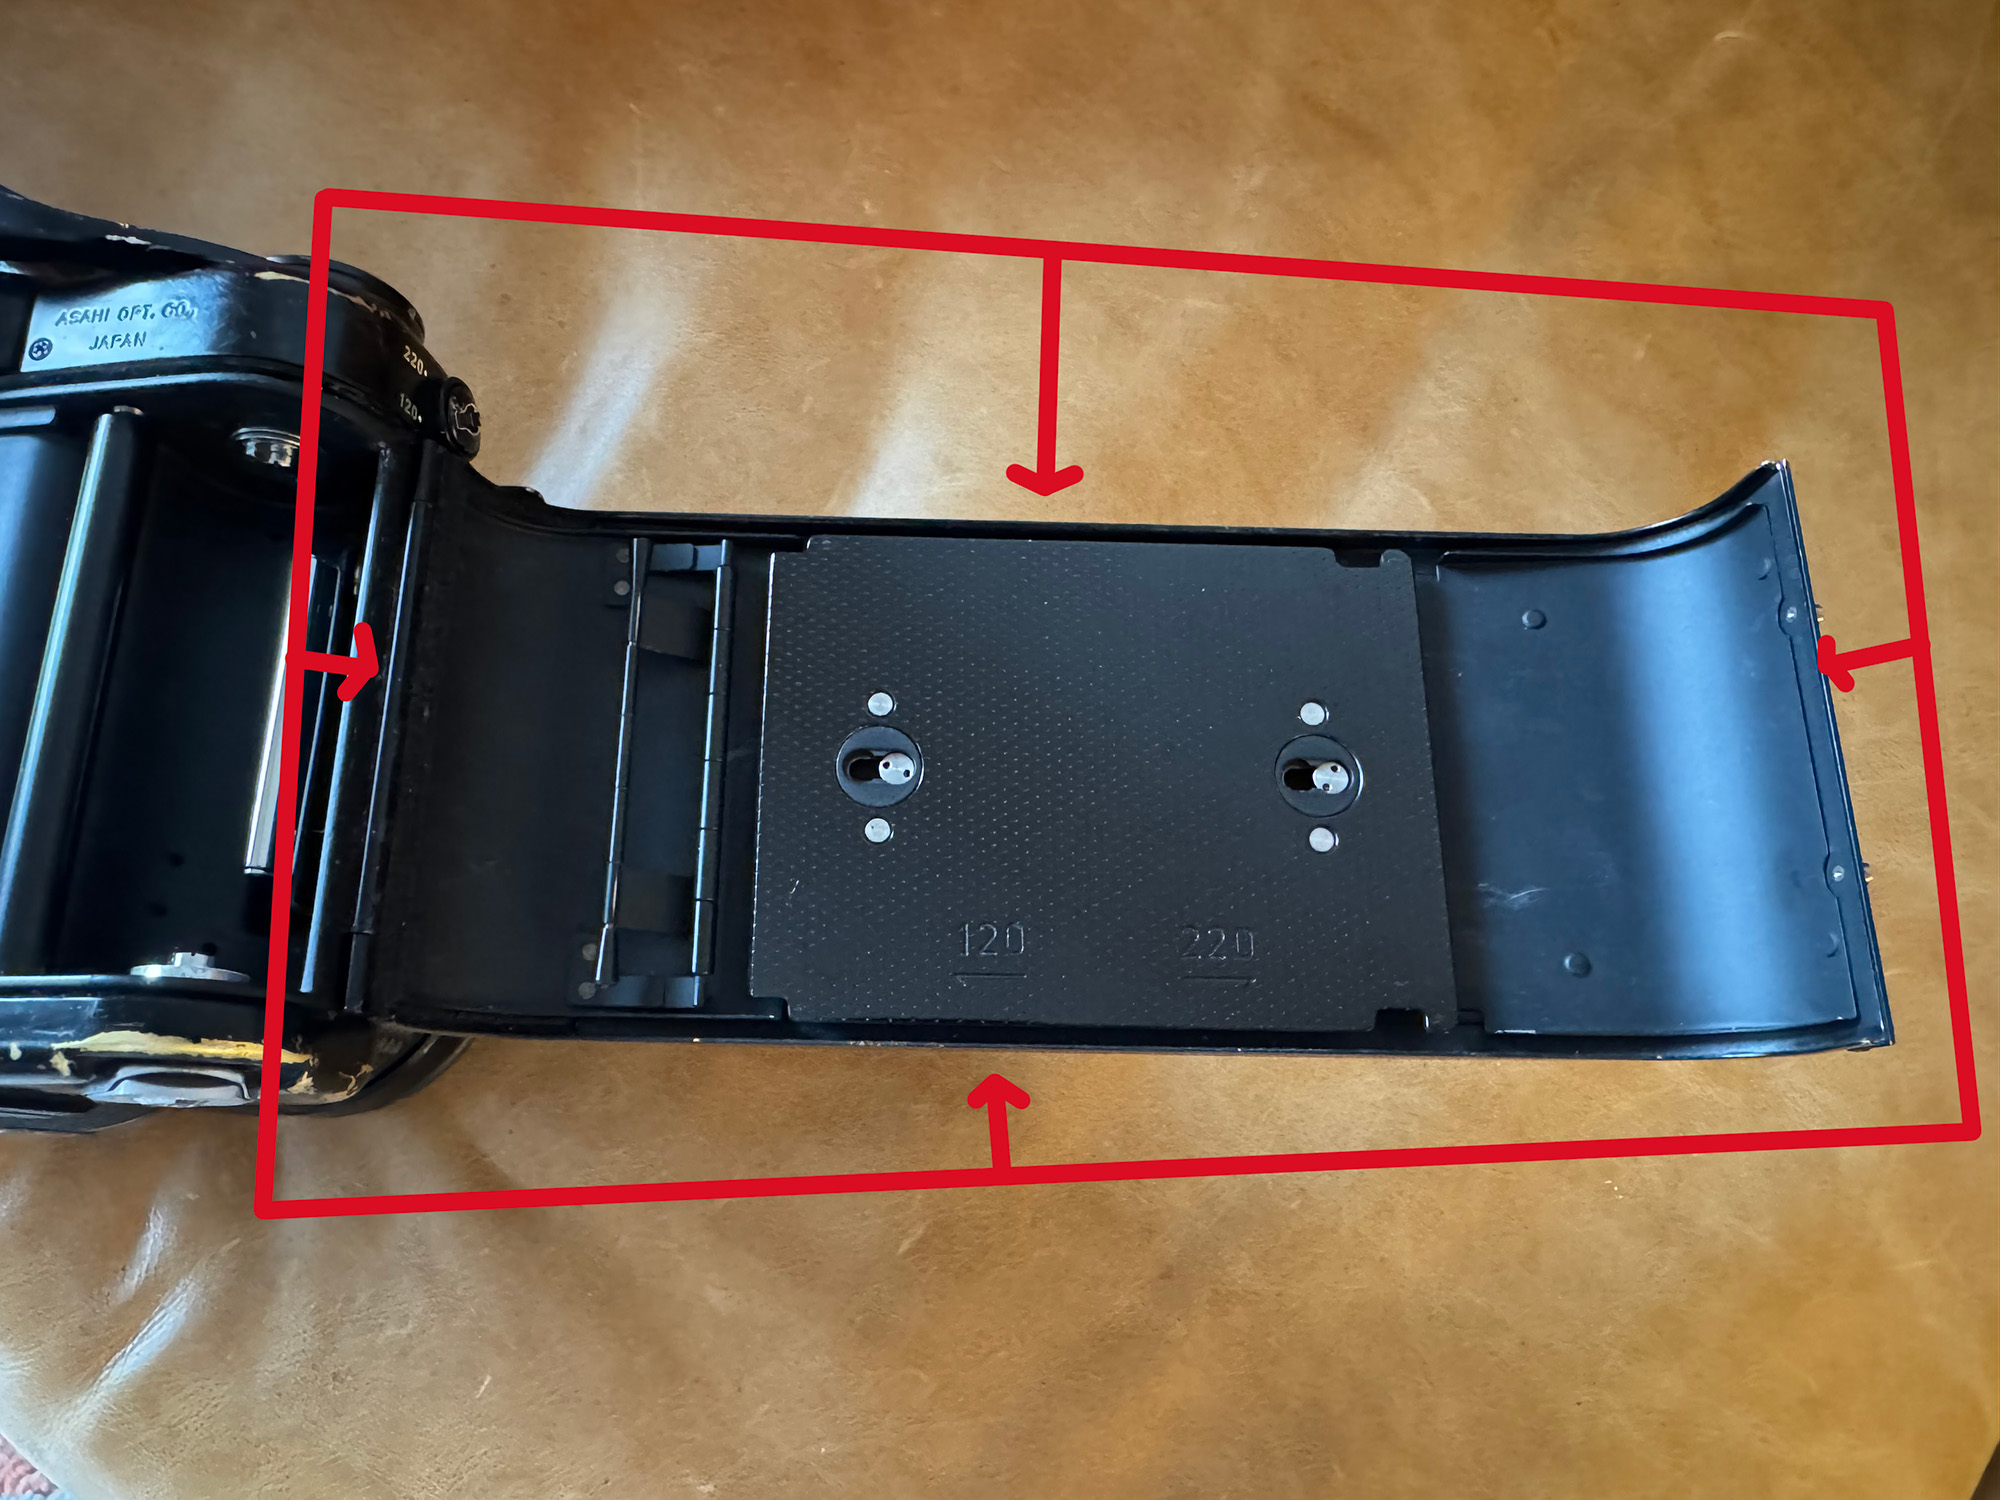
Don’t do what I did. Always check that this seal is present and in good condition. Make sure it’s not crumbling, and that it goes all the way around the door without missing sections.
Overall Base Fog
If the entire roll looks milky, flat, or low in contrast, you may be dealing with base fog. This can result from expired or improperly stored film, excessive heat exposure, or chemical contamination during processing. Unlike a light leak, base fog is uniform across the frame — there’s no directional pattern.
X-Ray Fog
If you’ve traveled with unprocessed film, look for faint streaks or bands that don’t correspond to the camera’s geometry. Modern carry-on X-ray machines are generally safe for film under ISO 800, but CT scanners (increasingly common at airports) will fog film of any speed, sometimes severely. The pattern is often random-looking streaks or wavy lines that cut across frames.
Developing Fog
Chemical fogging from the development process typically produces an even, overall density increase. If only one roll from a batch shows the problem, the issue is more likely the camera or film storage. If every roll from the same developing session is affected, suspect the chemistry — exhausted developer, contaminated stop bath, or incorrect temperatures can all cause it.
Common Causes of Light Leak Fogging
Degraded Light Seals
This is the number one culprit, especially in older cameras. The foam or felt light seals around film doors, dark slide slots, and back panels break down over time, crumbling into sticky residue that no longer blocks light. On medium format backs — Hasselblad A-series backs, Pentax 67 bodies, Mamiya RB/RZ backs — these seals may be decades old and well past their useful life.
Loose Film Winding
On medium format cameras that use 120 film, the paper backing is your first line of defense against light. If the film isn’t wound tightly on the take-up spool, gaps can form between layers of paper, allowing light to reach the emulsion from the edges. This is especially problematic with thinner-based film stocks such as the Kodak Ektar 100 in the example above. Always wind firmly after each exposure, and avoid letting loaded film sit in bright sunlight.
Camera Body Issues
Hairline cracks in the body shell, a warped or misaligned back, worn hinge pins, or even a missing screw can create enough of a gap for light to enter. Bellows on folding or view cameras are especially vulnerable — even a pinhole in aged bellows material will produce a telltale spot or streak.
Handling and Loading Errors
Loading or unloading film in direct sunlight — even briefly — can fog the outer frames of a roll. Medium format film is particularly sensitive here because the paper backing provides less protection at the very start and end of the roll. Always load in shade or subdued light.
How to Diagnose the Source
If you suspect a light leak, here’s a systematic approach:
The sacrificial roll test. Load a cheap roll of film, shoot a few frames in bright sunlight, and process the roll. If the fogging appears in the same position as before, you’ve confirmed it’s the camera or back, not a one-time handling error.
Check the pattern. Note where the fogging appears relative to the film path. On most medium format cameras, the film travels vertically — so a leak along the bottom of the frame as you view it might correspond to the left or right side of the camera body, depending on orientation. Map the fogging position back to the physical camera to narrow down the entry point.
Inspect the seals. Open the back in a well-lit area and run your finger along every seal. If you pick up black residue, those seals are gone. Even seals that look intact may have hardened and lost their compressibility — press gently to check.
The flashlight test. In a dark room, close the back with no film loaded, and shine a bright flashlight around every seam, hinge, and joint from the outside. Look inside the film chamber for any light getting through. A helper or a second pair of eyes inside and out makes this much easier.
Prevention
Replace Light Seals Regularly
If your camera is more than ten years old and has never had its seals replaced, it’s overdue. Light seal kits are inexpensive and widely available for most popular camera models. It’s a straightforward DIY job — clean out the old seal material with a wooden stick and lighter fluid or naphtha, then press in the new foam or yarn. For cameras you rely on heavily, consider replacing seals every five to seven years.
Store Film Properly
Keep unexposed film in a cool, dry place — ideally refrigerated if you’re storing it long-term. Heat accelerates base fog, especially on expired stock. Let refrigerated film come to room temperature for at least an hour before loading to prevent condensation on the emulsion.
Be Mindful When Loading and Unloading
Always load and unload film in shade or low light. For 120 film, make sure the paper leader is tight on the spool before you start threading, and wind deliberately without slack. After shooting your last frame, wind the film completely onto the take-up spool before opening the back, and seal the roll with the adhesive tab immediately.
Protect Film During Travel
Request hand inspection at airport security whenever possible. If your film must go through a scanner, keep it under ISO 400 for standard X-ray machines. Never put unprocessed film in checked baggage — the CT scanners used on checked bags will fog film regardless of speed. Consider using lead-lined film bags as a last resort, though be aware that security may simply increase the scanner intensity if they can’t see through the bag.
Inspect Your Gear
Make it a habit to visually inspect your camera back, bellows, and body before every shoot. Check that the back seats flush, that latches engage fully, and that there’s no visible damage. For view cameras, check bellows by extending them fully and looking for pinholes with a light source inside.
A Final Note
Fogging is frustrating, but it’s rarely mysterious. Almost every case can be traced to one of the causes above with a little systematic troubleshooting. The key is to act on it promptly — a small light leak left unaddressed will only get worse as seals continue to deteriorate. Your film deserves a light-tight home from the moment you load it to the moment it hits the developer.
Purchasing gear from the above link helps me keep the site going!