If you have ever talked yourself out of developing color film at home, the reason was almost certainly temperature. The standard C-41 process calls for developer at 102°F, held within a degree or two for the duration of the development step. That requirement sends people shopping for sous vide machines, foot spas, immersion circulators, and elaborate water bath setups — all to maintain a temperature that their kitchen sink cannot hold steady on its own. It is the single biggest barrier between a photographer and a home color darkroom, and for many people, it is enough to keep them mailing rolls to a lab indefinitely.
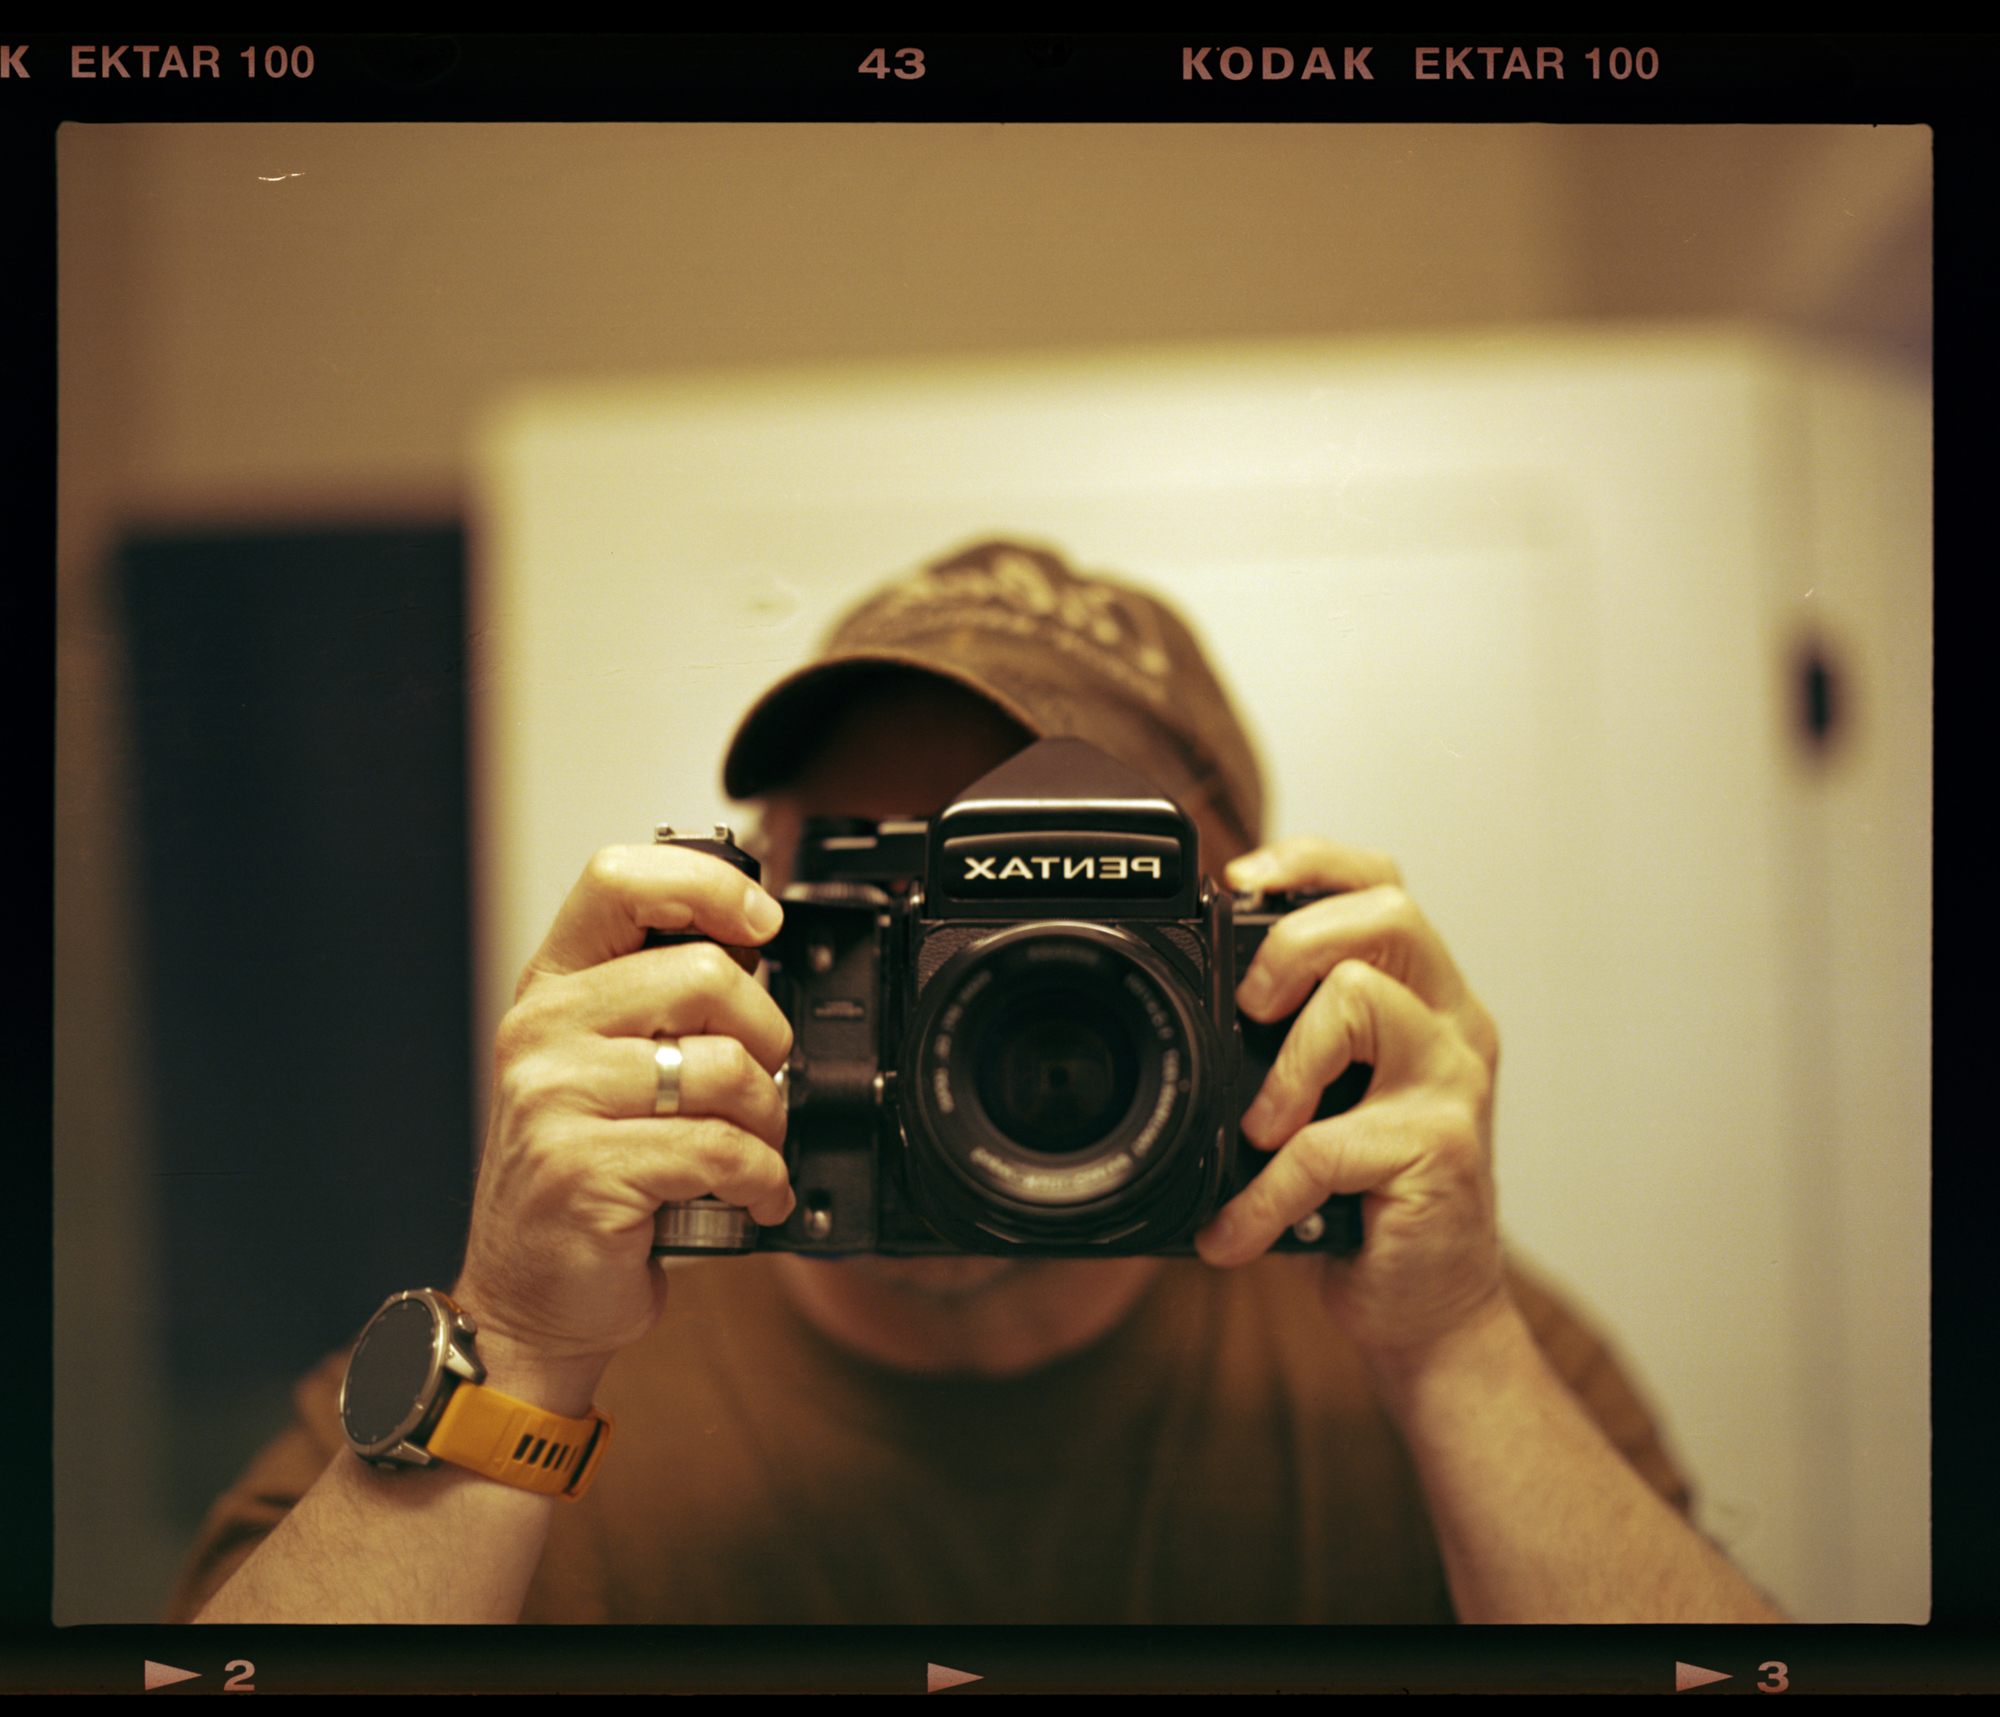
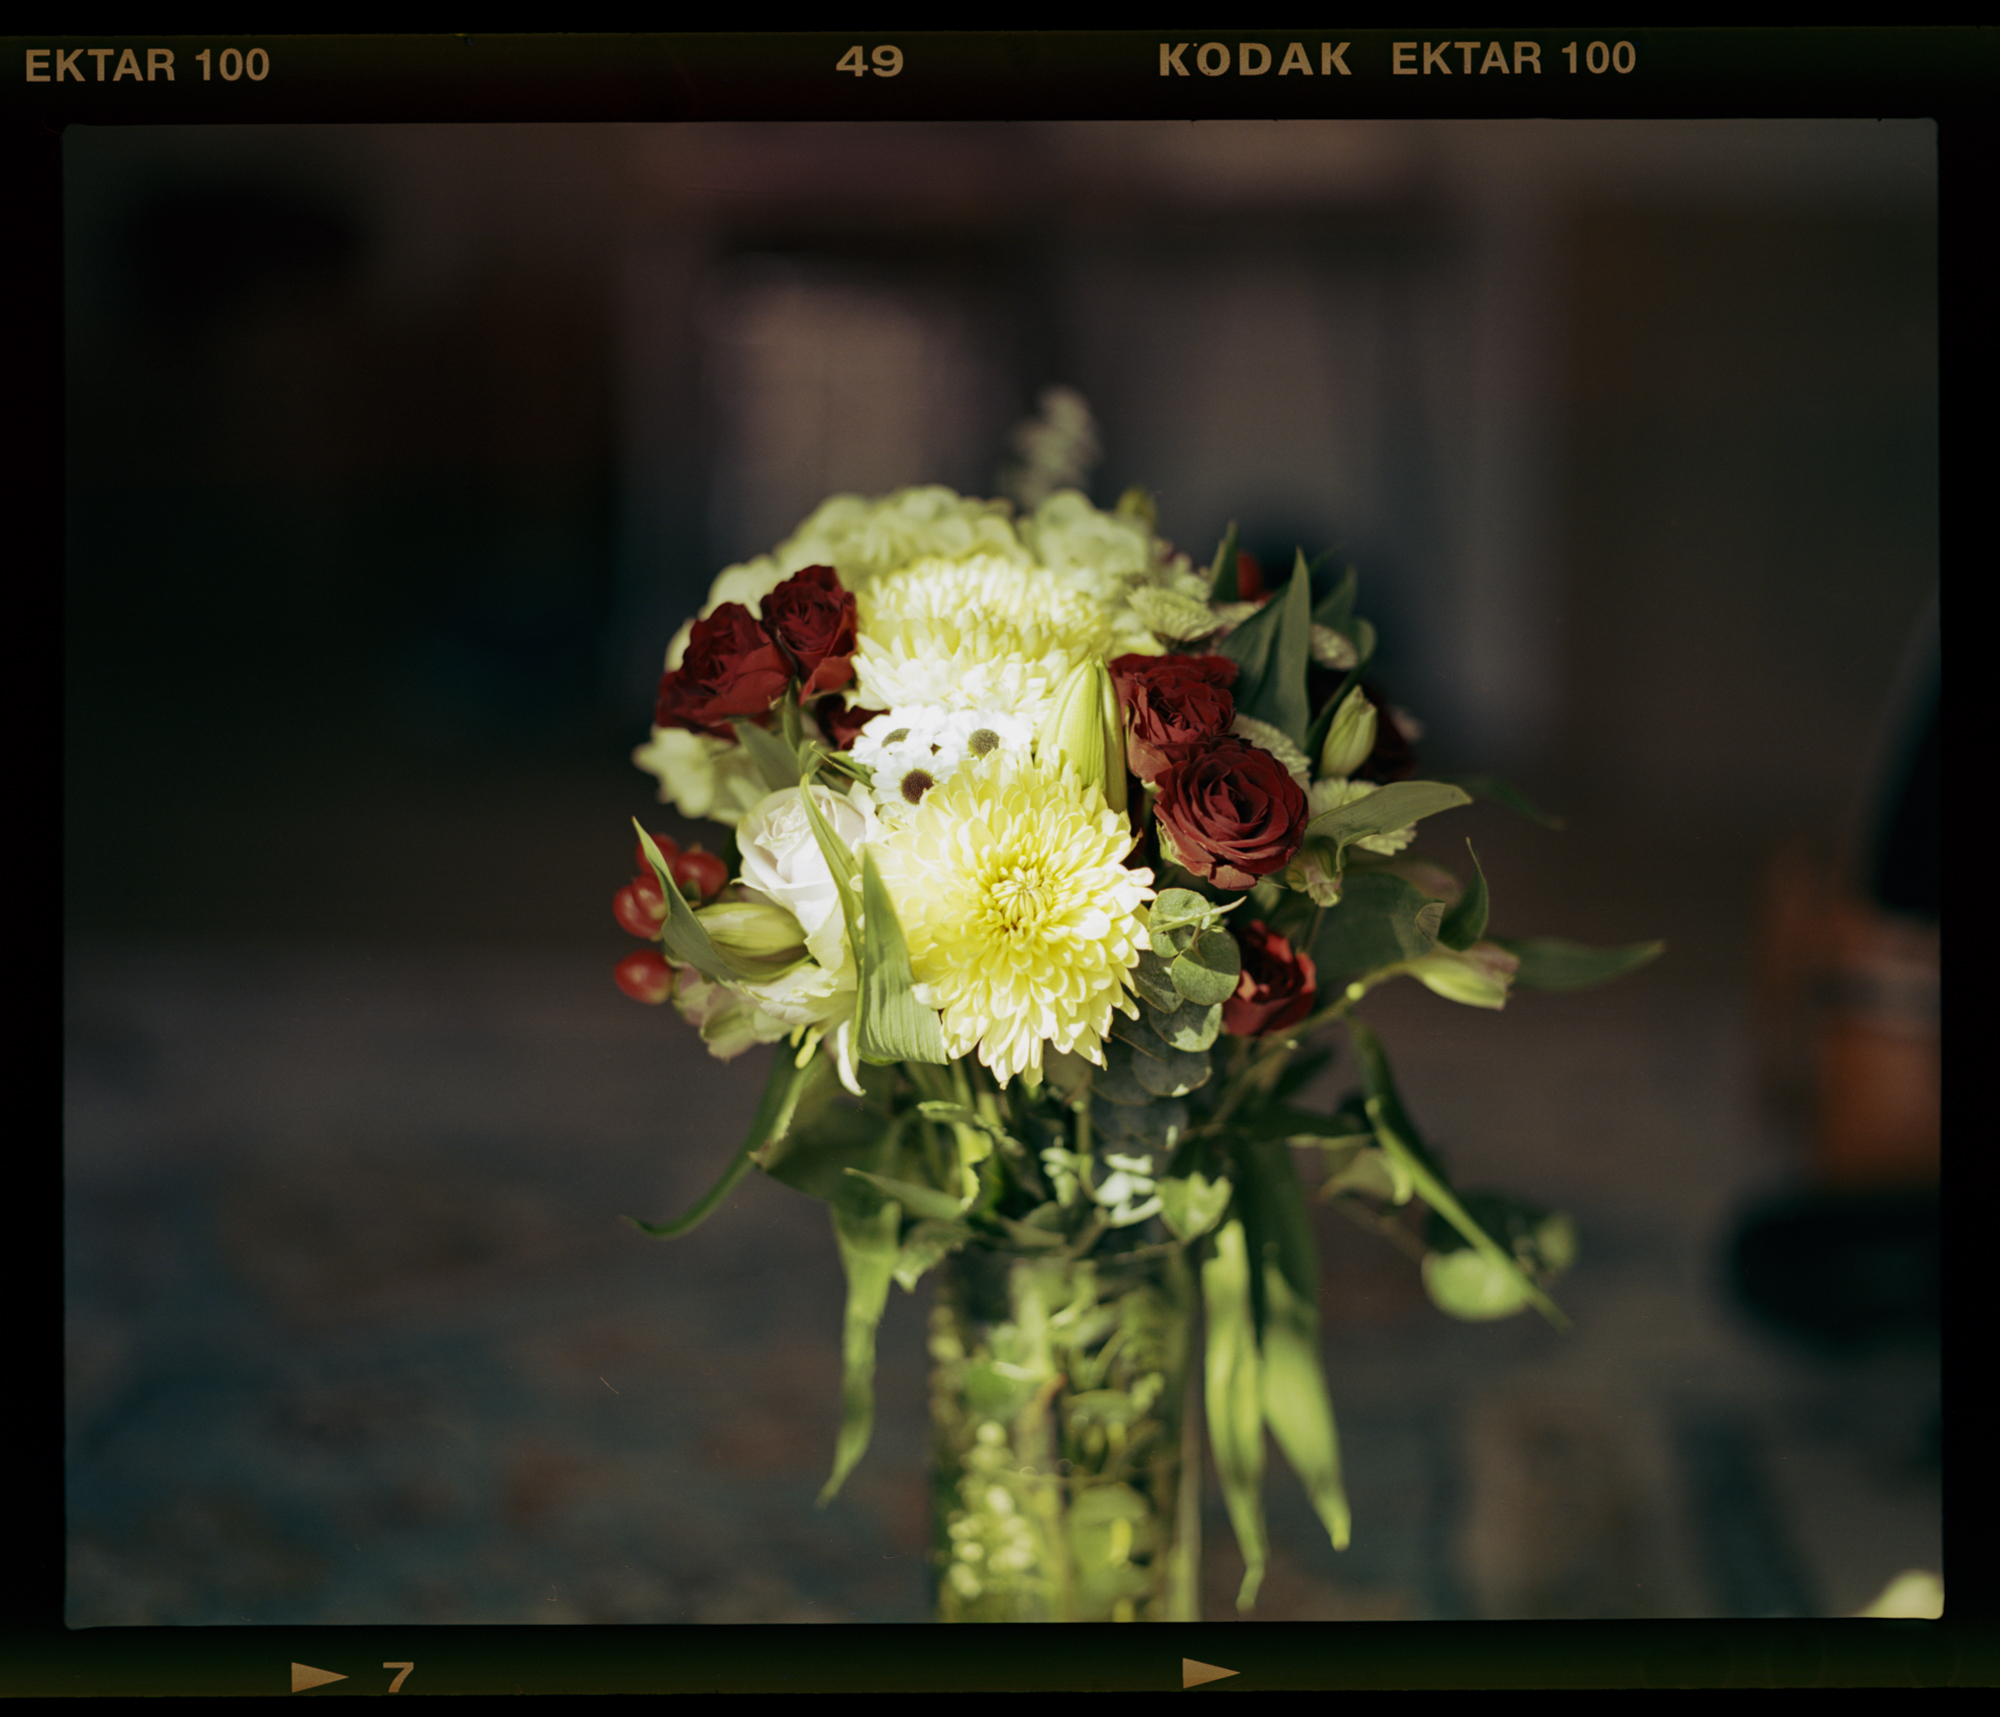
The image above was developed at 72°f for 60 minutes. The orange color cast is more from the warm bulb of the bathroom than anything inherent in the film. Below is another image developed at room temperature. I shot this when I was reviewing the minimum focus distance of the Pentax 105mm f2.4 Takumar.
The above images show that you do not actually have to develop at 102°F. You can develop color negative film at room temperature, with chemistry you already have access to, and get results that are indistinguishable from lab processing in any practical sense. I have been doing exactly that and it has completely changed how I think about processing color film at home.
Why Room Temperature Works
The C-41 process is a time-and-temperature relationship. Higher temperatures require shorter development times. Lower temperatures require longer ones. The chemistry does not stop working at lower temperatures — it simply works more slowly. This is the same fundamental principle that governs black and white development, and it is the reason that the Cinestill Cs41 kit includes a variable temperature development chart right in the instructions.
At the standard 102°F, development takes just 3 minutes and 30 seconds. Drop down to 85°F and the time stretches out. At 75°F, Cinestill’s own chart calls for approximately 50 minutes of development. The chemistry is doing the same work — the color couplers are reacting, the silver halides are being reduced, the dye clouds are forming — it is simply happening at a more leisurely pace.
The beauty of this approach is that room temperature is inherently stable. If your house sits at 72°F, your chemistry sits at 72°F. Your tank sits at 72°F. The developer does not cool down during the process because there is no temperature differential to drive heat loss. The entire thermal management problem — the water baths, the circulators, the thermometer checks, the reheating between pours — simply vanishes.
My Process
I use the Cinestill Cs41 kit, which is a two-bath system consisting of a developer and a blix (combined bleach and fixer). The kit is designed to process any C-41 compatible color negative film, and it includes a variable temperature chart for exactly this kind of use.

The Cinestill chart specifies 50 minutes of development at 75°F. My house thermostat is set to 72°F year-round, which means my chemistry consistently sits a few degrees below that chart entry. To compensate for the slightly lower temperature, I extend my development time to 60 minutes. That extra ten minutes provides a comfortable margin to ensure full development at the lower temperature, and the results have been consistently excellent.
My agitation routine is simple: 4 inversions every 5 minutes. That is it. No continuous agitation for the first 30 seconds, no complex inversion patterns, no rotation drums. Just four slow, deliberate inversions of the Paterson tank at regular intervals, then set it down and walk away until the next round.
The blix step follows the same room temperature approach. I leave the film in the blix for the standard 8 minutes, agitating on the same schedule. Then a rinse with the included stabilizer, and the film comes out of the tank ready to hang and dry.
The entire process, from loading the tank to hanging the negatives, takes about 75 minutes. The vast majority of that time is passive — the film is sitting in the developer while I am doing something else. There is no babysitting a water bath, no anxiously checking temperatures, no rushing through a 3.5-minute window hoping nothing drifted. It is the most relaxed version of color film processing I have ever experienced.
What About Color Shifts?
This is the question that comes up immediately, and it deserves an honest answer. In a laboratory environment with densitometer readings and tightly controlled reference standards, there can be measurable differences between film processed at the standard temperature and film processed at lower temperatures. Some users have reported a slight shift, often toward magenta, when processing at significantly lower temperatures.
In practice, for anyone scanning their negatives and doing even minimal color correction — which is essentially everyone processing film at home — these shifts are trivial. Modern scanning software and even basic editing tools can correct subtle color casts with a single white balance adjustment. The latitude of color negative film is enormous by design. Portra, Ektar, Gold, Ultramax — these emulsions are engineered to tolerate significant variations in exposure and still produce usable negatives. A few degrees of temperature variation in the developer is well within the range that the film can handle gracefully.
So far I have processed Ektar 100 at room temperature with this method, and the results have been consistent, well-saturated, and clean. Grain structure appears normal. Shadow detail is preserved. Highlights hold together. If there is a color shift happening, it is smaller than the variation I see between different scanners.
The Advantages Nobody Talks About
Beyond eliminating the temperature management headache, room temperature processing has a few other practical benefits that are easy to overlook.
The longer development time is actually more forgiving, not less. At 102°F, your total development window is 3 minutes and 30 seconds. If you are 15 seconds late on a pour, that represents a meaningful percentage of the total development time. At 60 minutes, a 15-second variation is statistically irrelevant. The margin for error is enormous.
The gentler agitation schedule also contributes to even development. With a standard high-temperature process, you are agitating continuously for the first 30 seconds and then at frequent intervals during a very short window. The risk of uneven development, surge marks around sprocket holes, or bromide drag is real if your agitation technique is inconsistent. With 4 inversions every 5 minutes over an hour, the developer has plenty of time to circulate naturally within the tank, and each agitation cycle is a small, gentle intervention rather than a frantic race against the clock.
Chemical longevity may also improve slightly. Developer oxidation is accelerated at higher temperatures. Chemistry sitting at 72°F between uses is under less thermal stress than chemistry that is repeatedly heated to 102°F and cooled back down. While this is difficult to quantify precisely, it stands to reason that gentler treatment extends the working life of the chemicals.
What You Need
The equipment list for room temperature C-41 development is identical to what you need for black and white development, which is part of what makes this approach so appealing. If you already develop black and white film at home, you already own everything you need:
A daylight developing tank and reels (Paterson, AP, or similar), the Cinestill Cs41 kit (powder or liquid — both work), storage bottles for the mixed chemistry, a graduated cylinder or measuring beaker, a thermometer (just to confirm your room temperature once), a timer or your phone, a changing bag or darkroom for loading film, and film clips and a dust-free place to hang negatives while they dry.
That is the complete list. No water bath. No immersion circulator. No sous vide machine. No foot spa. No slow cooker. No bucket full of hot water and a pile of towels. Just the same basic kit that any black and white home processor already has sitting on a shelf.
Step by Step
Mix your Cinestill Cs41 chemistry according to the kit instructions. I’ve been using tap water at around 110°f. While I do have a sous vide, the whole point of this is to see if I can develop color film without needing a heated water bath. If you’d like to use distilled water you could microwave the water until it’s around 105-110°f. Let everything come to room temperature — which it already is if it has been sitting in your workspace for any length of time.
Load your exposed film onto reels and into the developing tank in complete darkness, using either a changing bag or a darkroom. This is the same process as black and white loading, and the same reels and tank work for both.
Pour the room temperature developer into the tank. Start your timer for 60 minutes. Perform 4 slow inversions immediately, then set the tank down. Every 5 minutes, pick up the tank and perform 4 inversions. Between agitation cycles, the tank sits undisturbed on the counter.
When the timer reaches 60 minutes, pour the developer back into its storage bottle. Pour in the blix at room temperature and agitate on the same schedule — 4 inversions every 5 minutes for 8 minutes. Pour the blix back into its storage bottle.
Give the film a brief rinse with water, then pour in the stabilizer that comes with the kit. Agitate gently for about a minute. Pour the stabilizer back.
Open the tank, remove the reels, and carefully unwind the film. Hang it in a dust-free area with a clip at each end, and let it dry completely before cutting and scanning. That is the entire process.
A Note on Chemistry Reuse
The Cinestill Cs41 kit is designed to be reused for multiple rolls. Cinestill recommends adding 2% to the development time for each roll previously processed through the chemistry. At room temperature, this math still applies. If your base development time is 60 minutes and you have already processed 4 rolls, add 8% (about 5 extra minutes) to your next development. Keep a running count of how many rolls you have put through each batch of developer, and adjust accordingly.
One important caveat from Cinestill’s own documentation: mixing weakened developer solution (combining fresh and used chemistry) is less effective at lower processing temperatures. For room temperature processing, I recommend using the developer at full strength and simply adding time as it weakens, rather than trying to stretch the chemistry by diluting it. This gives you the most consistent results across the life of the kit.
The Bigger Picture
The C-41 process was designed for commercial labs running continuous processing machines at high temperatures to maximize throughput. A 3.5-minute development time makes perfect sense when you are running hundreds of rolls through a processor in a single day. Speed matters in a production environment.
But you are not running a production lab. You are processing a few rolls on your kitchen counter or in your bathroom. You have 60 minutes. You have stable room temperature. You have the luxury of time that a commercial lab does not, and you can use that time to simplify your process down to its absolute essentials.
Room temperature color development is not a hack or a workaround. It is a legitimate approach that the chemistry manufacturers account for in their own documentation. The Cinestill kit includes the lower-temperature times for a reason — because they work. Once you accept that longer development at lower temperature produces the same fundamental result as shorter development at higher temperature, the entire psychological barrier around home color processing collapses.
If you can develop black and white film, you can develop color film. The chemistry is different, but the workflow is the same. Pour it in, agitate occasionally, pour it out. The only thing that changes is how long you wait.
Purchasing gear from the above link helps me keep the site going!